APIs Explorer: Create and Update a Cluster - GSP288
D
A passionate full-stack developer from @ePlus.DEV
Search for a command to run...
A passionate full-stack developer from @ePlus.DEV
No comments yet. Be the first to comment.
Quick and practical tips to help users optimize tasks, improve skills, and solve common problems effectively across various areas like tech, lifestyle, productivity, and more.
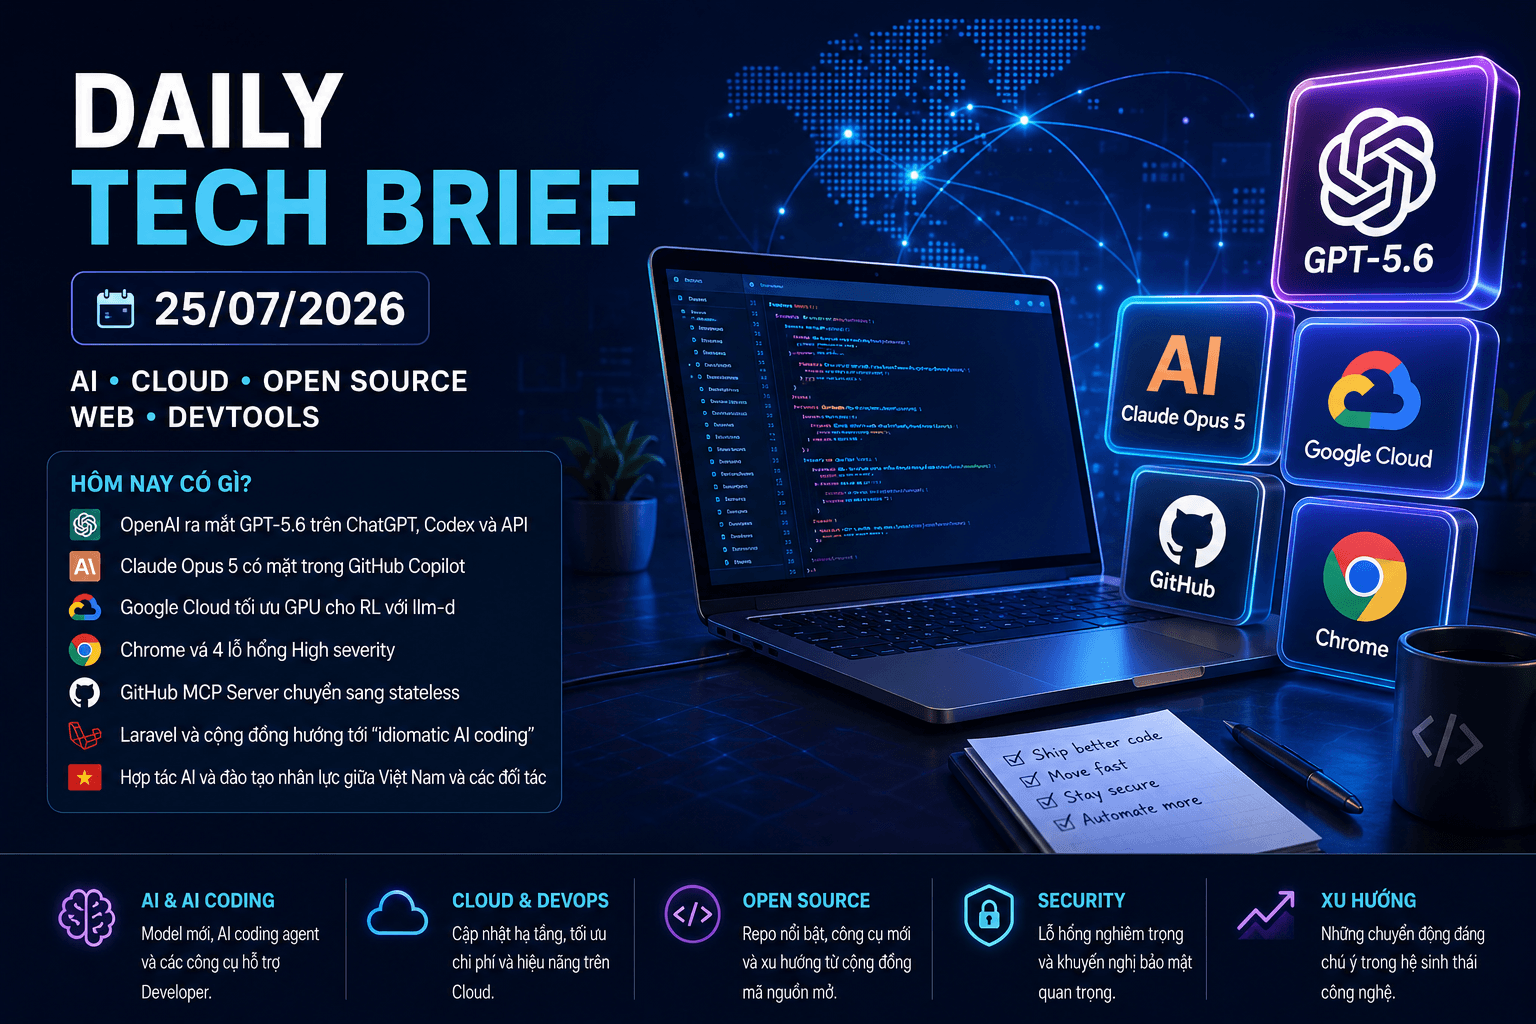
Một bản tin giúp Developer cập nhật nhanh AI, Cloud, Open Source và những công nghệ đáng chú ý trong ngày. 📌 Executive Summary OpenAI công bố báo cáo mới về cách AI đang làm thay đổi phạm vi công

Overview In a challenge lab you’re given a scenario and a set of tasks. Instead of following step-by-step instructions, you will use the skills learned from the labs in the course to figure out how to

Một bản tin giúp Developer cập nhật nhanh AI, Cloud, Open Source và những công nghệ đáng chú ý trong ngày. 📌 Executive Summary Anthropic bổ sung khả năng thay đổi tool giữa cuộc hội thoại mà không

Một bản tin giúp Developer cập nhật nhanh AI, Cloud, Open Source và những công nghệ đáng chú ý trong ngày. 📌 Executive Summary Claude Opus 5 bắt đầu được triển khai trên GitHub Copilot cho các tác

Một bản tin giúp Developer cập nhật nhanh AI, Cloud, Open Source và những công nghệ đáng chú ý trong ngày. 📌 Executive Summary Anthropic phát hành Claude Opus 5, tập trung vào các tác vụ coding và
The Google APIs Explorer is a tool that helps you explore various Google APIs interactively. With the APIs Explorer, you can:
Browse quickly through available APIs and versions.
See methods available for each API and what parameters they support along with inline documentation.
Execute requests for any method and see responses in real time.
Make authenticated and authorized API calls.
Search across all services, methods, and your recent requests to quickly find what you are looking for.
The APIs Explorer uses its own API key whenever it makes a request. When you use the APIs Explorer to make a request, it displays the request syntax, which includes a placeholder labeled {YOUR_API_KEY}. If you want to make the same request in your application, you need to replace this placeholder with your own API key.
In this lab, you'll learn how to use an inline Google APIs Explorer template to call the Cloud Dataproc API to create a cluster, then run a simple Spark job in the cluster. It also shows you how to use the APIs Explorer template to call the Cloud Dataproc API to update a cluster.
Read these instructions. Labs are timed and you cannot pause them. The timer, which starts when you click Start Lab, shows how long Google Cloud resources will be made available to you.
This hands-on lab lets you do the lab activities yourself in a real cloud environment, not in a simulation or demo environment. It does so by giving you new, temporary credentials that you use to sign in and access Google Cloud for the duration of the lab.
To complete this lab, you need:
Note: Use an Incognito or private browser window to run this lab. This prevents any conflicts between your personal account and the Student account, which may cause extra charges incurred to your personal account.
Note: If you already have your own personal Google Cloud account or project, do not use it for this lab to avoid extra charges to your account.
Click the Start Lab button. If you need to pay for the lab, a pop-up opens for you to select your payment method. On the left is the Lab Details panel with the following:
The Open Google Cloud console button
Time remaining
The temporary credentials that you must use for this lab
Other information, if needed, to step through this lab
Click Open Google Cloud console (or right-click and select Open Link in Incognito Window if you are running the Chrome browser).
The lab spins up resources, and then opens another tab that shows the Sign in page.
Tip: Arrange the tabs in separate windows, side-by-side.
Note: If you see the Choose an account dialog, click Use Another Account.
If necessary, copy the Username below and paste it into the Sign in dialog.
student-04-fcca080921a0@qwiklabs.net
You can also find the Username in the Lab Details panel.
Click Next.
Copy the Password below and paste it into the Welcome dialog.
FOq443Oral1H
You can also find the Password in the Lab Details panel.
Click Next.
Important: You must use the credentials the lab provides you. Do not use your Google Cloud account credentials.
Note: Using your own Google Cloud account for this lab may incur extra charges.
Click through the subsequent pages:
Accept the terms and conditions.
Do not add recovery options or two-factor authentication (because this is a temporary account).
Do not sign up for free trials.
After a few moments, the Google Cloud console opens in this tab.
Note: To view a menu with a list of Google Cloud products and services, click the Navigation menu at the top-left.
Cloud Shell is a virtual machine that is loaded with development tools. It offers a persistent 5GB home directory and runs on the Google Cloud. Cloud Shell provides command-line access to your Google Cloud resources.
Click Activate Cloud Shell
at the top of the Google Cloud console.
When you are connected, you are already authenticated, and the project is set to your Project_ID, qwiklabs-gcp-04-5633370102d2. The output contains a line that declares the Project_ID for this session:
Your Cloud Platform project in this session is set to qwiklabs-gcp-04-5633370102d2
gcloud is the command-line tool for Google Cloud. It comes pre-installed on Cloud Shell and supports tab-completion.
gcloud auth list
Output:
ACTIVE: *
ACCOUNT: student-04-fcca080921a0@qwiklabs.net

To set the active account, run:
    $ gcloud config set account `ACCOUNT`
gcloud config list project
Output:
[core]
project = qwiklabs-gcp-04-5633370102d2
Note: For full documentation of gcloud, in Google Cloud, refer to the gcloud CLI overview guide.
Go to Navigation menu > APIs & Services.
Scroll down the list until you find Cloud Dataproc API, and click on it.
Make sure that API is enabled, if not click Enable.
Now that you have verified the API's enablement, open Rest API Reference. This will open a new tab with the Rest API Reference page for the Cloud Dataproc API.
From the left APIs & Reference section navigate to REST reference > v1 > projects.regions.clusters > create to projects.regions.clusters.create method or, to create cluster, use the Method: projects.regions.clusters.create reference.
Now you'll fill in the form and execute the APIs Explorer template, below, as follows:
Insert your Qwiklabs Project ID in the projectId field.
Set the region field to us-central1.
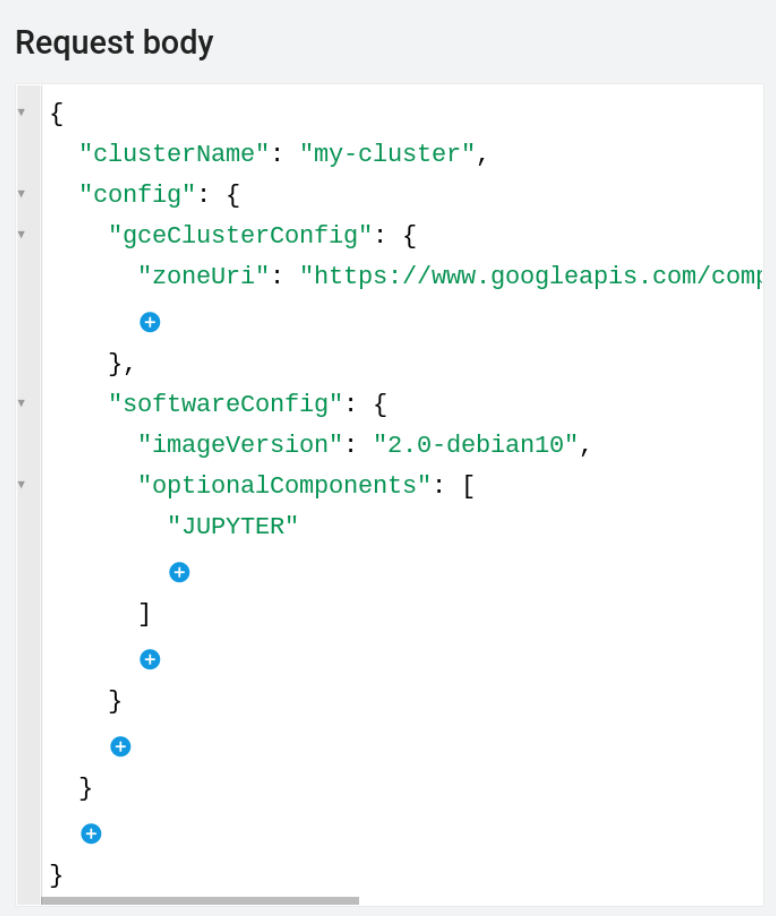
In the Request body, click between the curly brackets and add the clusterName property. Enter the clusterName of your choice. Note, the value of the clusterName must not contain any uppercase letters or spaces.
From the Add a Property dropdown menu choose config.
In the Add a Property dropdown, choose gceClusterConfig.
In this Add a Property dropdown choose zoneUri field, then add the following, replacing my-project-id with the Project ID for this lab:
https://www.googleapis.com/compute/v1/projects/my-project-id/zones/us-central1-c
In the curly bracket under config, select softwareConfig.
In the curly bracket under softwareConfig, select imageVersionand set it to 2.0-debian10.
In the curly bracket under softwareConfig, select optionalComponents. Under optionalComponents click on ADD ITEM and select JUPYTER from the dropdown.
When you're done your Request body should look like this:
Note: To view Credentials FAQs, click on the question mark icon next to Credentials title.
Make sure that there are no trailing spaces in any of the fields.
Now scroll down and click Execute.
Select the student account you started the lab with.
On the next screen, click Allow to give APIs Explorer access.
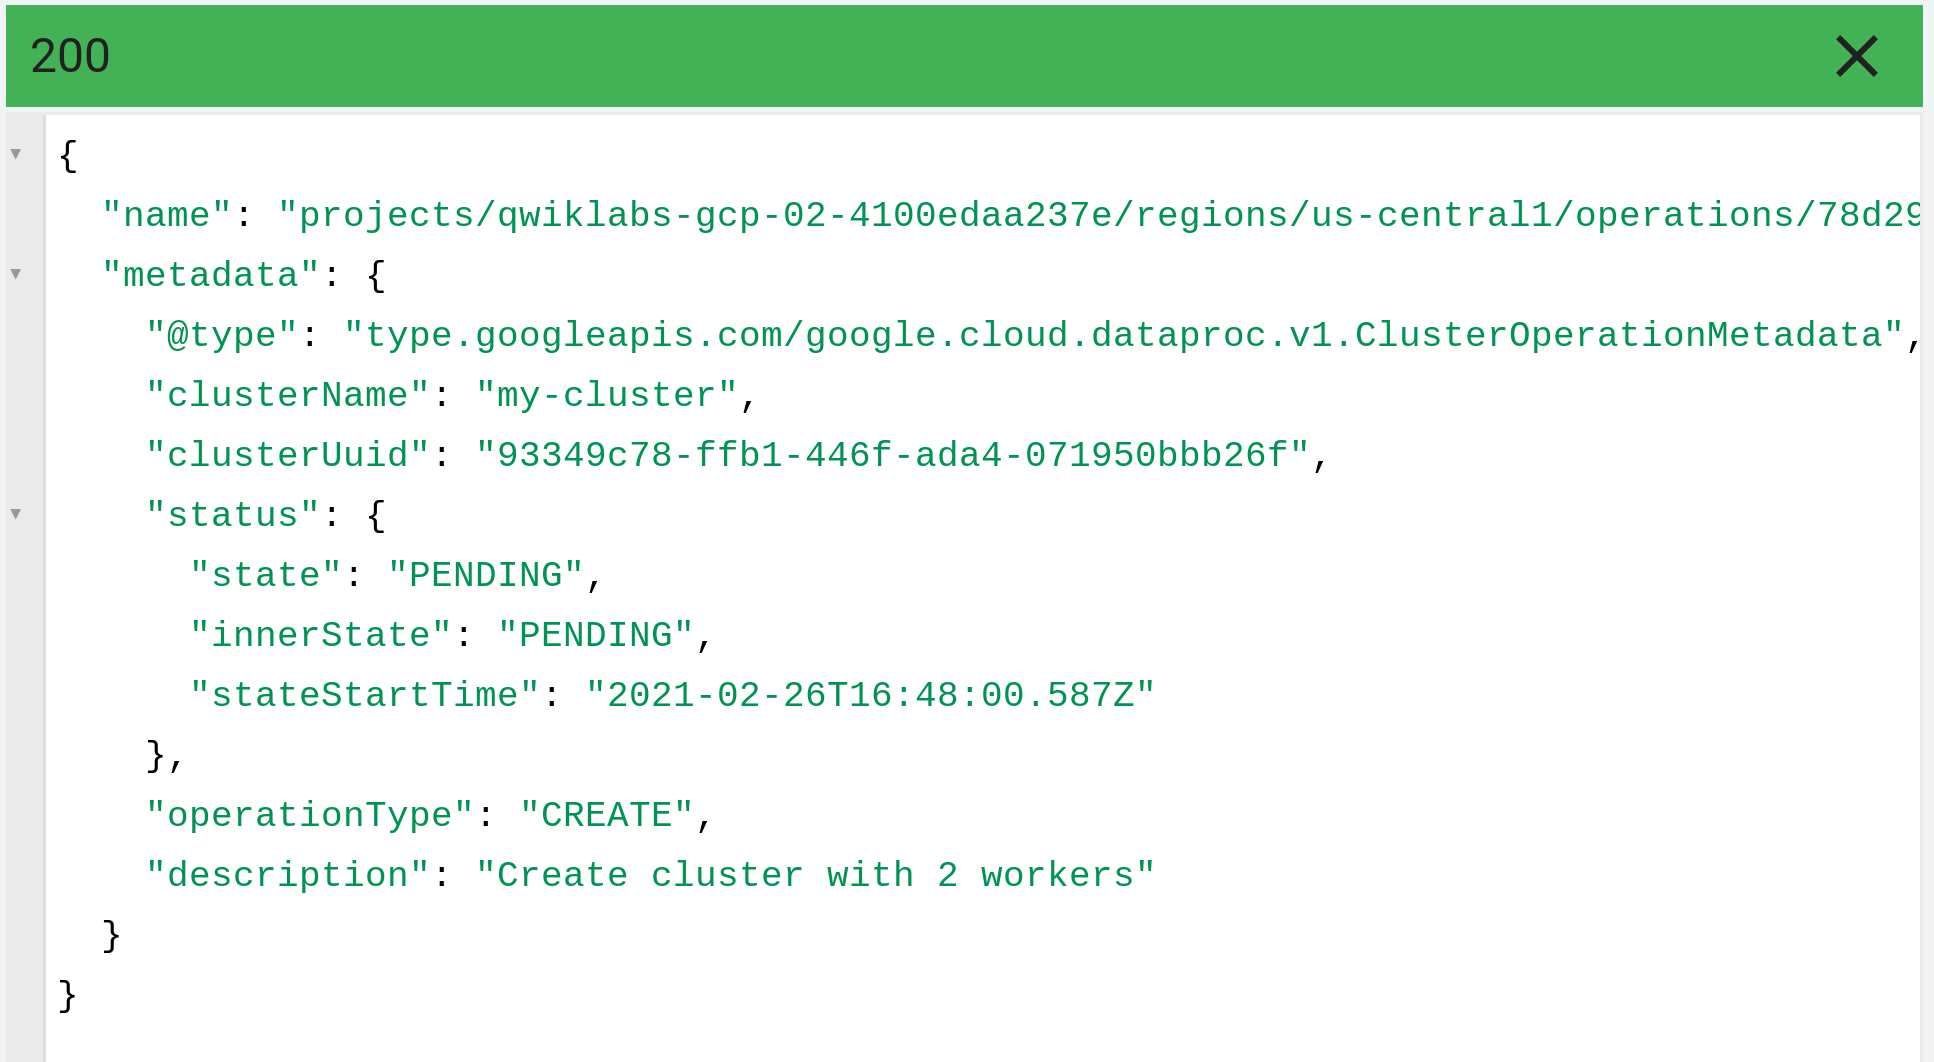
The results of the Dataproc API will appear below the Request and will look similar to the following:
Click Check my progress to verify your performed task. If you successfully created a Dataproc cluster in the us-central1 region, you will see an assessment score.
Create a Dataproc cluster (region: us-central1)
Check my progress
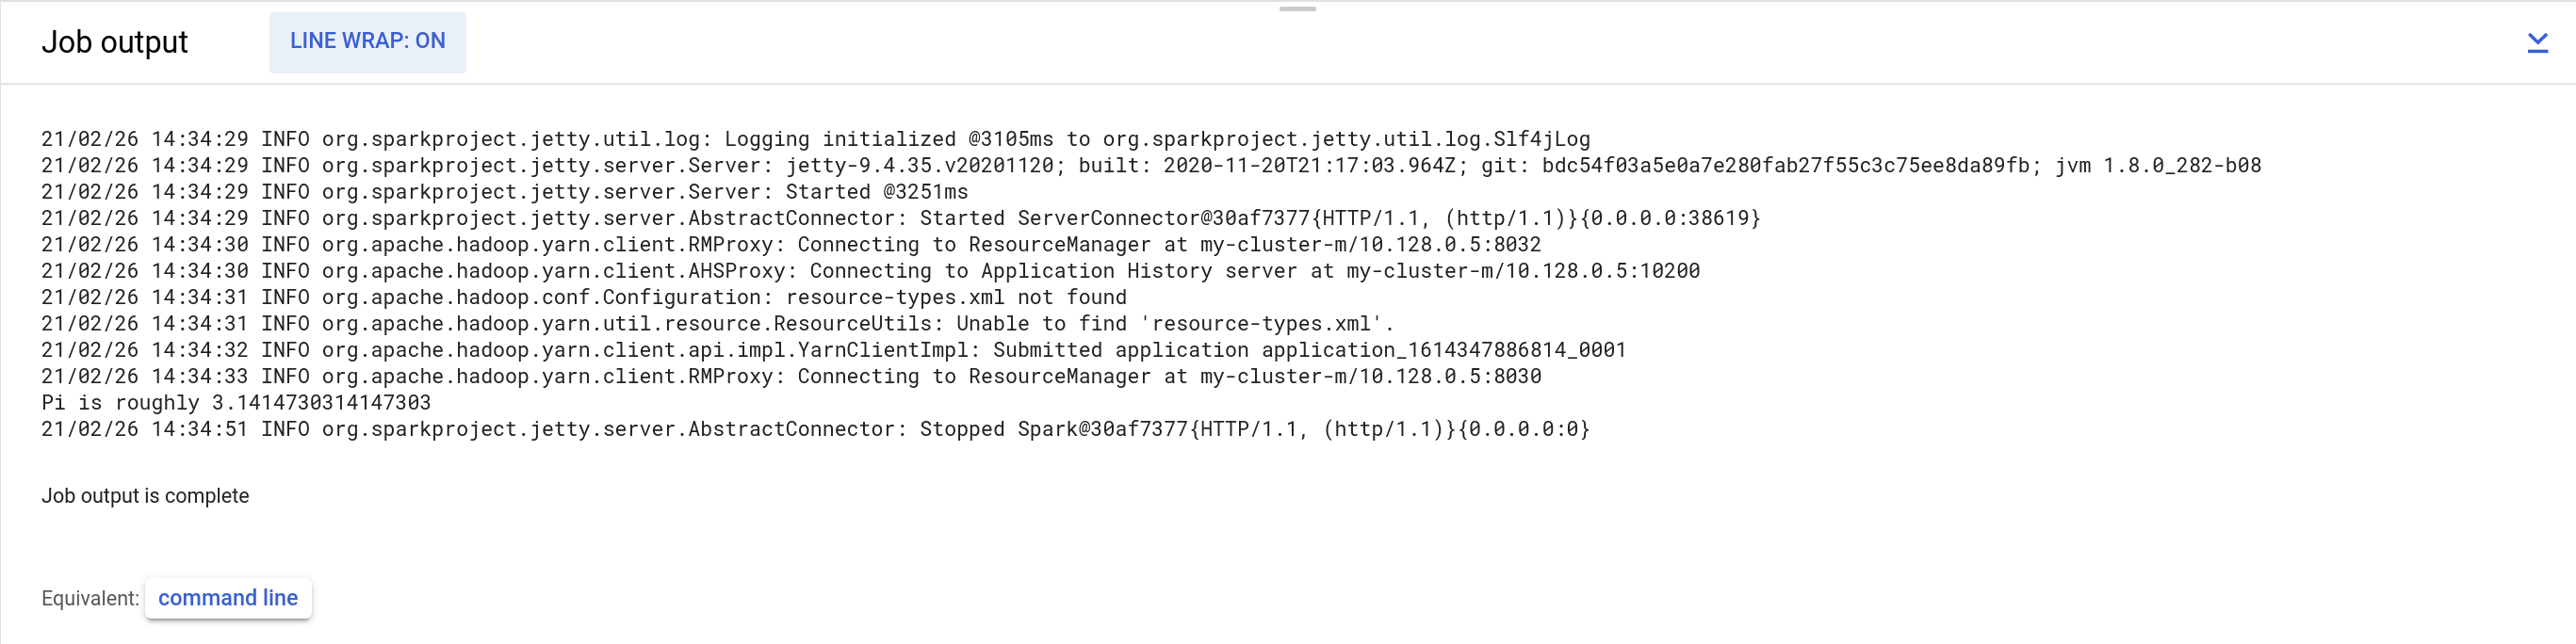
Next you'll run a simple Apache Spark job that calculates a rough value for pi in an existing Cloud Dataproc cluster.
projects.regions.jobs.submit method or use this link to submit a job to a cluster.Now you'll fill in the form and execute the APIs Explorer template, below, as follows:
Insert your project ID in the projectId field.
Set the region field to us-central1.
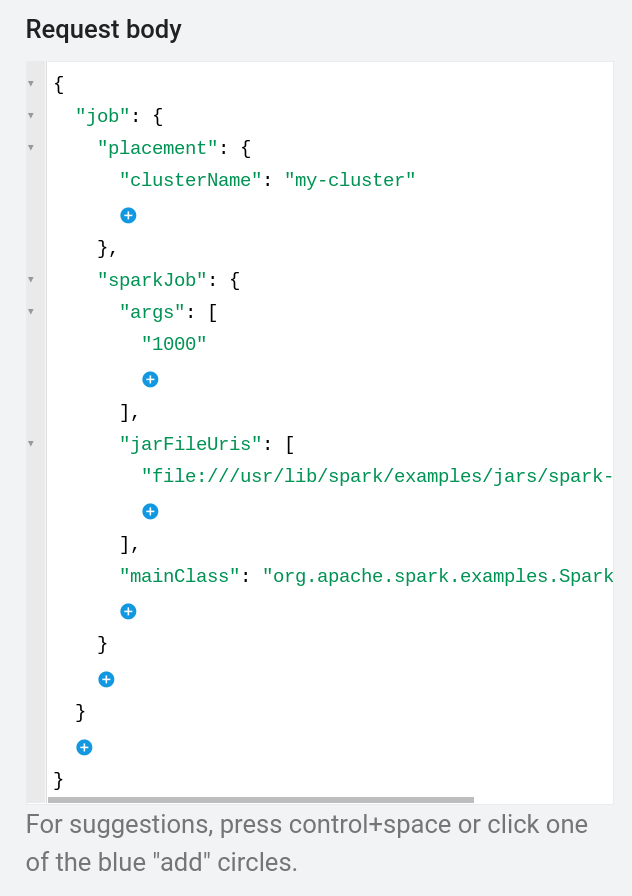
In the Request body, click between the curly brackets and choose job.
Click in the curly brackets below this and choose placement.
Click in the curly brackets below this and choose clusterName then type the name of your cluster.
In the curly bracket under job, select sparkJob.
You will now add 3 items under sparkJob:
In the curly bracket under sparkjob, select args. Under args click on ADD ITEM and type 1000
In the Add a Property dropdown, choose jarFileUris. Under jarFileUris click on ADD ITEM and type file:///usr/lib/spark/examples/jars/spark-examples.jar
In the Add a Property dropdown, choose mainClass and type org.apache.spark.examples.SparkPi
When you're done your Request body should look like this:
Note: To view Credentials FAQs, click on the question mark icon next to Credentials title.
The results of the Dataproc API will appear below the Request, and look similar to this:
You can find your results by going to Dataproc > Clusters. Click on the name of your cluster, then the Jobs tab.
Click on the Job ID and select Line Wrap to ON to bring the lines that exceed the right margin into view.
Click Check my progress to verify your performed task. If you successfully submit a Spark job to a cluster, you will see an assessment score.
Submit a Spark Job
Check my progress
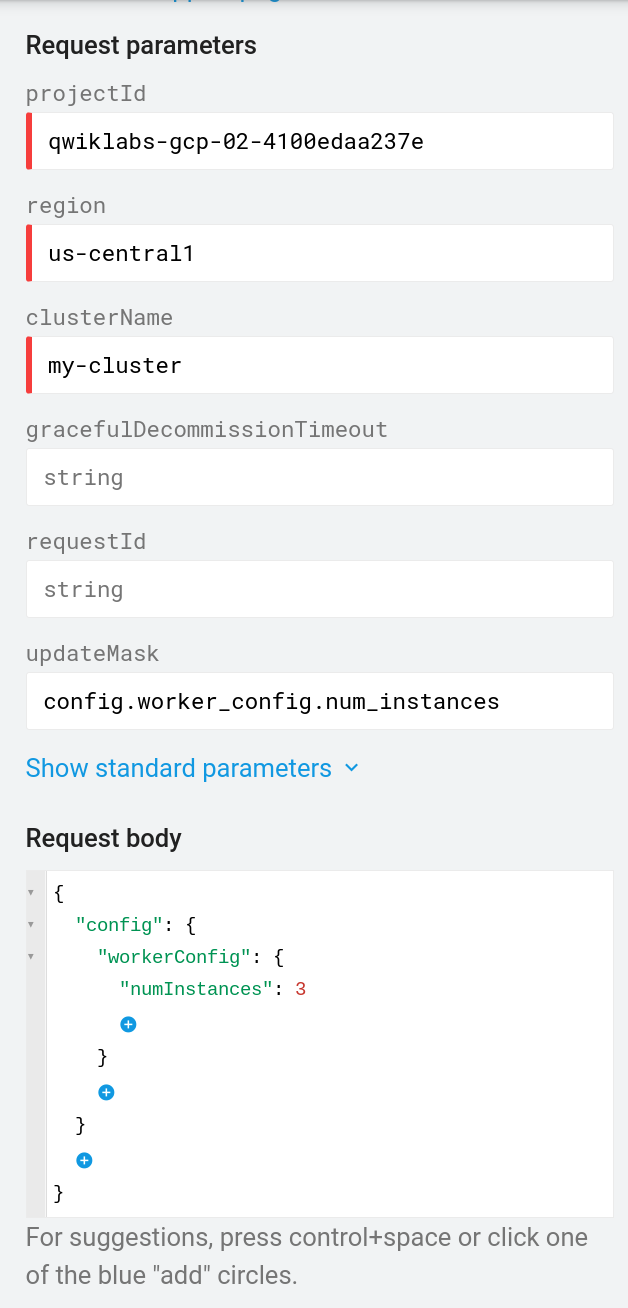
projects.regions.clusters.patch method or use this link to update a cluster.Now you'll fill in the form and execute the APIs Explorer template, below, as follows:
projectID = your project ID
Region = us-central1
clusterName = enter your cluster name
updateMask = config.worker_config.num_instances
Patch body, enter the following:
First curly bracket = config
Click in the curly bracket below this and choose workerConfig
Click in the curly bracket beneath this, and select numInstances , then type in 3.
Your form should look like this:
Note: To view Credentials FAQs, click on the question mark icon next to Credentials title.
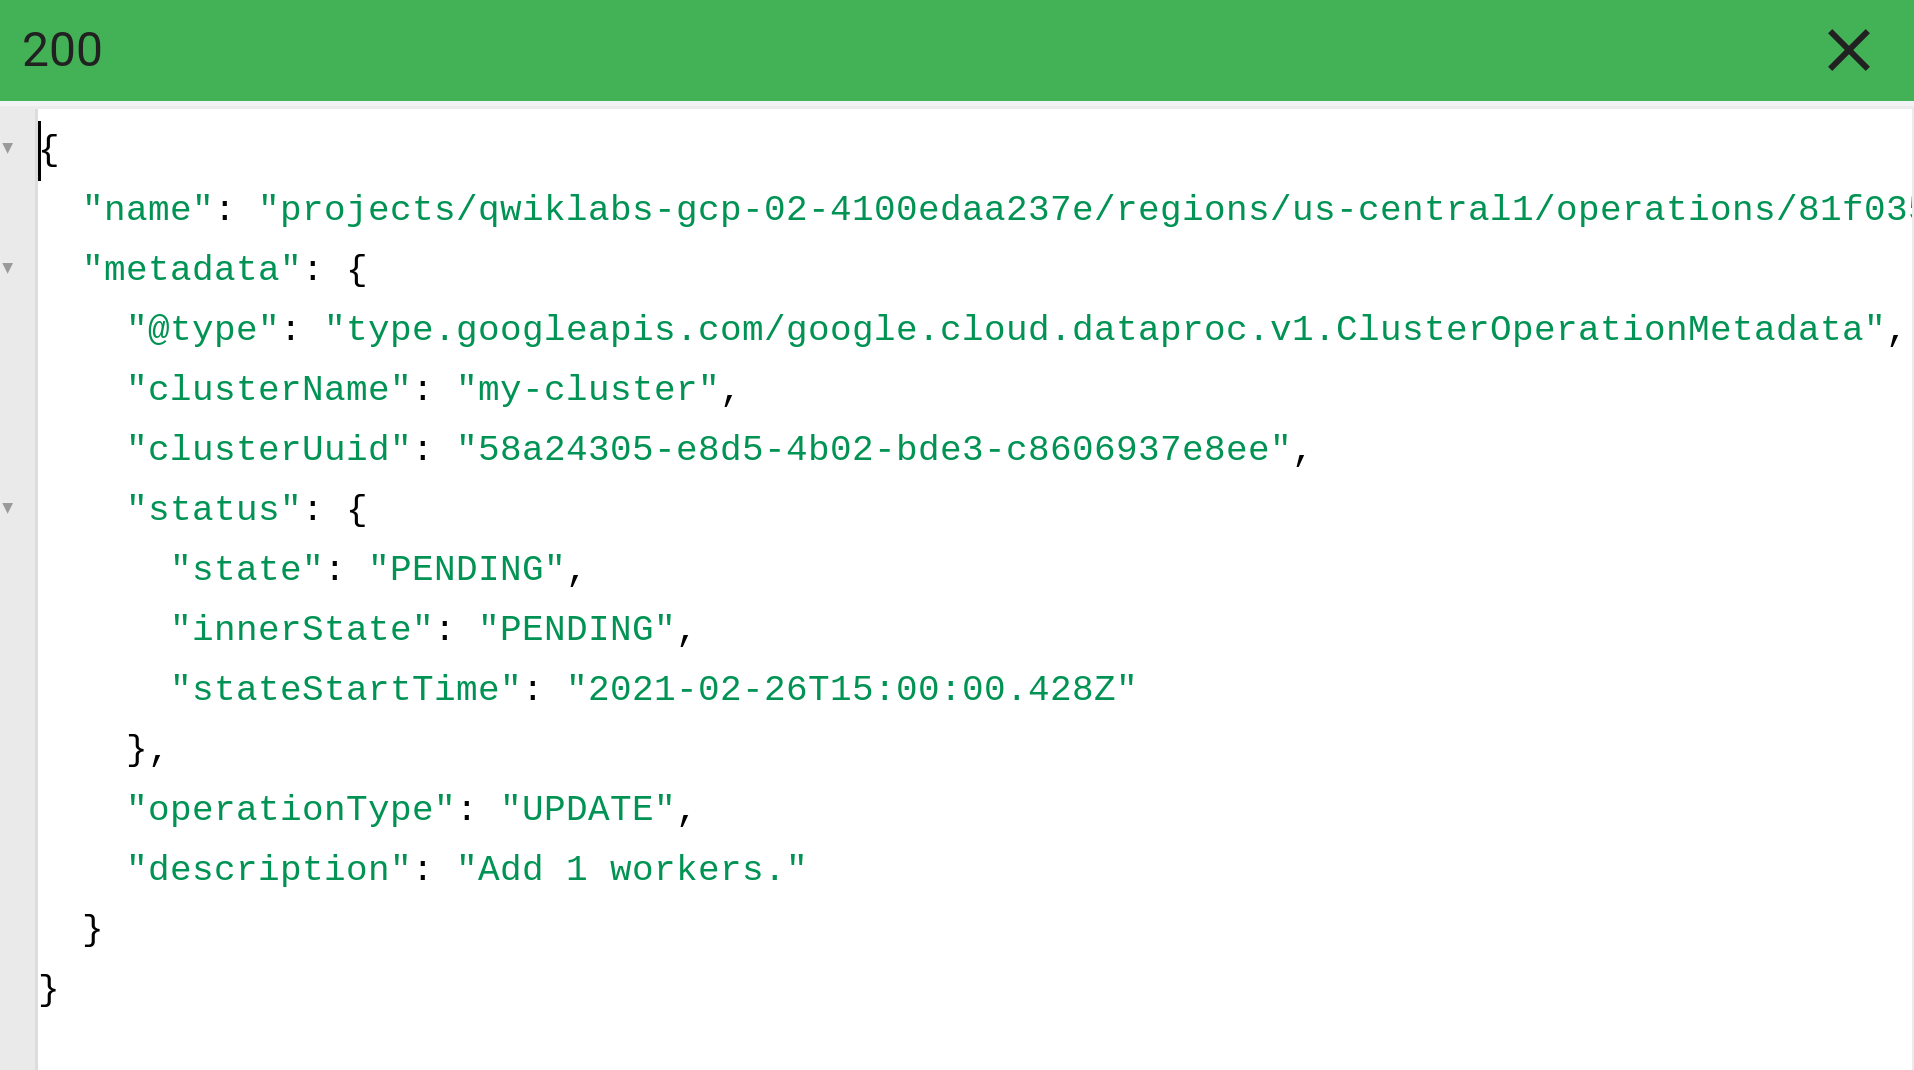
The results of the Dataproc API will appear below the Request, and look similar to this:
Click Check my progress to verify your performed task. If you have successfully updated a worker config for 3 worker nodes you will see an assessment score.
Update a cluster for 3 worker nodes
Check my progress
Below are multiple choice questions to reinforce your understanding of this lab's concepts. Answer them to the best of your abilities.
The API Explorer provides a way to try out methods in the Dataproc API without having to write any code.TrueFalse
In API Explorer we can only try out Google Cloud APIs.
True
False
curl -LO raw.githubusercontent.com/ePlus-DEV/storage/refs/heads/main/labs/GSP288/lab.sh
source lab.sh
Script Alternative
export REGION=
export ZONE=

curl -LO raw.githubusercontent.com/gcpsolution99/GCP-solution/refs/heads/main/GSP/GSP288.sh
sudo chmod +x GSP288.sh
./GSP288.sh