Table of Contents
Overview
Information access uses multiple formats, and BigQuery makes working with multiple data sources simple. In this lab you will get started with sports data science by importing external sports data sources into BigQuery tables. This will give you the basis for building more sophisticated analytics in subsequent labs.
The data used in this lab originates from the following sources:
Pappalardo et al., (2019) A public data set of spatio-temporal match events in soccer competitions, Nature Scientific Data 6:236, https://www.nature.com/articles/s41597-019-0247-7
Pappalardo et al. (2019) PlayerRank: Data-driven Performance Evaluation and Player Ranking in Soccer via a Machine Learning Approach. ACM Transactions on Intelligent Systems and Technologies (TIST) 10, 5, Article 59 (September 2019), 27 pages. DOI: https://doi.org/10.1145/3343172
Objectives
In this lab, you will learn how to:
Upload files from Google Cloud Storage (GCS) into BigQuery tables using the Cloud Console.
Use the Cloud Console to access information derived from BigQuery tables.
Understand how to write queries on the uploaded tables.
Setup and requirements
Before you click the Start Lab button
Read these instructions. Labs are timed and you cannot pause them. The timer, which starts when you click Start Lab, shows how long Google Cloud resources will be made available to you.
This hands-on lab lets you do the lab activities yourself in a real cloud environment, not in a simulation or demo environment. It does so by giving you new, temporary credentials that you use to sign in and access Google Cloud for the duration of the lab.
To complete this lab, you need:
- Access to a standard internet browser (Chrome browser recommended).
Note: Use an Incognito or private browser window to run this lab. This prevents any conflicts between your personal account and the Student account, which may cause extra charges incurred to your personal account.
- Time to complete the lab---remember, once you start, you cannot pause a lab.
Note: If you already have your own personal Google Cloud account or project, do not use it for this lab to avoid extra charges to your account.
How to start your lab and sign in to the Google Cloud console
Click the Start Lab button. If you need to pay for the lab, a pop-up opens for you to select your payment method. On the left is the Lab Details panel with the following:
The Open Google Cloud console button
Time remaining
The temporary credentials that you must use for this lab
Other information, if needed, to step through this lab
Click Open Google Cloud console (or right-click and select Open Link in Incognito Window if you are running the Chrome browser).
The lab spins up resources, and then opens another tab that shows the Sign in page.
Tip: Arrange the tabs in separate windows, side-by-side.
Note: If you see the Choose an account dialog, click Use Another Account.
If necessary, copy the Username below and paste it into the Sign in dialog.
student-04-c53c39caeba6@qwiklabs.netYou can also find the Username in the Lab Details panel.
Click Next.
Copy the Password below and paste it into the Welcome dialog.
bGDAuTj83DU3You can also find the Password in the Lab Details panel.
Click Next.
Important: You must use the credentials the lab provides you. Do not use your Google Cloud account credentials.
Note: Using your own Google Cloud account for this lab may incur extra charges.
Click through the subsequent pages:
Accept the terms and conditions.
Do not add recovery options or two-factor authentication (because this is a temporary account).
Do not sign up for free trials.
After a few moments, the Google Cloud console opens in this tab.
Note: To view a menu with a list of Google Cloud products and services, click the Navigation menu at the top-left.
Task 1. Open BigQuery
The BigQuery console provides an interface to query tables, including public datasets offered by BigQuery.
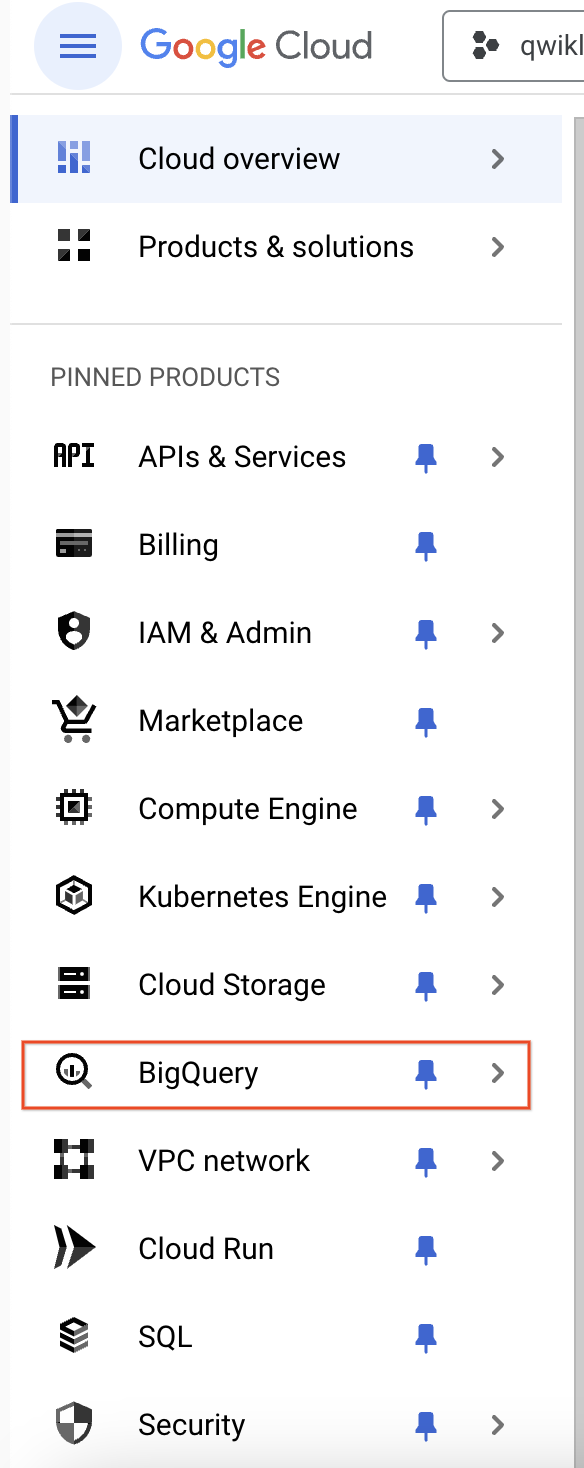
- In the Cloud Console, from the Navigation menu select BigQuery:
The Welcome to BigQuery in the Cloud Console message box opens. This message box provides a link to the quickstart guide and the release notes.
Click Done.
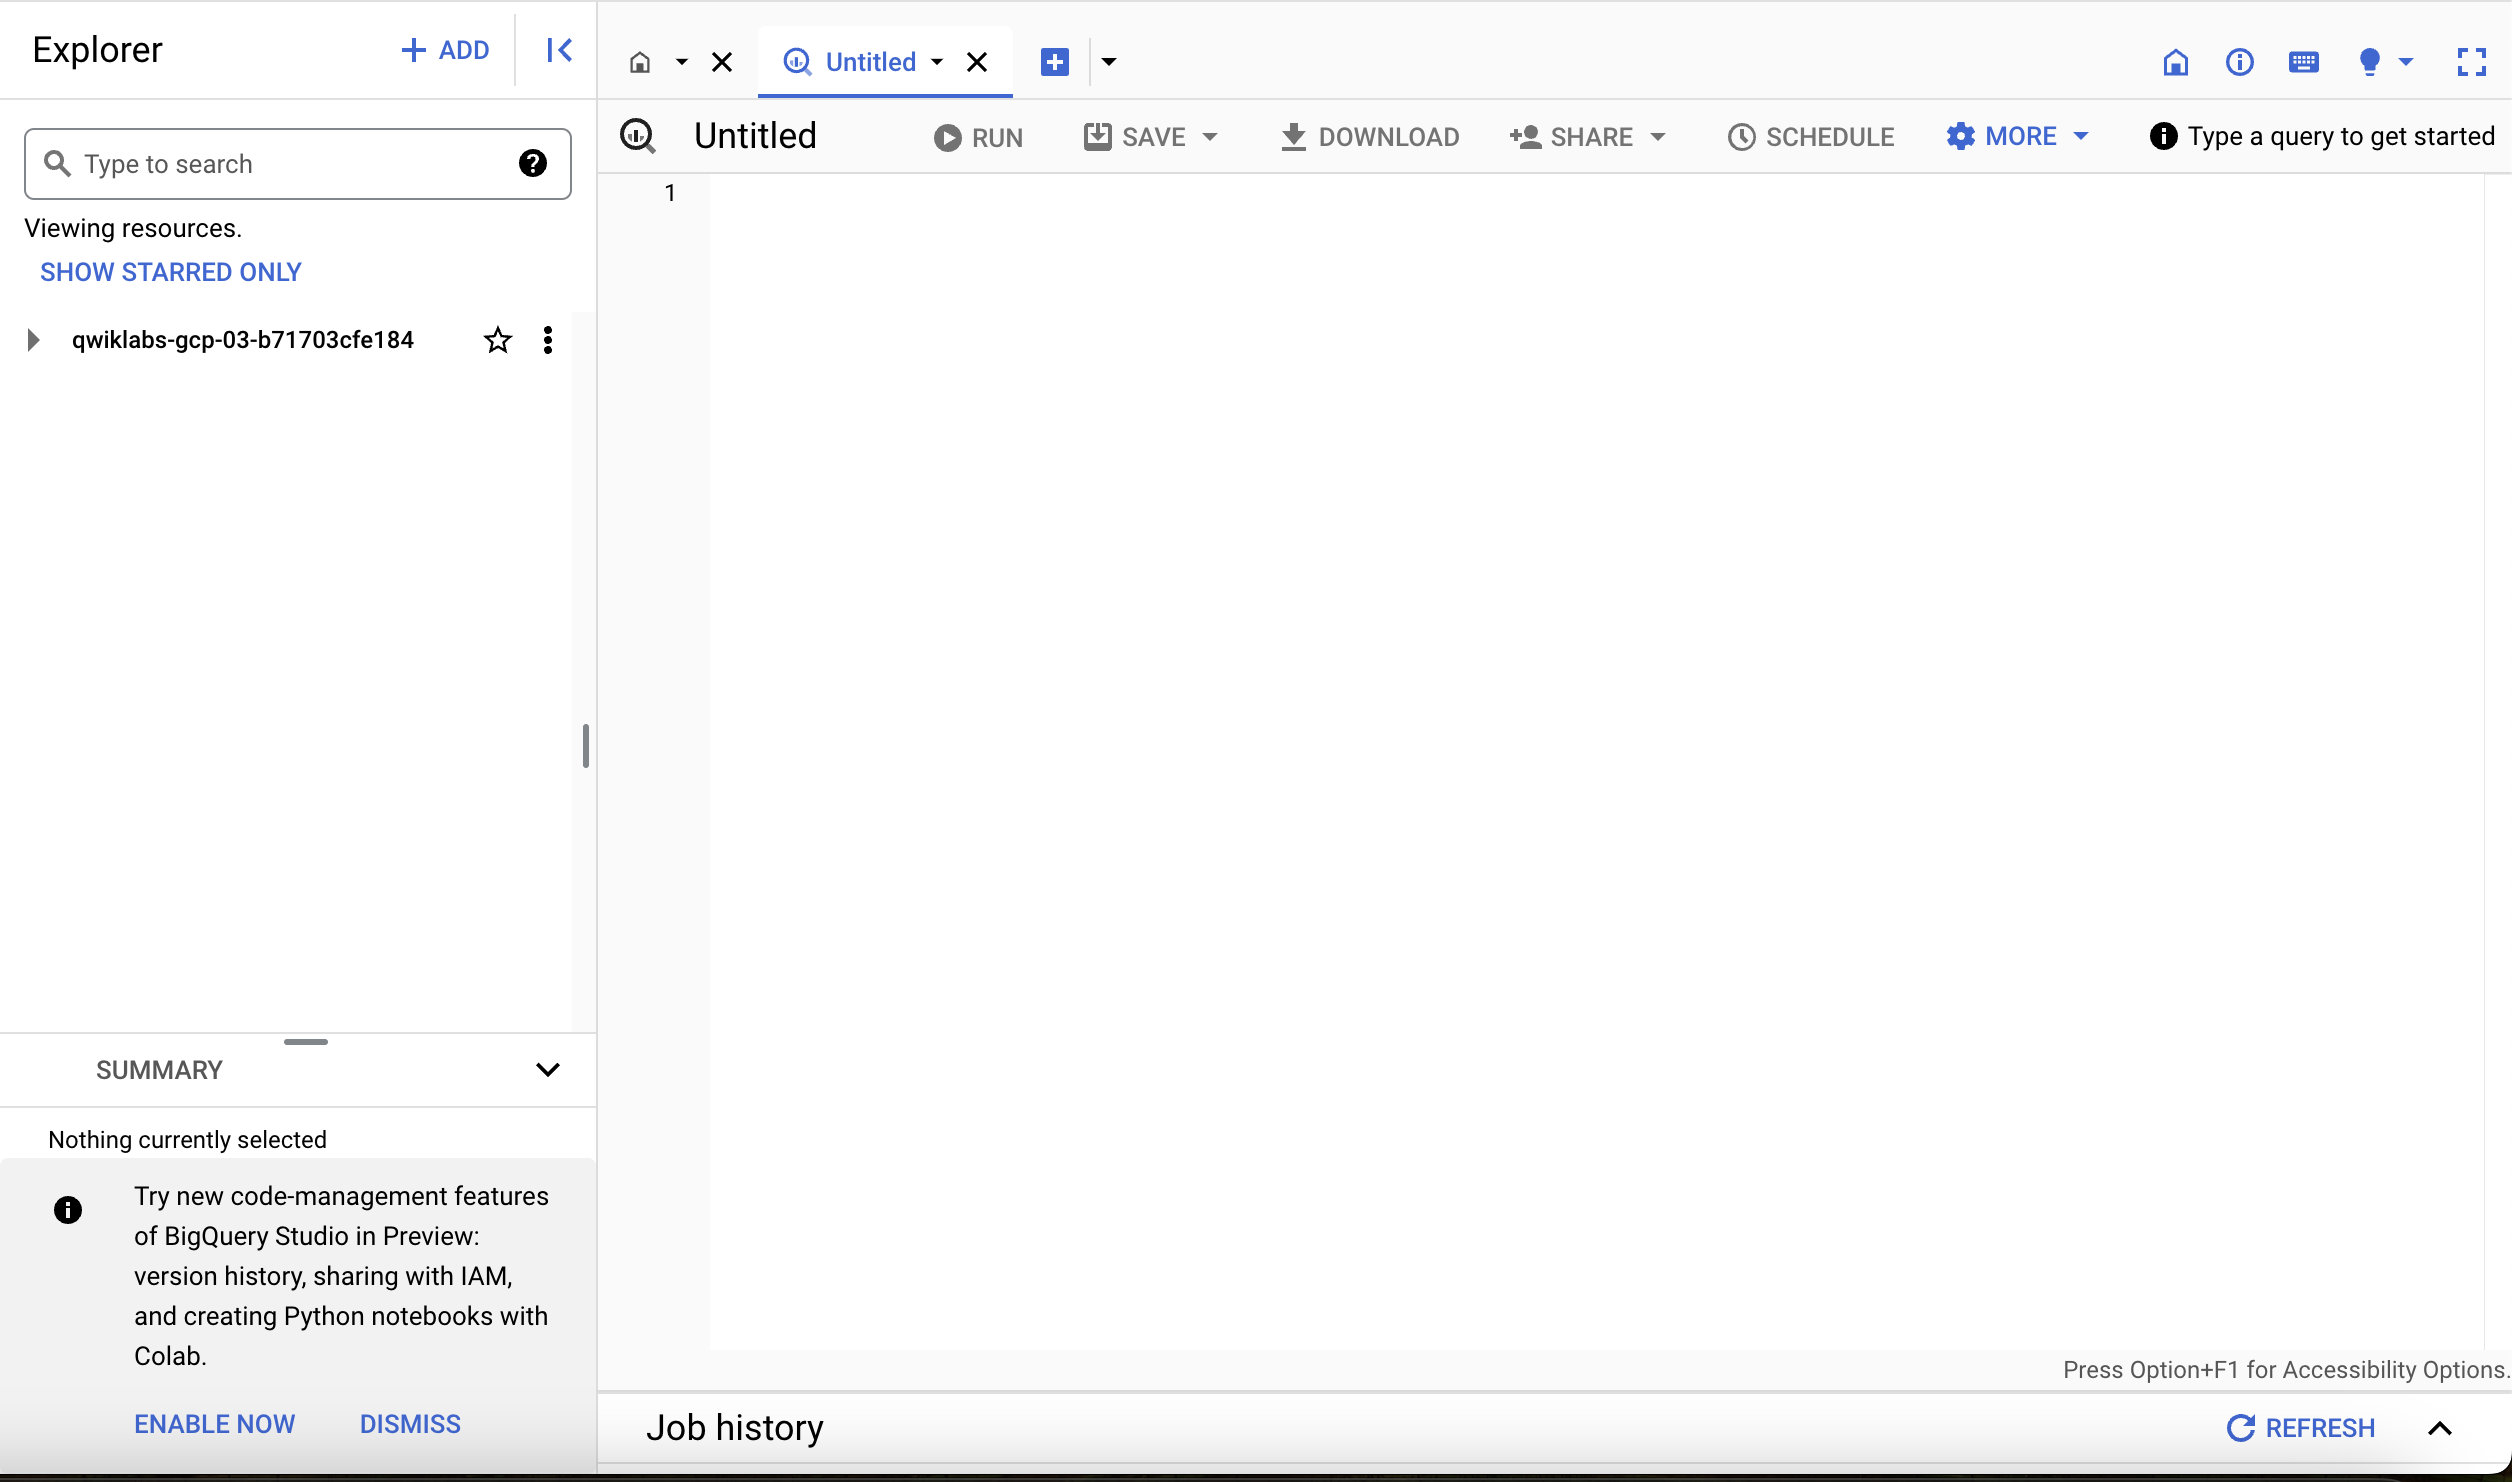
The BigQuery console opens.
In this section the BigQuery interface was used to access the console. The console provides a convenient way to add information to a dataset. BigQuery uses tables to represent data in a structured way.
In the next section learn more about BigQuery and how to create custom tables.
Task 2. Create custom tables
In this section, you will create a dataset. The dataset is used to add data to the project. Datasets utilize tables and views to help control access to data within a project.
In the BigQuery console, observe the Explorer section.
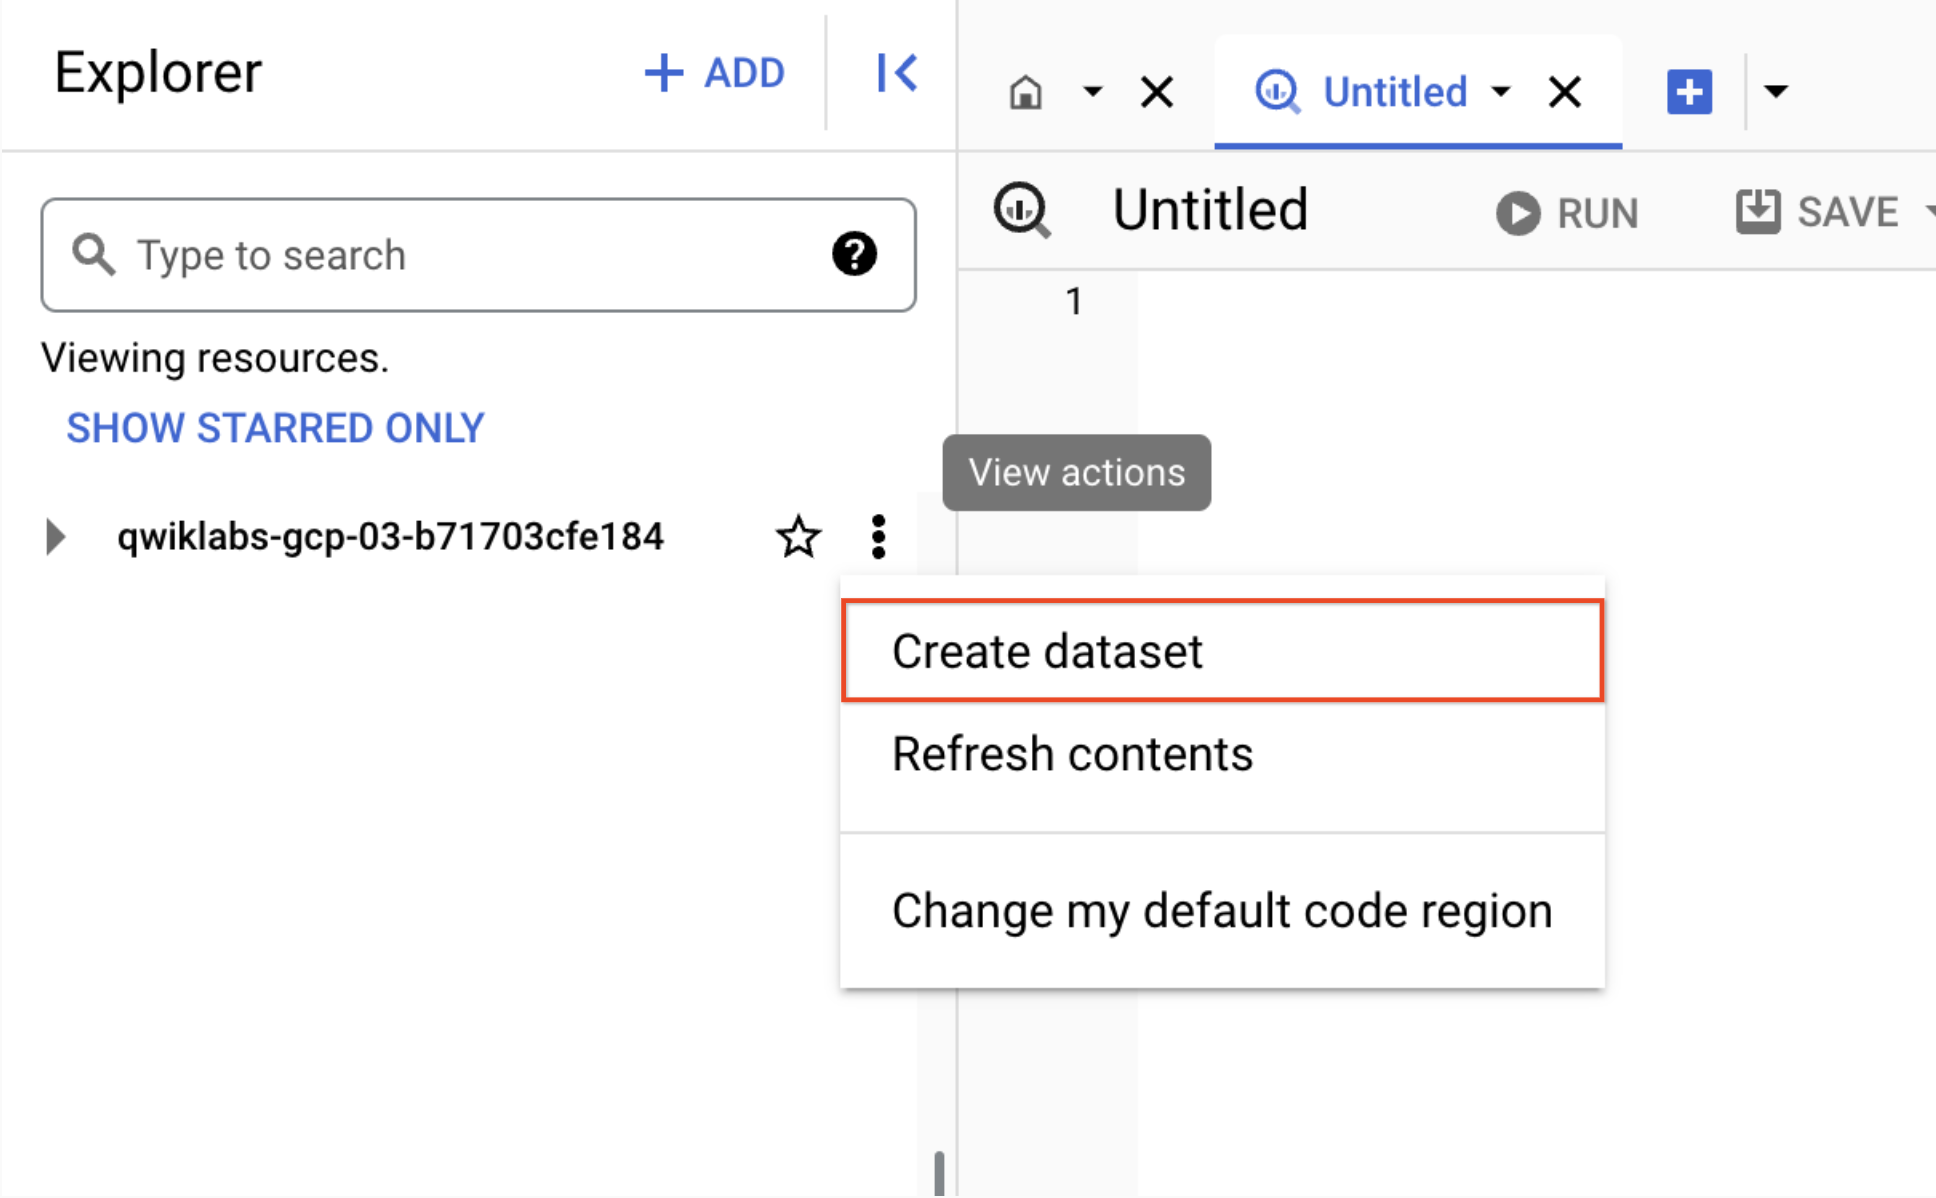
Click on the View actions icon next to your project ID and select Create dataset.
Note: A dataset is contained within a specific project. Datasets are top-level containers that are used to organize and control access to your tables and views. A table or view must belong to a dataset, so you need to create at least one dataset before loading data into BigQuery. Reference: BigQuery datasets introduction.
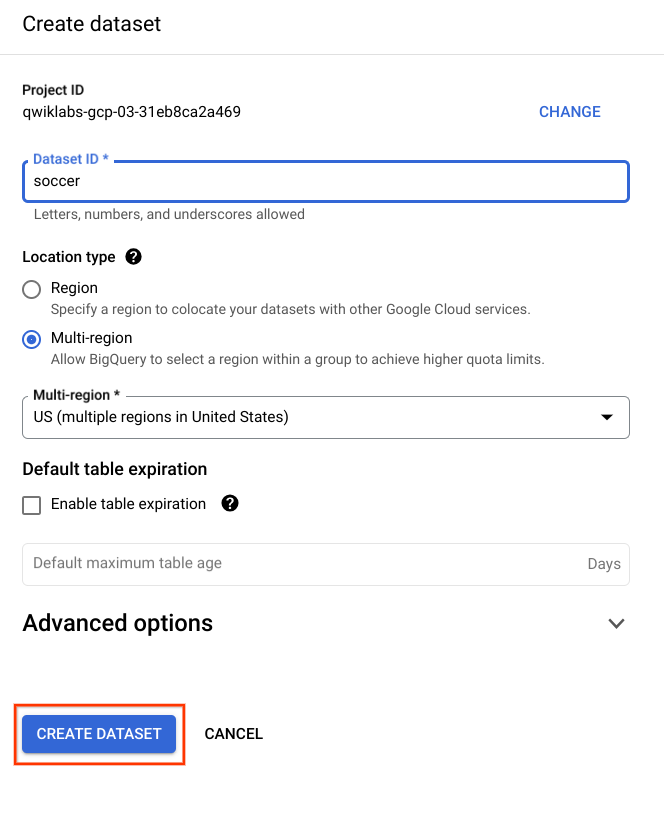
- On the Create dataset page fill in the following:
| Field | Value |
| Dataset ID | soccer |
| Data location | us (multiple regions in United States) |
| Default table expiration | Default |
- The BigQuery Create dataset screen will display information similar to below:
Note: Currently, the public datasets are stored in the US multi-region data locations. For simplicity, place your dataset in the same location.
- Click Create dataset at the bottom of the panel.
Click Check my progress to verify the objective
Check a new dataset is created
Check my progress
In this section a new dataset was created using BigQuery. During this process, BigQuery needs to know where to store the information to be created. It also provides the option to include customer managed encryption, if required.
In the next section learn how to populate the created dataset with JavaScript Object Notation (JSON) a common data format.
Task 3. Load JSON Data
Now you will load the tables created previously with soccer data into the dataset.
BigQuery provides support for a number of import formats. In this lab use JSON with the dataset created in the previous section.
Create a table by clicking on the View actions icon next to your
soccerdataset in the Explorer section.Select Create table.
In the following section use the default values for all settings unless otherwise indicated. The data is stored in a public Google Cloud Storage (GCS) bucket.
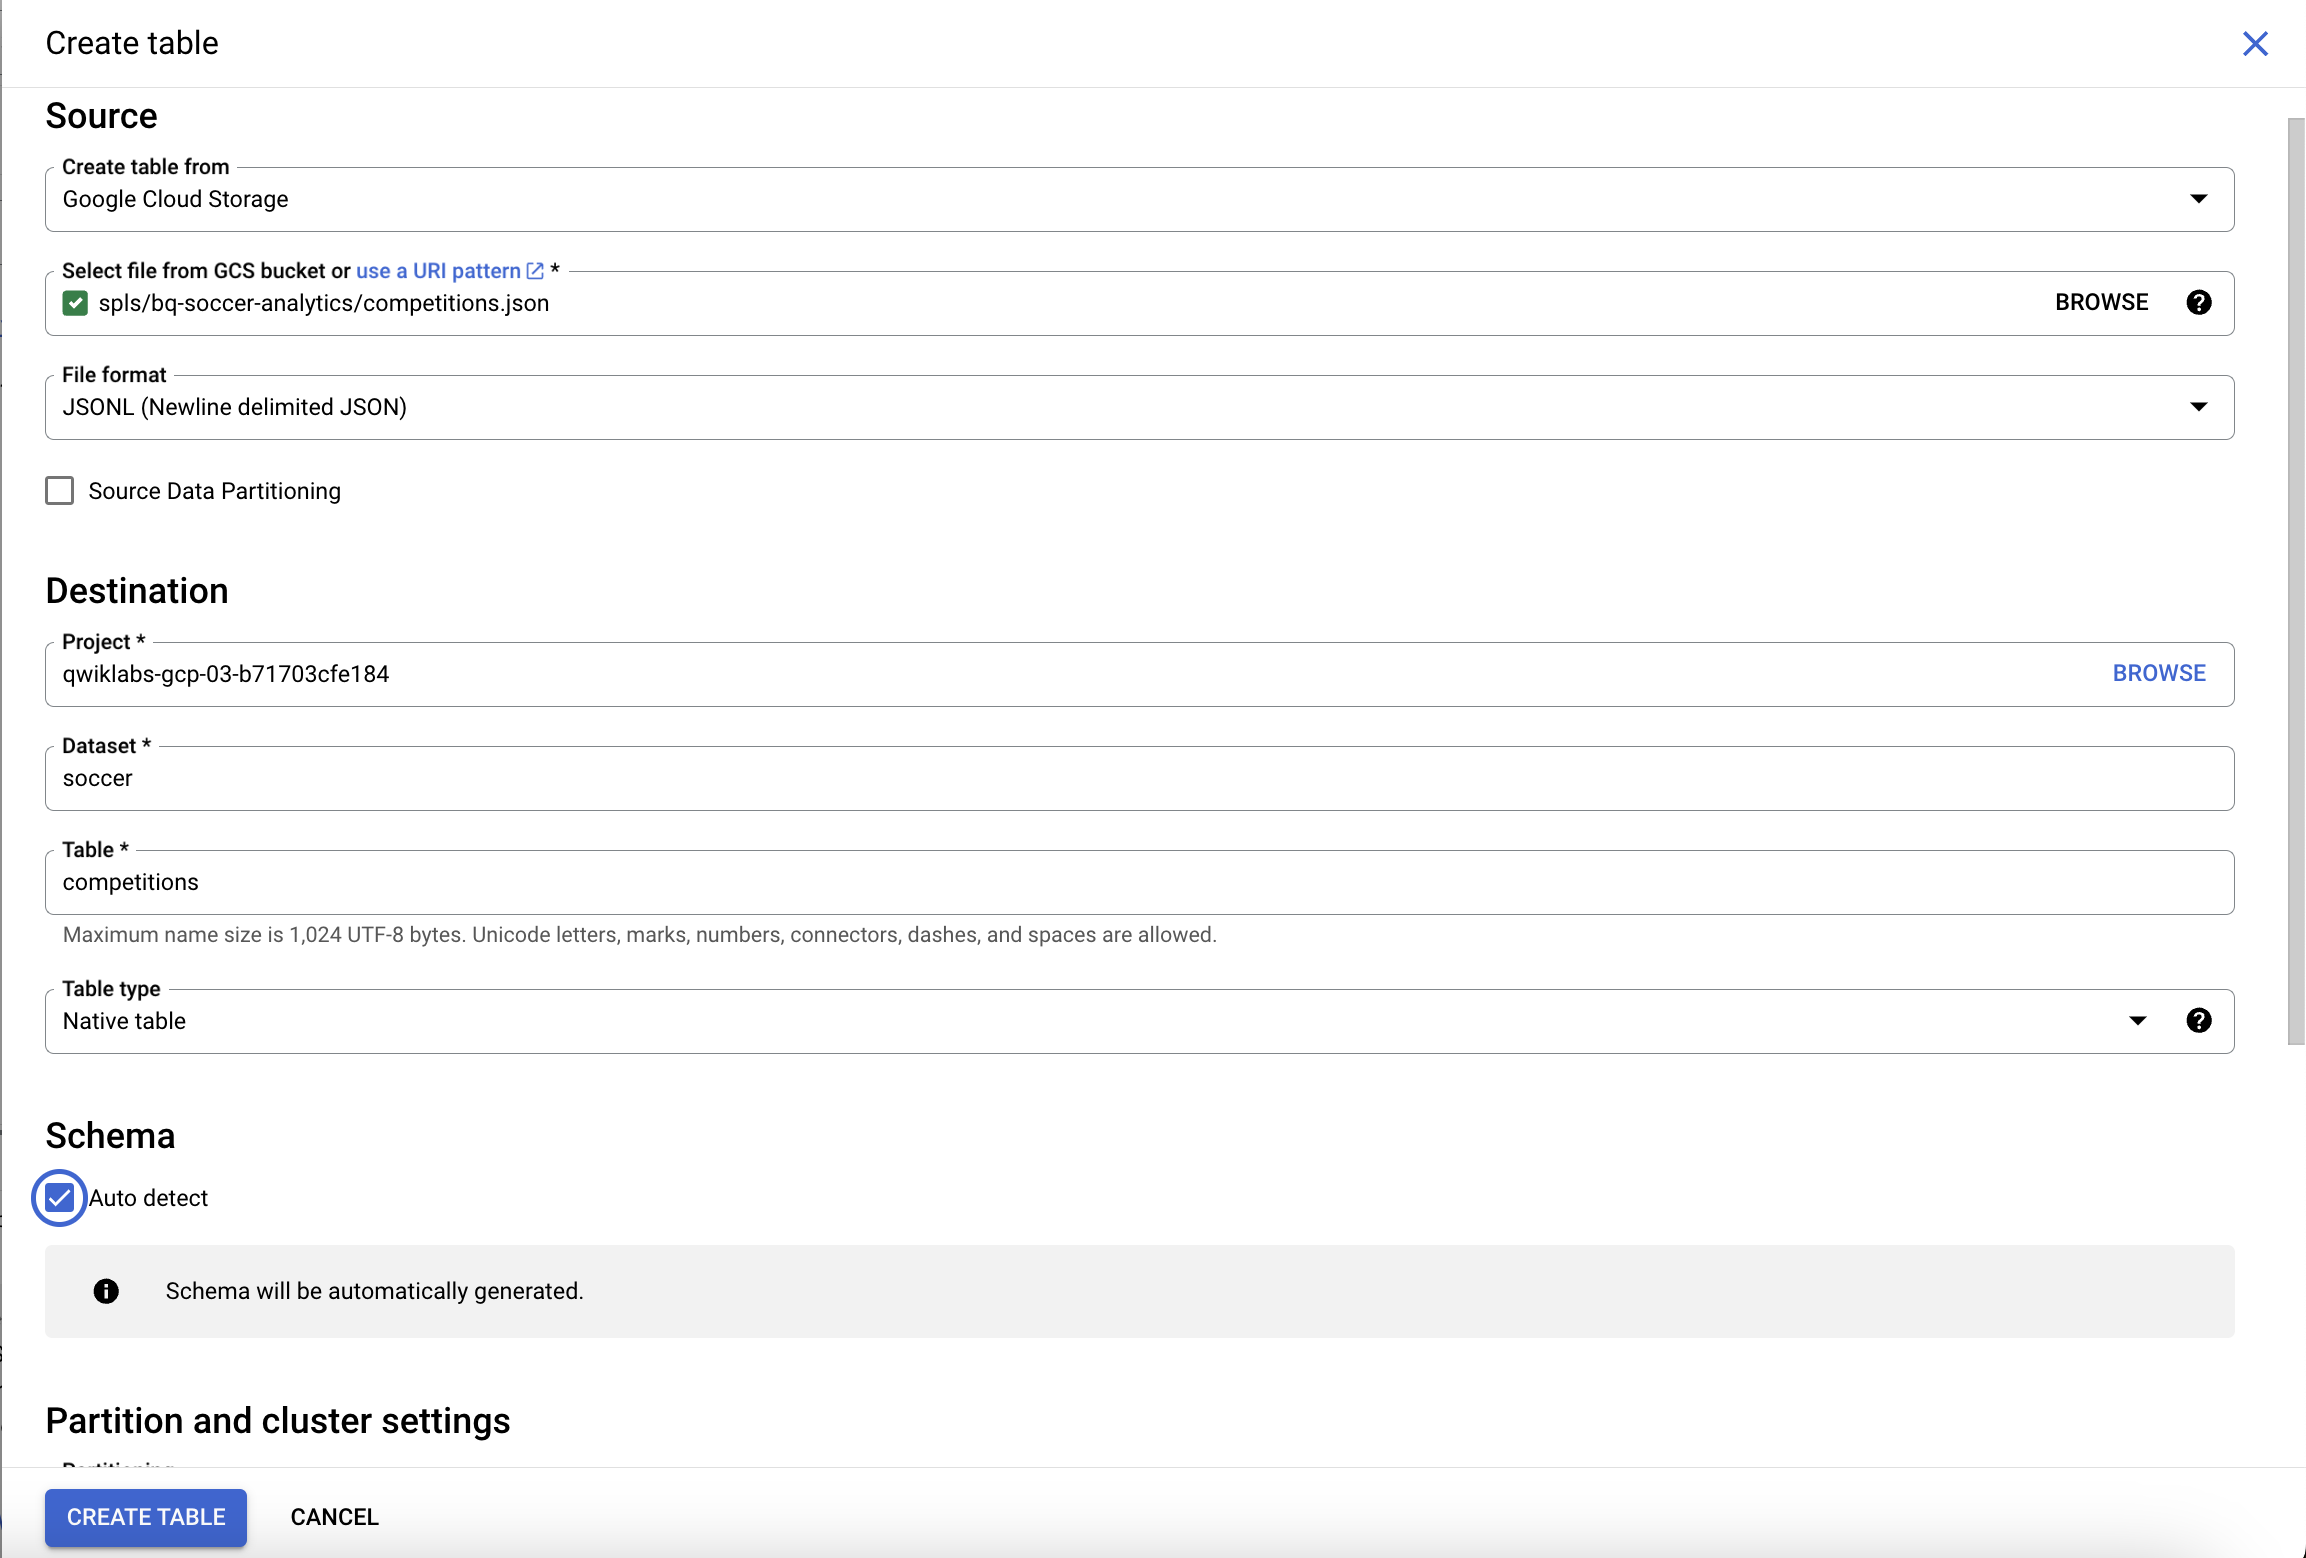
- On the Create table page add the following information:
| Field | Value |
| Create table from | Google Cloud Storage |
| Select file from GCS bucket | spls/bq-soccer-analytics/competitions.json |
| File format | JSONL (Newline delimited JSON) |
| Table name | competitions |
| Schema | Check the box marked Schema Auto detect |
Note: When using Cloud Storage buckets with BigQuery, it does not require the prefix of gs:// to be applied.
- The BigQuery Create table screen will display information similar to below:
Click Create table.
Wait for BigQuery to create the table and load the data.
A pop up notification message saying "competitions" created is displayed.
The table will show up after the data is loaded.
Repeat the steps above for the other JSON data to be ingested.
| GCS bucket file | Table name |
| spls/bq-soccer-analytics/matches.json | matches |
| spls/bq-soccer-analytics/teams.json | teams |
| spls/bq-soccer-analytics/players.json | players |
| spls/bq-soccer-analytics/events.json | events |
Note: Use the exact Cloud Storage bucket files and table names shown.
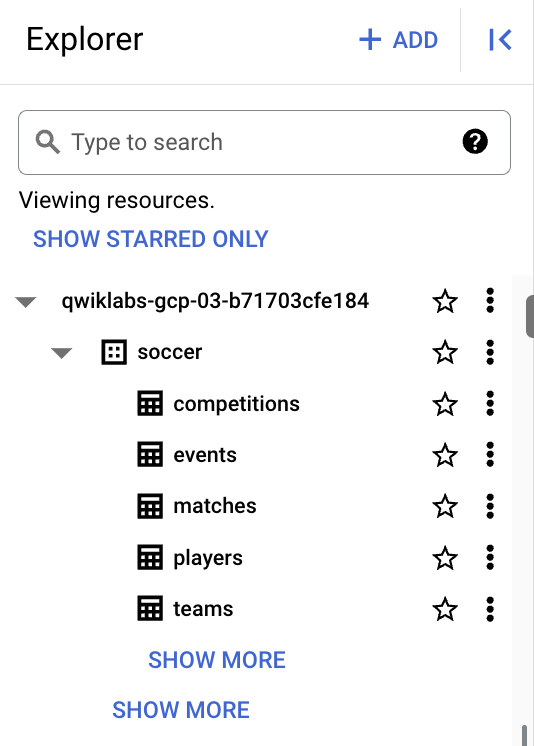
- Once the tables are created the display will be similar to below:
Click Check my progress to verify the objective
Check a competitions table is created
Check my progress
In this section new tables were created using BigQuery. During this process, BigQuery used Cloud Storage as the source for the JSON files. Cloud Storage provides a good intermediate storage option for object files.
In the next section learn how to populate the created dataset with a comma-separated values (CSV) file, that is another common data format.
Task 4. Load CSV data
In this section, load another table of soccer data into the dataset. The load process will this time be sourced from a comma-separated values (CSV) file stored in Cloud Storage.
- Create a table by clicking on the View actions icon next to your
soccerdataset in the Explorer section, and select Create table.
Use the default values for all settings unless otherwise indicated.
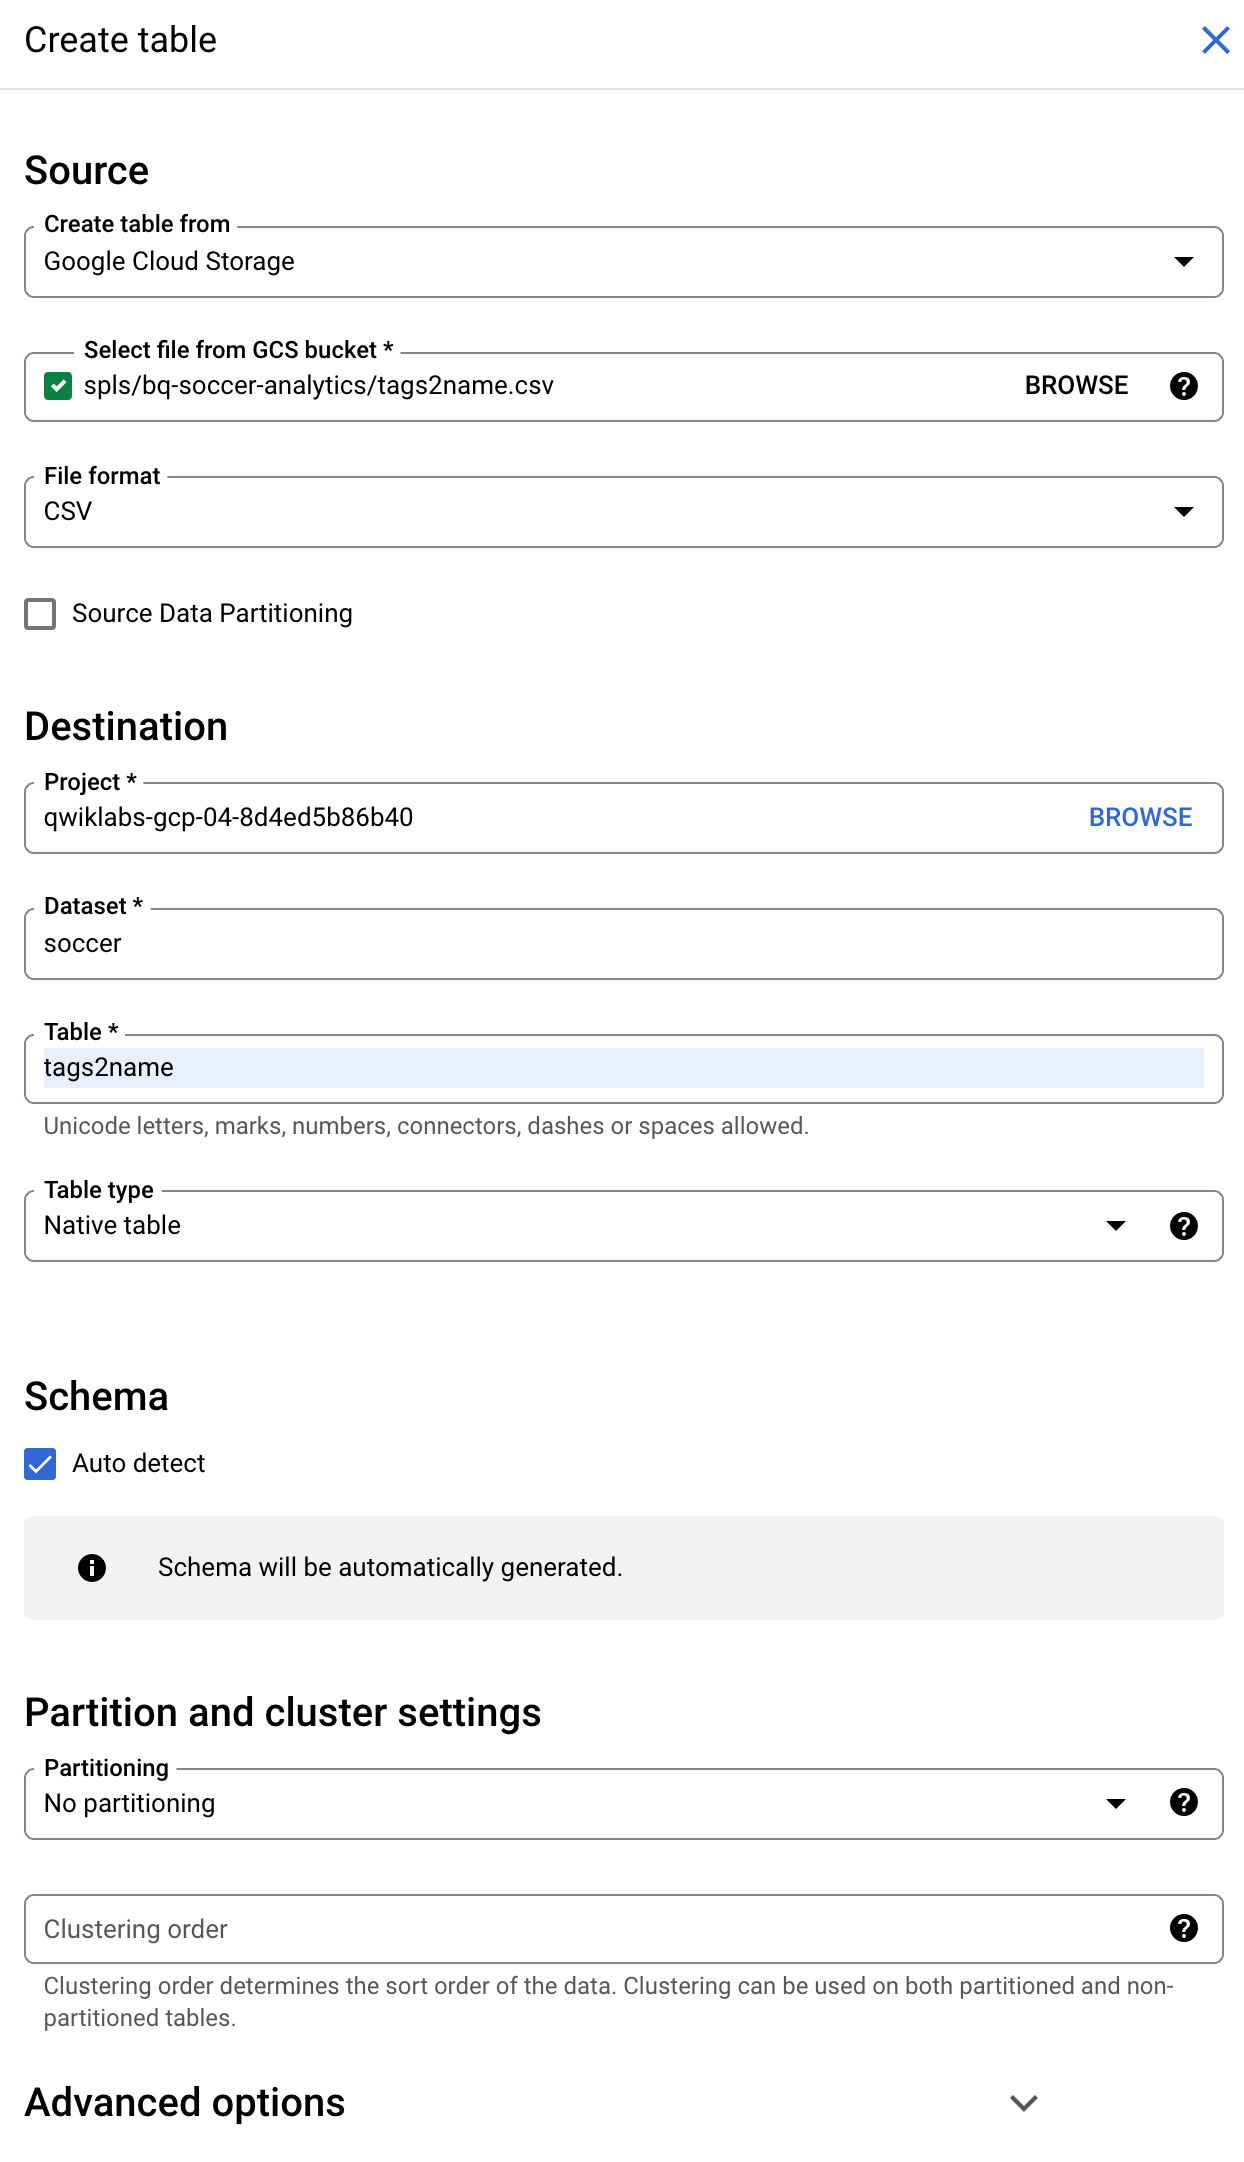
- On the Create table page add the following information:
| Field | Value |
| Create table from | Google Cloud Storage |
| Select file from GCS bucket | spls/bq-soccer-analytics/tags2name.csv |
| File format | CSV |
| Table name | tags2name |
| Schema | Check the box marked Auto detect |
- The BigQuery Create table screen will display information similar to below:
Click Create table (at the bottom of the window).
Wait for BigQuery to create the table and load the data.
A pop up message will appear saying "tags2name" created.
- The table will show up after the data is loaded.
Click Check my progress to verify the objective
Check the tags2name table is created
Check my progress
In this section a new table was created using BigQuery. During this process, BigQuery used Cloud Storage as the source for the CSV file. Cloud Storage provides a good intermediate storage option for object files.
Task 5. Preview tables
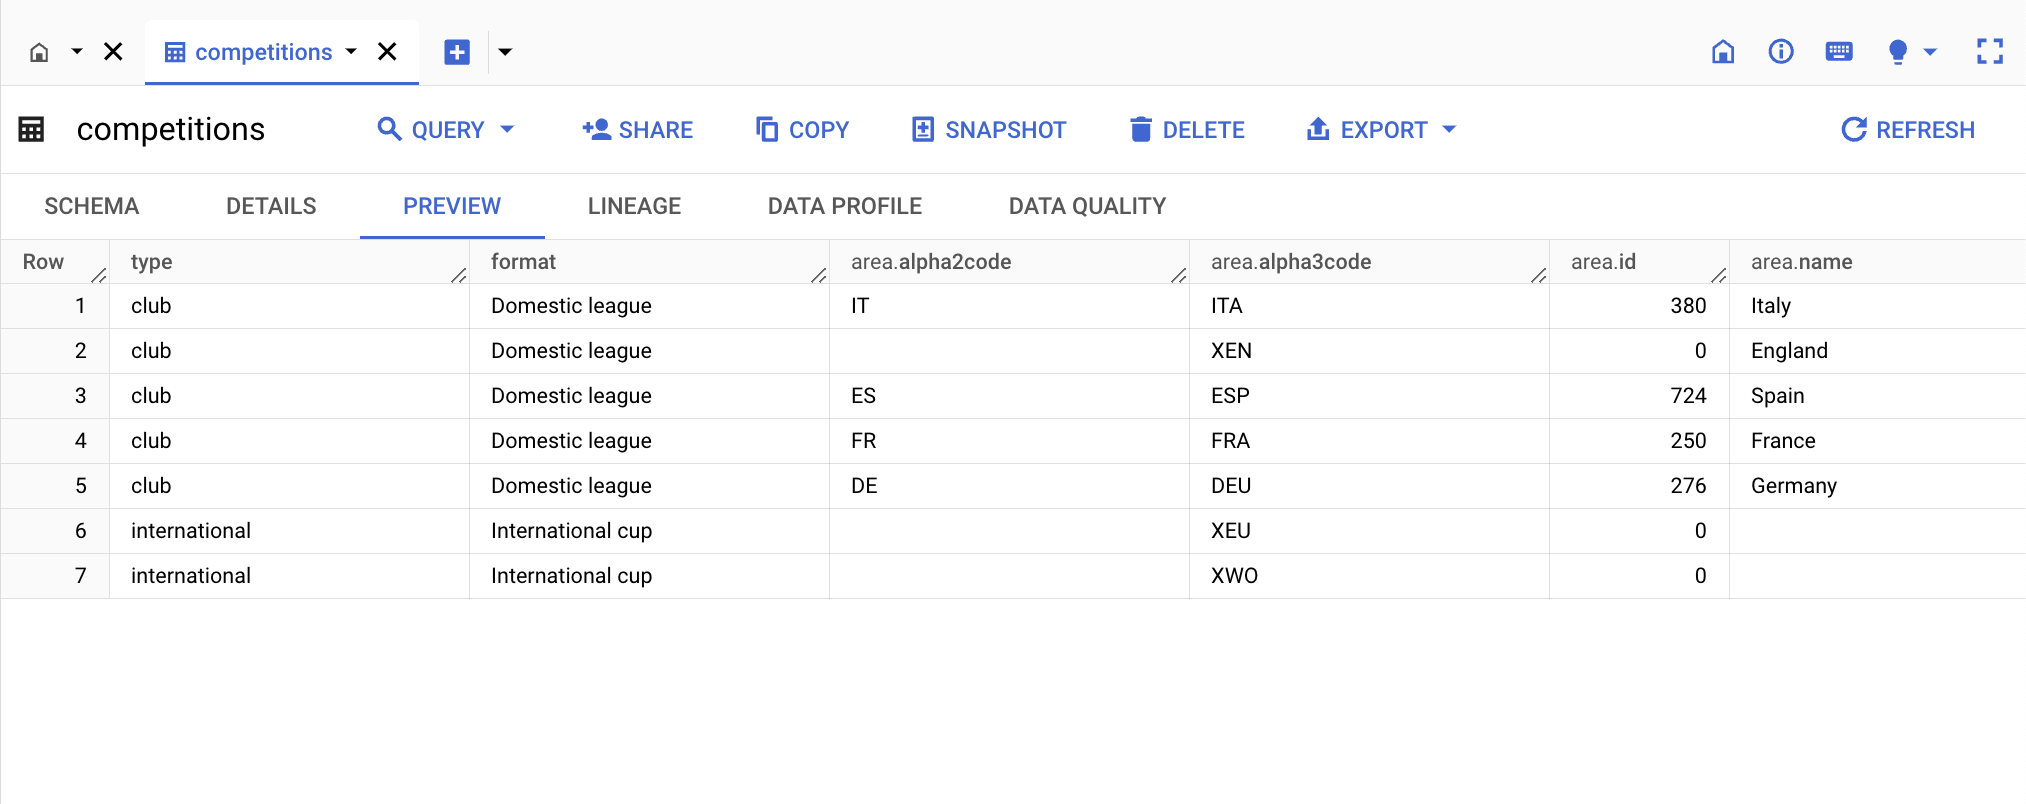
In the left pane, select soccer > competitions in the navigation panel.
In the Details panel, click the Preview tab.
Click through the other uploaded tables from the navigation panel.
Check the Schema, Details, Preview, Lineage, Data Profile and Data Quality tabs to learn more about the data in each table.
BigQuery provides a convenient way to store data previously held in a variety of formats. To learn more about data ingestion techniques for BigQuery read Choosing a data ingestion method.
In the next couple of sections learn how to query the datasets created in BigQuery.
Task 6. Query Player data
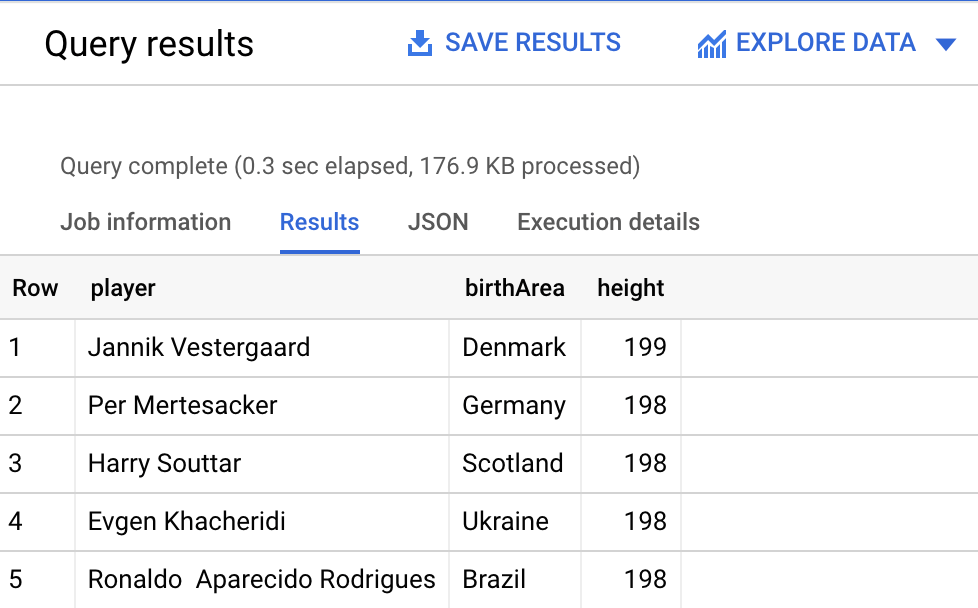
Now that you've loaded data into your tables, you can run queries against it. Next, create a query that retrieves the top 10 tallest defenders (for whom height is available) in the players table.
In the query Editor, click "+" (Create SQL query) icon.
Copy and paste the following query into the query Editor:
SELECT
  (firstName || ' ' || lastName) AS player,
  birthArea.name AS birthArea,
  height
FROM
  `soccer.players`
WHERE
  role.name = 'Defender'
ORDER BY
  height DESC
LIMIT 5
Note: In the above query, use BigQuery to retrieve information relating to soccer players. Specifically query for a specific player role to understand the general characteristics of a defender.
- Click Run. The results are displayed below the query window.
Click Check my progress to verify the objective
Check the query has been run
Check my progress
Understanding how to perform queries in BigQuery is essential. Running queries in BigQuery provides a simple interface to extract powerful data insights.
Task 7. Query events data
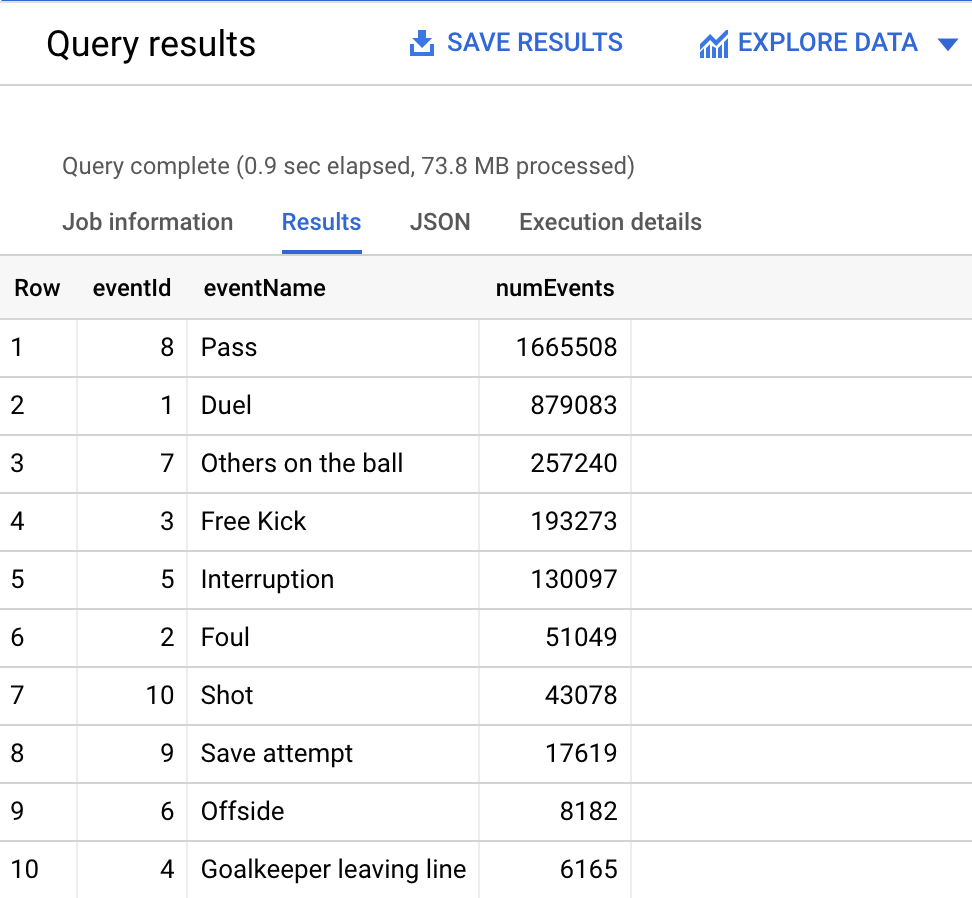
Create a query to retrieve counts of all event types that are found in the events table.
- Copy and paste the following query into the query Editor:
SELECT
  eventId,
  eventName,
  COUNT(id) AS numEvents
FROM
  `soccer.events`
GROUP BY
  eventId, eventName
ORDER BY
  numEvents DESC
- Click Run. The results are displayed below the query window.
Note: In the above query, use BigQuery to retrieve information relating to events occurring within a soccer match. Specifically query for the frequency of events like passes and shots.
Click Check my progress to verify the objective
Check the query has been run
Check my progress
Being able to capitalize on stored data to establish trends and patterns presents an opportunity to deliver real benefit to end users. In the next section test your understanding of what you have learned in this introduction to BigQuery.
Task 8. Pop quiz
Test your understanding of BigQuery by completing the short quiz on the topics covered in this lab.
How many domestic leagues appear in the competitions table?275
Submit
How many rows are in the events table?
4,59
8,693
3,25
1,294
1,941
Which table contains tags (numerical IDs) that can be matched to text labels and descriptions in the tags2name table?eventsplayerscompetitions
Solution of Lab
curl -LO raw.githubusercontent.com/quiccklabs/Labs_solutions/master/BigQuery%20Soccer%20Data%20Ingestion/quicklabgsp848.sh
sudo chmod +x quicklabgsp848.sh
./quicklabgsp848.sh


