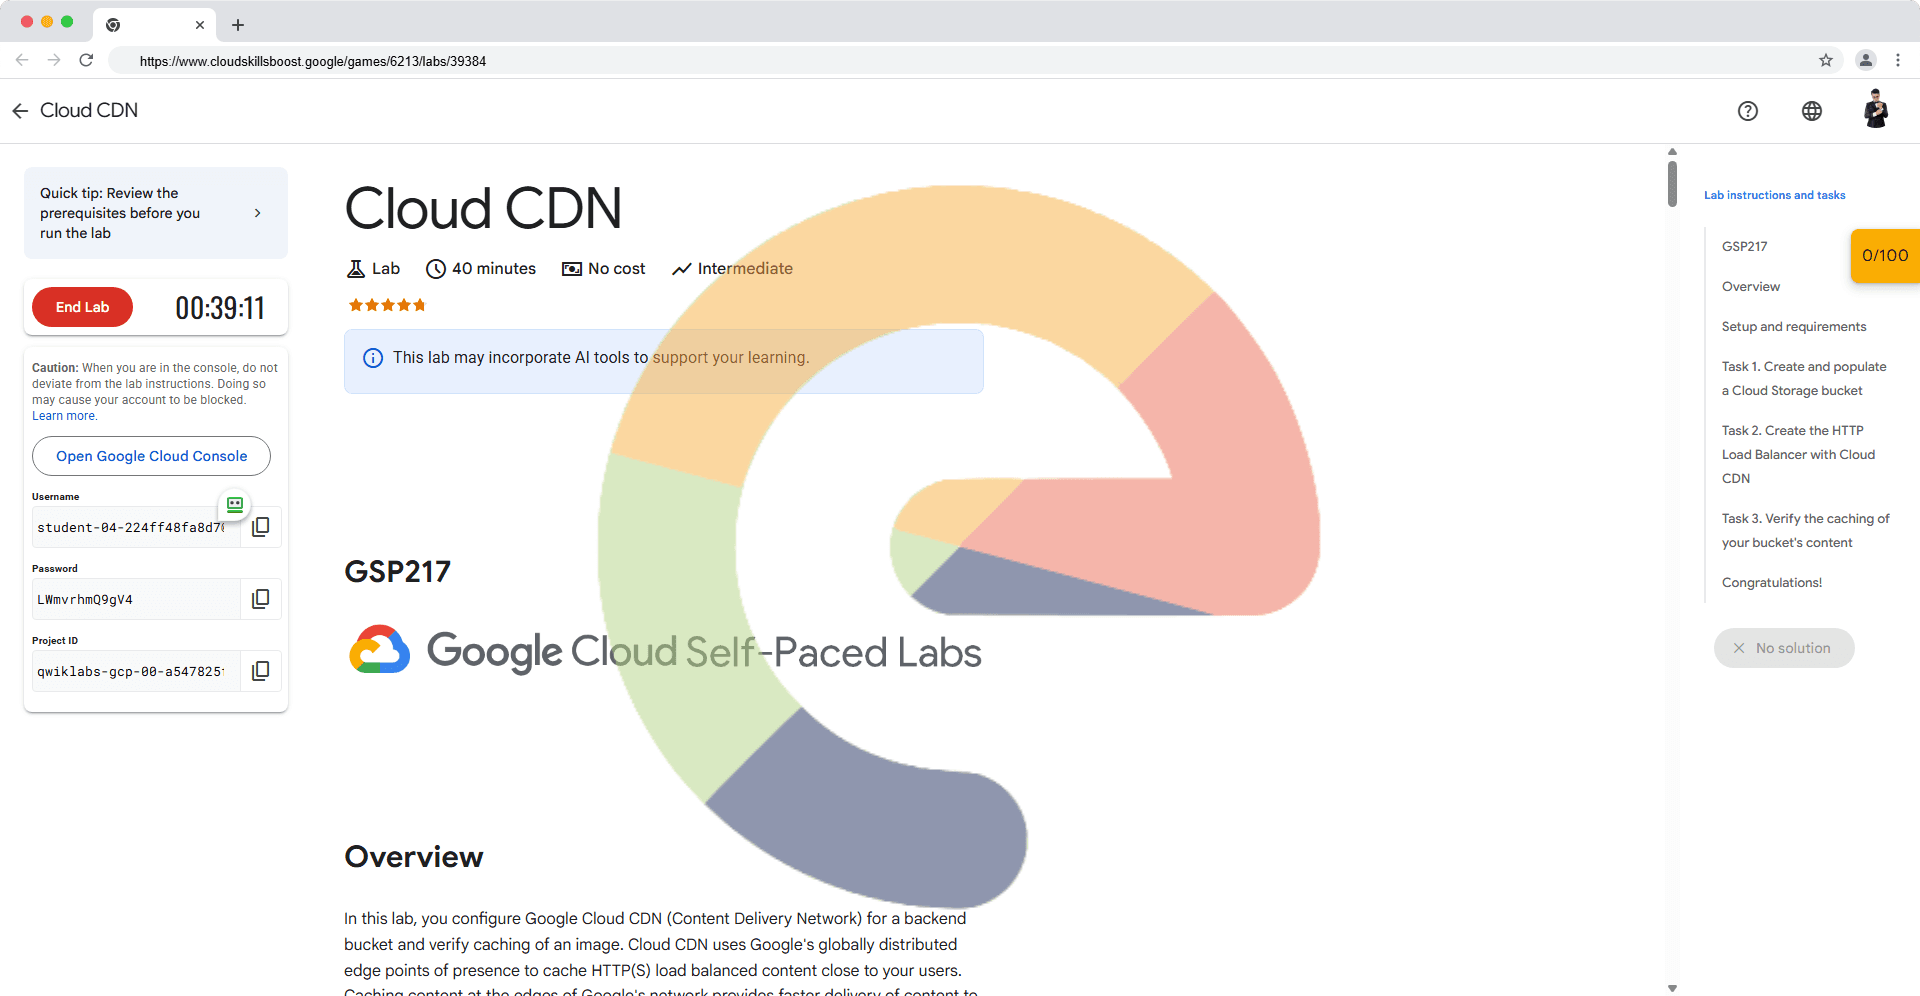
Cloud CDN - GSP217
A passionate full-stack developer from @ePlus.DEV
Overview
In this lab, you configure Google Cloud CDN (Content Delivery Network) for a backend bucket and verify caching of an image. Cloud CDN uses Google's globally distributed edge points of presence to cache HTTP(S) load balanced content close to your users. Caching content at the edges of Google's network provides faster delivery of content to your users while reducing serving costs.
For an up-to-date list of Google's Cloud CDN cache sites, refer to the Cache locations resource.
Objectives
In this lab, you will learn how to perform the following tasks:
Create and populate a Cloud Storage bucket
Create an HTTP Load Balancer with Cloud CDN
Verify the caching of your bucket's content
Setup and requirements
Before you click the Start Lab button
Read these instructions. Labs are timed and you cannot pause them. The timer, which starts when you click Start Lab, shows how long Google Cloud resources are made available to you.
This hands-on lab lets you do the lab activities in a real cloud environment, not in a simulation or demo environment. It does so by giving you new, temporary credentials you use to sign in and access Google Cloud for the duration of the lab.
To complete this lab, you need:
- Access to a standard internet browser (Chrome browser recommended).
Note: Use an Incognito (recommended) or private browser window to run this lab. This prevents conflicts between your personal account and the student account, which may cause extra charges incurred to your personal account.
- Time to complete the lab—remember, once you start, you cannot pause a lab.
Note: Use only the student account for this lab. If you use a different Google Cloud account, you may incur charges to that account.
How to start your lab and sign in to the Google Cloud console
Click the Start Lab button. If you need to pay for the lab, a dialog opens for you to select your payment method. On the left is the Lab Details pane with the following:
The Open Google Cloud console button
Time remaining
The temporary credentials that you must use for this lab
Other information, if needed, to step through this lab
Click Open Google Cloud console (or right-click and select Open Link in Incognito Window if you are running the Chrome browser).
The lab spins up resources, and then opens another tab that shows the Sign in page.
Tip: Arrange the tabs in separate windows, side-by-side.
Note: If you see the Choose an account dialog, click Use Another Account.
If necessary, copy the Username below and paste it into the Sign in dialog.
student-04-224ff48fa8d7@qwiklabs.netYou can also find the Username in the Lab Details pane.
Click Next.
Copy the Password below and paste it into the Welcome dialog.
LWmvrhmQ9gV4You can also find the Password in the Lab Details pane.
Click Next.
Important: You must use the credentials the lab provides you. Do not use your Google Cloud account credentials.
Note: Using your own Google Cloud account for this lab may incur extra charges.
Click through the subsequent pages:
Accept the terms and conditions.
Do not add recovery options or two-factor authentication (because this is a temporary account).
Do not sign up for free trials.
After a few moments, the Google Cloud console opens in this tab.
Note: To access Google Cloud products and services, click the Navigation menu or type the service or product name in the Search field.

Activate Cloud Shell
Cloud Shell is a virtual machine that is loaded with development tools. It offers a persistent 5GB home directory and runs on the Google Cloud. Cloud Shell provides command-line access to your Google Cloud resources.
Click Activate Cloud Shell at the top of the Google Cloud console.
Click through the following windows:
Continue through the Cloud Shell information window.
Authorize Cloud Shell to use your credentials to make Google Cloud API calls.
When you are connected, you are already authenticated, and the project is set to your Project_ID, qwiklabs-gcp-00-a547825f60f3. The output contains a line that declares the Project_ID for this session:
Your Cloud Platform project in this session is set to qwiklabs-gcp-00-a547825f60f3
gcloud is the command-line tool for Google Cloud. It comes pre-installed on Cloud Shell and supports tab-completion.
- (Optional) You can list the active account name with this command:
gcloud auth list
- Click Authorize.
Output:
ACTIVE: *
ACCOUNT: student-04-224ff48fa8d7@qwiklabs.net

To set the active account, run:
    $ gcloud config set account `ACCOUNT`
- (Optional) You can list the project ID with this command:
gcloud config list project
Output:
[core]
project = qwiklabs-gcp-00-a547825f60f3
Note: For full documentation of gcloud, in Google Cloud, refer to the gcloud CLI overview guide.
Task 1. Create and populate a Cloud Storage bucket
Cloud CDN content can originate from two types of backends:
Compute Engine virtual machine (VM) instance groups
Cloud Storage buckets
In this lab, you will configure a Cloud Storage bucket as the backend.
Create a unique Cloud Storage bucket
In the Cloud Console, from the Navigation menu click Cloud Storage > Buckets.
Click Create bucket.
Specify values for the following fields, leave all others at their defaults:
| Property | Value (type value or select option as specified) | | --- | --- | | Name | Enter a globally unique name.
If the name you enter is not unique, you'll see a message to try another name. | | Location type | Multi-regional | | Location | Choose a location that is very far from you. |
Note: Try to choose a location that is either half-way around the world from you or at least on a different continent. Doing this will provide a greater difference between accessing the image with and without Cloud CDN enabled.
Click Continue.
For Choose how to control access to objects in Prevent public access Dialog box uncheck
Enforce public access prevention on this bucketand click Continue.Click Create.
Note the name of your storage bucket for the next step. It will be referred to as
[your-storage-bucket].
Copy an image file into your bucket
Copy an image from a public Cloud Storage bucket to your own bucket.
- Run the following command in Cloud Shell, replacing
[your-storage-bucket]with your bucket's name:
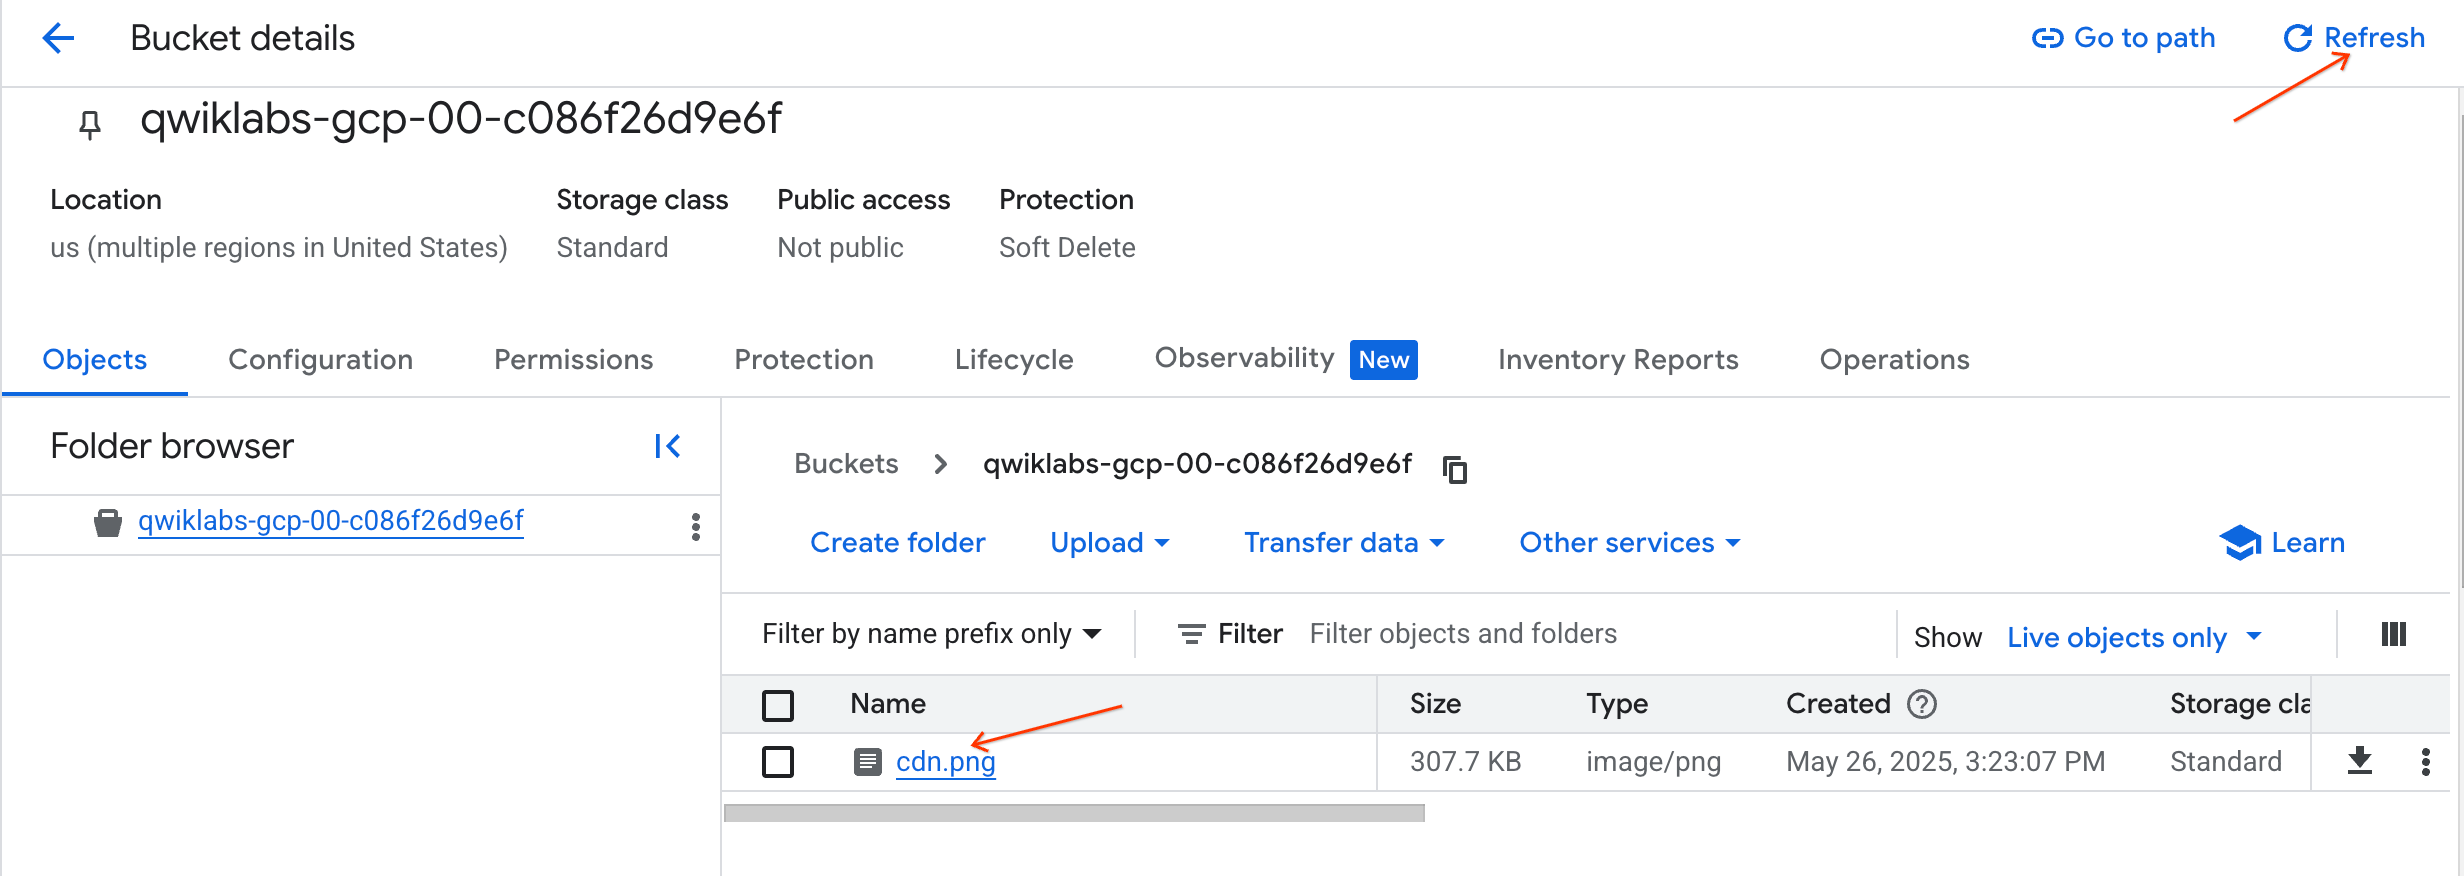
gsutil cp gs://cloud-training/gcpnet/cdn/cdn.png gs://[your-storage-bucket]
Click Authorize.
On the Bucket details page, click Refresh to verify that the image was copied into your bucket.
Make the bucket public
The recommended practice is to dedicate specific Cloud Storage buckets for public objects.
On the Bucket details page click the Permissions tab.
Click Grant Access.
In New principals, start typing "allUsers" then select the choice from the dropdown menu.
For the role, select Cloud Storage > Storage Object Viewer.
Click Save.
Click Allow public access.
Click on the Objects tab.
Click Copy URL under Public access, then open a new browser tab and paste it in to verify that you can access the image.

Click Check my progress to verify the objective.
Create and populate a Cloud Storage bucket
Check my progress
Task 2. Create the HTTP Load Balancer with Cloud CDN
HTTP(S) load balancing provides global load balancing for HTTP(S) requests of static content to a Cloud Storage bucket (backend). By enabling Cloud CDN on your backend, your content is cached at a location at the edge of Google's network, which is usually far closer to the user than your backend.
Start the HTTP Load Balancer Configuration
In the Cloud Console, from the Navigation menu (
) click View All Products > Network services > Load Balancing.
Click + Create load balancer.
Under Type of load balancer, select Application Load Balancer (HTTP/HTTPS) and click Next.
Leave all the settings as default and click Configure.
For Load Balancer Name, type cdn-lb.

Configure the backend
Click on Backend configuration.
For Backend services & backend buckets, click backend services & backend buckets dropdown menu, then click Create a backend bucket.
Set the Name to
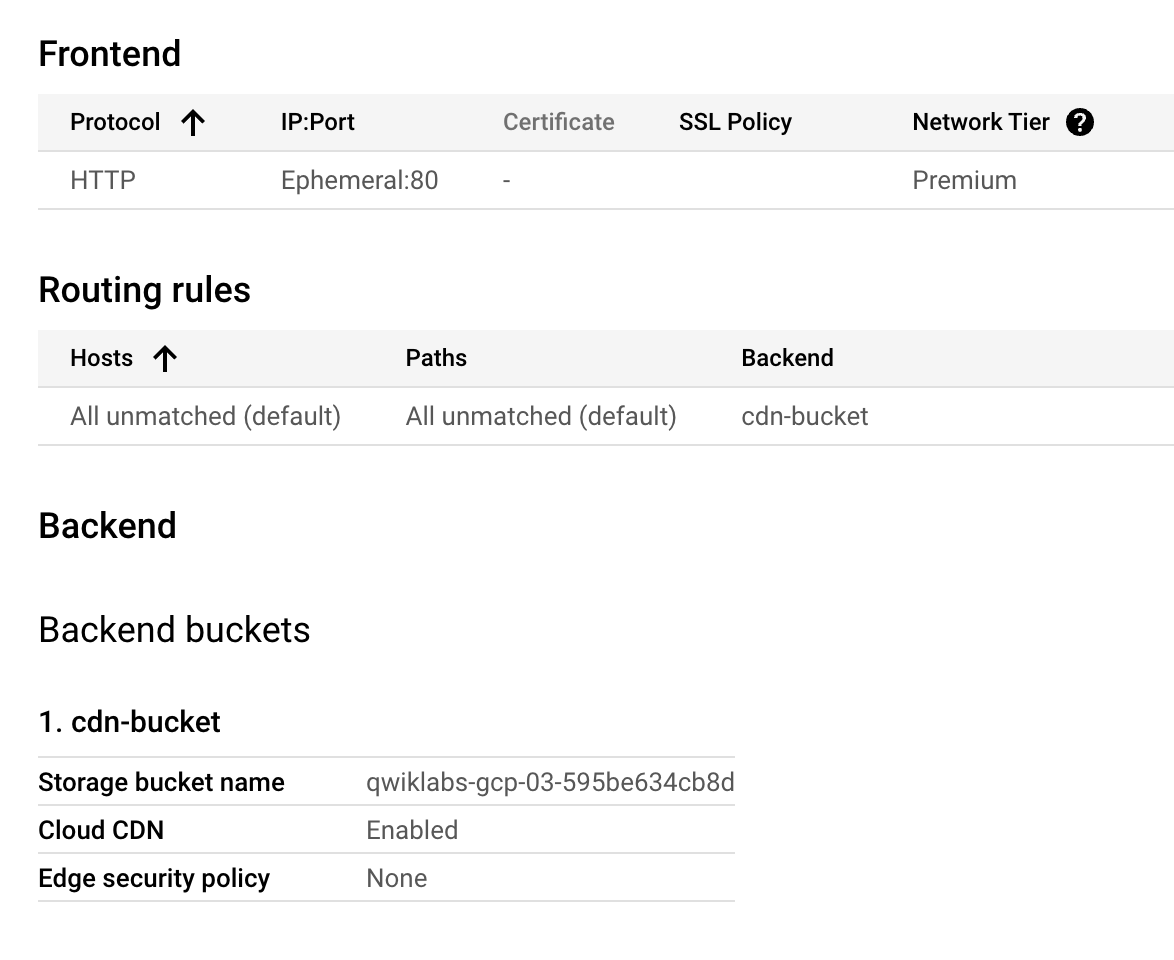
cdn-bucket.Under Cloud Storage bucket click Browse.
Click your bucket and click Select.
Check Enable Cloud CDN.
Cache Static Content is selected by default, for this lab, set the Client TTL, Default TTL and Maximum TTL to 1 minute.
Click Create.
Note: Yes, enabling Cloud CDN is as simple as checking Enable Cloud CDN!
Configure the frontend
Note: The host and path rules determine how your traffic will be directed. For example, you could direct video traffic to one backend and image traffic do another backend. However, you are not configuring the Host and path rules in this lab. Ignore Host and path rules option.
Click Frontend configuration.
Specify the following, leave all other values with their defaults:
| Property | Value (type value or select option as specified) | | --- | --- | | Protocol | HTTP | | IP version | IPv4 | | IP address | Ephemeral | | Port | 80 |
Click Done.
Review and create the HTTP Load Balancer
Click Review and finalize.
Review the Backend Buckets and Frontend.
Click Create and wait for the load balancer to be created.
Click on the name of the load balancer (cdn-lb).
Note the IP address of the load balancer for the next task. It will be referred to as
[LB_IP_ADDRESS].
Click Check my progress to verify the objective.
Create the HTTP Load Balancer with Cloud CDN
Check my progress
Task 3. Verify the caching of your bucket's content
Now that you have created the HTTP Load Balancer for your bucket and enabled Cloud CDN, it is time to verify that the image gets cached on the edge of Google's network.
Time the HTTP request for the image
One way to verify that the image gets cached is to time the HTTP request for the image. The first request should take significantly longer as content is only cached at an edge location after being accessed through that location.
- In Cloud Shell, store the IP address of the Load Balancer in an environment variable:
export LB_IP_ADDRESS=<Enter the IP address of the Load Balancer>
- Run the following to time 3 consecutive HTTP requests:
for i in {1..3};do curl -s -w "%{time_total}\n" -o /dev/null http://$LB_IP_ADDRESS/cdn.png; done
The output should look like this example:
1.234357
0.009600
0.006652
Note: In this example output, the second and third request take less than 1% of the time of the first request. This demonstrates that the image was cached during the first request and accessed from an edge location on further requests. Depending on how far you placed your storage bucket and where your closest edge location is, you will see different results.
- Repeat the command a few times to provide logs:
for i in {1..3};do curl -s -w "%{time_total}\n" -o /dev/null http://$LB_IP_ADDRESS/cdn.png; done
Explore the Cloud CDN logs
Another way to verify that the image got cached in the previous step is to explore the Cloud CDN logs. These logs will contain information on when content was cached and when the cache was accessed.
In the Cloud Console, from the Navigation menu, click View all products. Under the Observability section, click Logging > Logs Explorer.
Under the Resources filter, select Application Load Balancer > cdn-lb-forwarding-rule > cdn-lb. Then click Apply.
Click Run Query.
Note: If you see "warnings" in the query, go back to Cloud Shell and re-run the last command a few times to generate more logs.
Expand the first log entry (on top).
Within the entry, expand the httpRequest and notice that the cacheLookup is
truebut there is no cacheHit field. This illustrates that the cache did not contain the image on this first request.Expand the jsonPayload and notice that the statusDetails field contains
response_sent_by_backend. This also illustrates that the image came from the backend bucket on this first request.Close the current log entry and expand a log entry towards the bottom of the query results.
Within the entry, expand the httpRequest and notice that the cacheLookup and CacheHit is
true. This illustrates that the cache contained the image on this request.Expand the jsonPayload and notice that the statusDetails field contains
response_from_cache. This also illustrates that the cache provided the image on this request, instead of the backend.
Note: The Cloud CDN logs clearly demonstrate that the image was provided from the backend on the first request. This request filled the cache on the edge location and all future requests got the image from that cache.
Solution of Lab
curl -LO raw.githubusercontent.com/ePlus-DEV/storage/refs/heads/main/labs/GSP217/lab.sh
source lab.sh
Script Alternative
curl -LO raw.githubusercontent.com/ePlus-DEV/storage/refs/heads/main/labs/GSP217/solution-2.sh
source solution-2.sh
Script Alternative
PROJECT_ID=$(gcloud config get-value project)
BUCKET_NAME="$PROJECT_ID"

gsutil mb -l US gs://$BUCKET_NAME


gsutil cp gs://cloud-training/gcpnet/cdn/cdn.png gs://$BUCKET_NAME


gsutil iam ch allUsers:objectViewer gs://$BUCKET_NAME


TOKEN=$(gcloud auth application-default print-access-token)

curl -X POST -H "Content-Type: application/json" \
  -H "Authorization: Bearer $TOKEN" \
  -d '{
    "bucketName": "'"$PROJECT_ID"'",
    "cdnPolicy": {
      "cacheMode": "CACHE_ALL_STATIC",
      "clientTtl": 60,
      "defaultTtl": 60,
      "maxTtl": 60,
      "negativeCaching": false,
      "serveWhileStale": 0
    },
    "compressionMode": "DISABLED",
    "description": "",
    "enableCdn": true,
    "name": "cdn-bucket"
  }' \
  "https://compute.googleapis.com/compute/v1/projects/$PROJECT_ID/global/backendBuckets"

sleep 20

curl -X POST -H "Content-Type: application/json" \
  -H "Authorization: Bearer $TOKEN" \
  -d '{
    "defaultService": "projects/'"$PROJECT_ID"'/global/backendBuckets/cdn-bucket",
    "name": "cdn-lb"
  }' \
  "https://compute.googleapis.com/compute/v1/projects/$PROJECT_ID/global/urlMaps"


sleep 20

curl -X POST -H "Content-Type: application/json" \
  -H "Authorization: Bearer $TOKEN" \
  -d '{
    "name": "cdn-lb-target-proxy",
    "urlMap": "projects/'"$PROJECT_ID"'/global/urlMaps/cdn-lb"
  }' \
  "https://compute.googleapis.com/compute/v1/projects/$PROJECT_ID/global/targetHttpProxies"


sleep 20

curl -X POST -H "Content-Type: application/json" \
  -H "Authorization: Bearer $TOKEN" \
  -d '{
    "IPProtocol": "TCP",
    "ipVersion": "IPV4",
    "loadBalancingScheme": "EXTERNAL_MANAGED",
    "name": "cdn-lb-forwarding-rule",
    "networkTier": "PREMIUM",
    "portRange": "80",
    "target": "projects/'"$PROJECT_ID"'/global/targetHttpProxies/cdn-lb-target-proxy"
  }' \
  "https://compute.googleapis.com/compute/v1/projects/$PROJECT_ID/global/forwardingRules"