
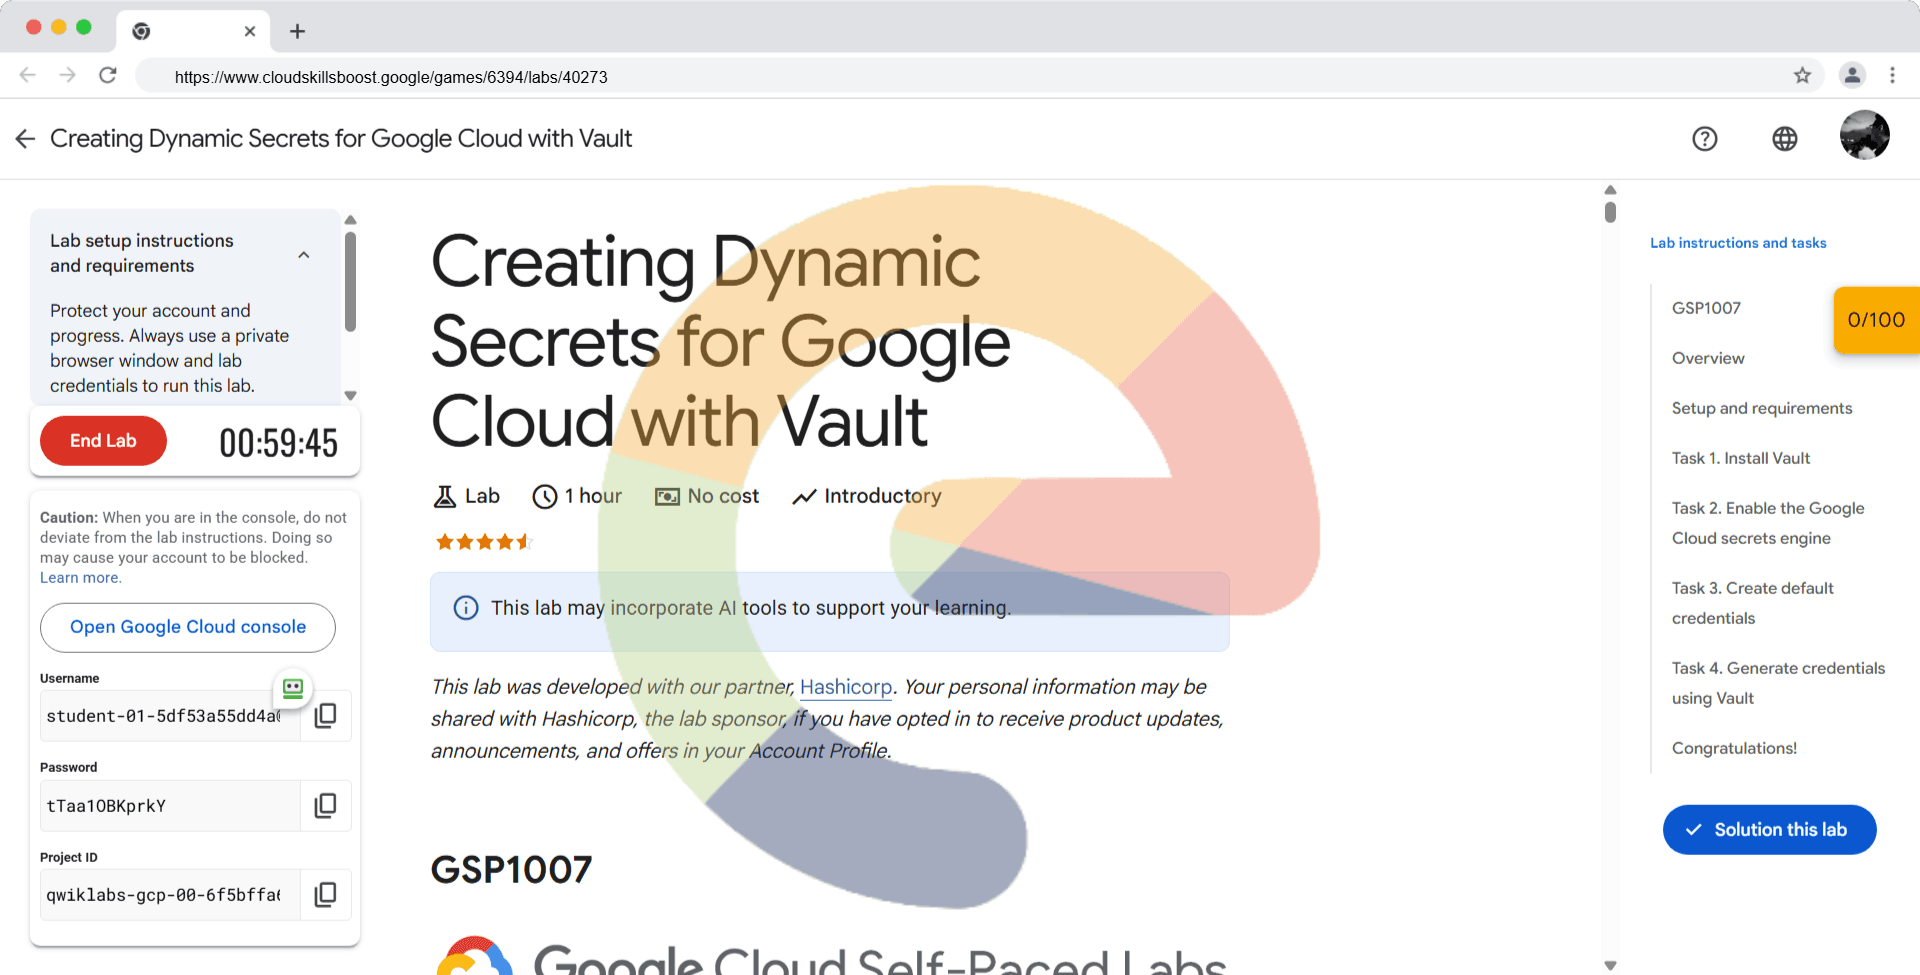
Creating Dynamic Secrets for Google Cloud with Vault - GSP1007
A passionate full-stack developer from @ePlus.DEV
Overview
The Google Cloud Vault secrets engine dynamically generates Google Cloud service account keys and OAuth tokens based on IAM policies. This enables users to gain access to Google Cloud resources without needing to create or manage a dedicated service account. In this lab, you will learn about the Google Cloud secrets engine and how to dynamically provision OAuth2 authentication tokens and service account keys.
Objectives
In this lab, you will:
Deploy a non-dev Vault server
Create a bindings file for a custom roleset
Configure a roleset that generates OAuth2 access tokens
Configure a roleset that generates service account keys
Add a static service account to Vault to manage IAM bindings
Setup and requirements
Before you click the Start Lab button
Read these instructions. Labs are timed and you cannot pause them. The timer, which starts when you click Start Lab, shows how long Google Cloud resources will be made available to you.
This hands-on lab lets you do the lab activities yourself in a real cloud environment, not in a simulation or demo environment. It does so by giving you new, temporary credentials that you use to sign in and access Google Cloud for the duration of the lab.
To complete this lab, you need:
- Access to a standard internet browser (Chrome browser recommended).
Note: Use an Incognito or private browser window to run this lab. This prevents any conflicts between your personal account and the Student account, which may cause extra charges incurred to your personal account.
- Time to complete the lab---remember, once you start, you cannot pause a lab.
Note: If you already have your own personal Google Cloud account or project, do not use it for this lab to avoid extra charges to your account.
How to start your lab and sign in to the Google Cloud console
Click the Start Lab button. If you need to pay for the lab, a pop-up opens for you to select your payment method. On the left is the Lab Details panel with the following:
The Open Google Cloud console button
Time remaining
The temporary credentials that you must use for this lab
Other information, if needed, to step through this lab
Click Open Google Cloud console (or right-click and select Open Link in Incognito Window if you are running the Chrome browser).
The lab spins up resources, and then opens another tab that shows the Sign in page.
Tip: Arrange the tabs in separate windows, side-by-side.
Note: If you see the Choose an account dialog, click Use Another Account.
If necessary, copy the Username below and paste it into the Sign in dialog.
student-00-daf7e8de76e4@qwiklabs.netYou can also find the Username in the Lab Details panel.
Click Next.
Copy the Password below and paste it into the Welcome dialog.
RUBP9xkogKKLYou can also find the Password in the Lab Details panel.
Click Next.
Important: You must use the credentials the lab provides you. Do not use your Google Cloud account credentials.
Note: Using your own Google Cloud account for this lab may incur extra charges.
Click through the subsequent pages:
Accept the terms and conditions.
Do not add recovery options or two-factor authentication (because this is a temporary account).
Do not sign up for free trials.
After a few moments, the Google Cloud console opens in this tab.
Note: To view a menu with a list of Google Cloud products and services, click the Navigation menu at the top-left.

Activate Cloud Shell
Cloud Shell is a virtual machine that is loaded with development tools. It offers a persistent 5GB home directory and runs on the Google Cloud. Cloud Shell provides command-line access to your Google Cloud resources.
Click Activate Cloud Shell
at the top of the Google Cloud console.

When you are connected, you are already authenticated, and the project is set to your Project_ID, qwiklabs-gcp-01-cb735622ca2d. The output contains a line that declares the Project_ID for this session:
Your Cloud Platform project in this session is set to qwiklabs-gcp-01-cb735622ca2d
gcloud is the command-line tool for Google Cloud. It comes pre-installed on Cloud Shell and supports tab-completion.
- (Optional) You can list the active account name with this command:
gcloud auth list
- Click Authorize.
Output:
ACTIVE: *
ACCOUNT: student-00-daf7e8de76e4@qwiklabs.net

To set the active account, run:
    $ gcloud config set account `ACCOUNT`
- (Optional) You can list the project ID with this command:
gcloud config list project
Output:
[core]
project = qwiklabs-gcp-01-cb735622ca2d
Note: For full documentation of gcloud, in Google Cloud, refer to the gcloud CLI overview guide.
Task 1. Install Vault
- In Cloud Shell, add the HashiCorp GPG key:
curl -fsSL https://apt.releases.hashicorp.com/gpg | sudo apt-key add -
- Add the official HashiCorp Linux repository:
sudo apt-add-repository "deb [arch=amd64] https://apt.releases.hashicorp.com $(lsb_release -cs) main"
- Update and install Vault:
sudo apt-get update
sudo apt-get install vault
Verify the installation
After installing Vault, verify the installation worked by checking that the Vault binary is available.
- Execute the
vaultcommand to verify the installation:
vault
You should see help output similar to the following:
Usage: vault <command> [args]

Common commands:
    read        Read data and retrieves secrets
    write       Write data, configuration, and secrets
    delete      Delete secrets and configuration
    list        List data or secrets
    login       Authenticate locally
    agent       Start a Vault agent
    server      Start a Vault server
    status      Print seal and HA status
    unwrap      Unwrap a wrapped secret

Other commands:
    audit          Interact with audit devices
    auth           Interact with auth methods
    debug          Runs the debug command
    kv             Interact with Vault's Key-Value storage
    lease          Interact with leases
    monitor        Stream log messages from a Vault server
    namespace      Interact with namespaces
    operator       Perform operator-specific tasks
    path-help      Retrieve API help for paths
    plugin         Interact with Vault plugins and catalog
    policy         Interact with policies
    print          Prints runtime configurations
    secrets        Interact with secrets engines
    ssh            Initiate an SSH session
    token          Interact with tokens
Deploy Vault
Up to this point, you interacted with the "dev" server, which automatically unseals Vault, sets up in-memory storage, etc. Now that you know the basics of Vault, it is important to learn how to deploy Vault into a real environment. Vault is configured using HCL files. For a deeper dive into this topic covering all the ways to configure a Vault server, refer to the Configure Vault tutorial.
Note: For the purposes of this lab, you will be running the Vault server in Cloud Shell. This is not recommended for a production setup.
- Open a new Cloud Shell window and create the Vault configuration file named
config.hcl:
touch config.hcl
Click Open Editor on the toolbar of your Cloud Shell window. If prompted, click Open in a new window.
Open the
config.hclfile and add the following code to it:
storage "raft" {
  path    = "./vault/data"
  node_id = "node1"
}

listener "tcp" {
  address     = "127.0.0.1:8200"
  tls_disable = "true"
}

api_addr = "http://127.0.0.1:8200"
cluster_addr = "https://127.0.0.1:8201"
ui = true
Within the configuration file, there are two primary configurations:
storage- This is the physical backend that Vault uses for storage. Up to this point the dev server has used "inmem" (in memory), but the example above uses Integrated Storage (raft), a much more production-ready backend.listener- One or more listeners determine how Vault listens for API requests. The example above listens on localhost port 8200 without TLS. In your environment setVAULT_ADDR=http://127.0.0.1:8200so the Vault client will connect without TLS.api_addr- Specifies the address to advertise to route client requests.cluster_addr- Indicates the address and port to be used for communication between the Vault nodes in a cluster.
Note: Insecure operation: The listener stanza disables TLS (tls_disable = "true"). In production, Vault should always use TLS to provide secure communication between clients and the Vault server. It requires a certificate file and key file on each Vault host.
Starting the server
On cloud console, click Open Terminal .
Create the
./vault/datadirectory that theraftstorage backend uses:
mkdir -p ./vault/data
- Set the
-configflag to point to the proper path where you saved the configuration above:
vault server -config=config.hcl
Note: If you get a warning message about mlock not being supported, that is okay. However, for maximum security you should run Vault on a system that supports mlock. For guidance on dealing with this issue, see the discussion of disable_mlock in Server Configuration.
Initializing the Vault
Initialization is the process of configuring Vault. This only happens once when the server is started against a new backend that has never been used with Vault before. When running in HA mode, this happens once per cluster, not per server. During initialization, the encryption keys are generated, unseal keys are created, and the initial root token is created.
- Open a new Cloud Shell tab and set
VAULT_ADDRenvironment variable:
export VAULT_ADDR='http://127.0.0.1:8200'
- To initialize Vault use
vault operator init. This is an unauthenticated request, but it only works on brand new Vaults without existing data:
vault operator init
Your output should resemble the following:
Unseal Key 1: 4jYbl2CBIv6SpkKj6Hos9iD32k5RfGkLzlosrrq/JgOm
Unseal Key 2: B05G1DRtfYckFV5BbdBvXq0wkK5HFqB9g2jcDmNfTQiS
Unseal Key 3: Arig0N9rN9ezkTRo7qTB7gsIZDaonOcc53EHo83F5chA
Unseal Key 4: 0cZE0C/gEk3YHaKjIWxhyyfs8REhqkRW/CSXTnmTilv+
Unseal Key 5: fYhZOseRgzxmJCmIqUdxEm9C3jB5Q27AowER9w4FC2Ck

Initial Root Token: s.KkNJYWF5g0pomcCLEmDdOVCW

Vault initialized with 5 key shares and a key threshold of 3. Please securely
distribute the key shares printed above. When the Vault is re-sealed,
restarted, or stopped, you must supply at least 3 of these keys to unseal it
before it can start servicing requests.

Vault does not store the generated master key. Without at least 3 key to
reconstruct the master key, Vault will remain permanently sealed!

It is possible to generate new unseal keys, provided you have a quorum of
existing unseal keys shares. See "vault operator rekey" for more information.
Initialization outputs two incredibly important pieces of information: the unseal keys and the initial root token. This is the only time ever that all of this data is known by Vault, and also the only time that the unseal keys should ever be so close together.
For the purpose of this lab, save all of these keys somewhere, and continue. In a real deployment scenario, you would never save these keys together. Instead, you would likely use Vault's PGP and Keybase.io support to encrypt each of these keys with the users' PGP keys. This prevents one single person from having all the unseal keys. Please see the documentation on using PGP, GPG, and Keybase for more information.
Make sure to copy all the Unseal keys and Initial root token.
Seal/Unseal
Every initialized Vault server starts in the sealed state. From the configuration, Vault can access the physical storage, but it can't read any of it because it doesn't know how to decrypt it. The process of teaching Vault how to decrypt the data is known as unsealing the Vault.
Unsealing has to happen every time Vault starts. It can be done via the API and via the command line. To unseal the Vault, you must have the threshold number of unseal keys. In the output above, notice that the "key threshold" is 3. This means that to unseal the Vault, you need 3 of the 5 keys that were generated.
- Begin unsealing the Vault:
vault operator unseal
- Paste one of the unseal keys in.
After pasting in a valid key and confirming, you see that Vault is still sealed, but progress is made. Vault knows it has 1 key out of 3. Due to the nature of the algorithm, Vault doesn't know if it has the correct key until the threshold is reached.
Also notice that the unseal process is stateful. You can go to another computer, use vault operator unseal, and as long as it's pointing to the same server, that other computer can continue the unseal process. This is incredibly important to the design of the unseal process: multiple people with multiple keys are required to unseal the Vault. The Vault can be unsealed from multiple computers and the keys should never be together. A single malicious operator does not have enough keys to be malicious.
- Continue with
vault operator unsealto complete unsealing the Vault. To unseal the vault you must use three different unseal keys, the same key repeated will not work. When the value forSealedchanges tofalse, the Vault is unsealed.
Once you have supplied the threshold number of unseal keys, you should see output like this:
Key                     Value
---                     -----
Seal Type               shamir
Initialized             true
Sealed                  false
Total Shares            5
Threshold               3
Version                 1.7.0
Storage Type            raft
Cluster Name            vault-cluster-0ba62cae
Cluster ID              7d49e5fd-a1a4-c1d1-55e2-7962e43006a1
HA Enabled              true
HA Cluster              n/a
HA Mode                 standby
Active Node Address     <none>
Raft Committed Index    24
Raft Applied Index      24
- Finally, authenticate as the initial root token (it was included in the output with the unseal keys):
vault login <Initial_Root_Token>
As a root user, you can reseal the Vault with vault operator seal. A single operator is allowed to do this. This lets a single operator lock down the Vault in an emergency without consulting other operators. When the Vault is sealed again, it clears all of its state (including the encryption key) from memory. The Vault is secure and locked down from access.
In this section, you configured, initialized, and unsealed Vault. This is the basic knowledge necessary to deploy Vault into a real environment.
Task 2. Enable the Google Cloud secrets engine
The Google Cloud Vault secrets engine dynamically generates Google Cloud service account keys and OAuth tokens based on IAM policies. This enables users to gain access to Google Cloud resources without needing to create or manage a dedicated service account.
The benefits of using this secrets engine to manage Google Cloud IAM service accounts are:
Automatic cleanup of Google Cloud IAM service account keys - each Service Account key is associated with a Vault lease. When the lease expires (either during normal revocation or through early revocation), the service account key is automatically revoked.
Quick, short-term access - users do not need to create new Google Cloud Service Accounts for short-term or one-off access (such as batch jobs or quick introspection).
Multi-cloud and hybrid cloud applications - users authenticate to Vault using a central identity service (such as LDAP) and generate Google Cloud credentials without the need to create or manage a new Service Account for that user.
In this section, you will add the Google Cloud secrets engine and interact with it.
Most secrets engines must be configured in advance before they can perform their functions. These steps are usually completed by an operator or configuration management tool.
- Navigate back to Cloud Shell and enable the Google Cloud secrets engine:
vault secrets enable gcp
By default, the secrets engine will mount at the name of the engine. To enable the secrets engine at a different path, use the -path argument.
Task 3. Create default credentials
In this section, you will create the default credentials that Vault will use to generate the service account keys and access tokens.
From the Navigation menu, go to IAM & Admin > Service Accounts.
Click the dots () next to the Qwiklabs User Service Account and select Manage keys.
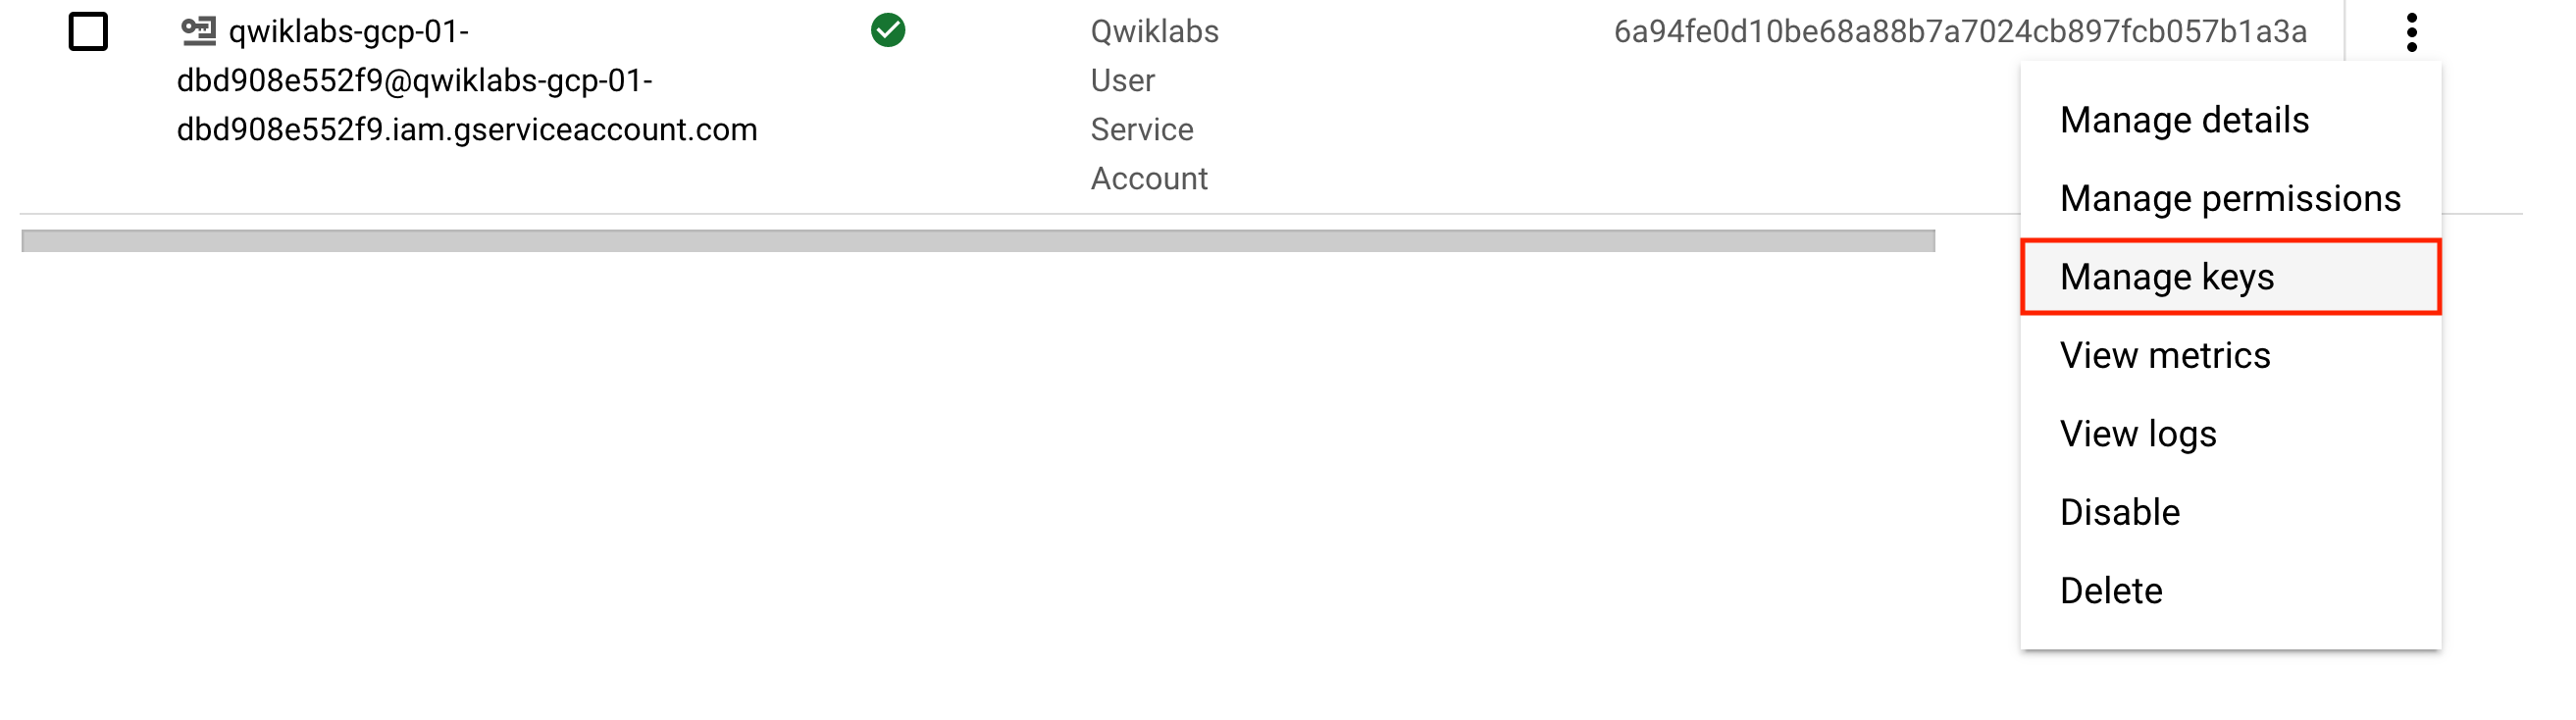
Click Add Key > Create new key.
Leave the default type as JSON then click Create.
Click Save and then, click Close.
Your private key should be downloaded to your local machine.
Click Check my progress to verify the objective.
Create default credentials
Check my progress
From the Cloud Shell toolbar, click the dots (
) then select Upload.


Click Choose Files and select the service account key that you just created and then, click Upload.
Run the following command to list the files in your home directory:
cd ~
ls
- Make a note of the name of your private key file. It should resemble something like the following:
qwiklabs-gcp-01-dbd908e552f9-b5a13f4e6a50.json
Task 4. Generate credentials using Vault
In this section you will supply the default credentials that Vault will use to generate the service account keys and access tokens, as well as TTL metadata for the leases Vault assigns to these secrets when generated.
- Set up the engine with initial config and role sets. Replace
path/to/creds.jsonwith the path to your private key file you uploaded:
vault write gcp/config \
credentials=@path/to/creds.json \
 ttl=3600 \
 max_ttl=86400
If your service account key file was correctly referenced, you should see the following output:
Success! Data written to: gcp/config
This config supplies default credentials that Vault will use to generate the service account keys and access tokens, as well as TTL metadata for the leases Vault assigns to these secrets when generated.
Bindings
Roleset or static account bindings define a list of resources and the associated IAM roles on that resource. Bindings are used as the binding argument when creating or updating a roleset or static account and are specified in the following format using HCL:
resource NAME {
  roles = [ROLE, [ROLE...]]
}
For example:
resource "buckets/my-bucket" {
  roles = [
    "roles/storage.objectAdmin",
    "roles/storage.legacyBucketReader",
  ]
}

# At instance level, using self-link
resource "https://www.googleapis.com/compute/v1/projects/my-project/zone/my-zone/instances/my-instance" {
  roles = [
    "roles/compute.instanceAdmin.v1"
  ]
}

# At project level
resource "//cloudresourcemanager.googleapis.com/projects/my-project" {
  roles = [
    "roles/compute.instanceAdmin.v1",
    "roles/iam.serviceAccountUser",  # required if managing instances that run as service accounts
  ]
}

# At folder level
resource "//cloudresourcemanager.googleapis.com/folders/123456" {
  roles = [
    "roles/compute.viewer",
    "roles/deploymentmanager.viewer",
  ]
}
The top-level resource block defines the resource or resource path for which IAM policy information will be bound. The resource path may be specified in a few different formats:
Project-level self-link - a URI with scheme and host, generally corresponding to the
self_linkattribute of a resource in Google Cloud. This must include the resource nested in the parent project.Full resource name - a schema-less URI consisting of a DNS-compatible API service name and resource path. See the full resource name API documentation for more information.
Relative resource name - A path-noscheme URI path, usually as accepted by the API. Use this if the version or service are apparent from the resource type. Please see the relative resource name API documentation for more information.
The nested roles attribute is an array of strings names of Google Cloud IAM roles. The roles may be specified in the following formats:
Global role name - these are global roles built into Google Cloud. For the full list of available roles, please see the list of predefined Google Cloud roles.
Organization-level custom role - these are roles that are created at the organization level by organization owners. For more information, please see the documentation on Google Cloud custom roles.
Project-level custom role - these are roles that are created at a per-project level by project owners. For more information, please see the documentation on Google Cloud custom roles.
In this section, you will create a bindings file that you will use to create a custom roleset.
- In Cloud Shell, create the Vault bindings file named
bindings.hcl:
touch bindings.hcl
Navigate to code editor tab and if its not open then, click Open Editor on the toolbar of your Cloud Shell window.
Open the
bindings.hclfile and add the following code to it. Replace<my-bucket>with your Project ID. Note that a Cloud Storage bucket was created upon lab startup and named with your Project ID:
resource "buckets/<my-bucket>" {
  roles = [
    "roles/storage.objectAdmin",
    "roles/storage.legacyBucketReader",
  ]
}
- Save the file.
Rolesets
A roleset consists of a Vault managed Google Cloud Service account along with a set of IAM bindings defined for that service account. The name of the service account is generated based on the time of creation or update. You should not depend on the name of the service account being fixed and should manage all IAM bindings for the service account through the bindings parameter when creating or updating the roleset.
Each role set can generate one of two types of secrets: either access_token for one-use OAuth access tokens or service_account_key for long-lived service account keys. In this section, you will configure both of these rolesets and test out their capabilities.
Configure a roleset that generates OAuth2 access tokens
- Return to your terminal and run the following command to configure a roleset that generates OAuth2 access tokens. Replace
<project-id>with your Project ID:
vault write gcp/roleset/my-token-roleset \
    project="<project-id>" \
    secret_type="access_token"  \
    token_scopes="https://www.googleapis.com/auth/cloud-platform" \
    bindings=@bindings.hcl
Click Check my progress to verify the objective.
Rolesets bindings
Check my progress
After the secrets engine is configured and a user/machine has a Vault token with the proper permission, it can generate credentials. Depending on how the roleset was configured, you can generate OAuth2 tokens or service account keys. You will now generate OAuth2 access tokens.
To generate OAuth2 tokens, read from gcp/token/.... The roleset must have been created as type access_token.
- Run the following command to generate the access token:
vault read gcp/roleset/my-token-roleset/token
Key                Value
---                -----
expires_at_seconds    1537402548
token                 ya29.c.ElodBmNPwHUNY5gcBpnXcE4ywG4w1k...
token_ttl             3599
This endpoint generates a non-renewable, non-revocable static OAuth2 access token with a lifetime of one hour, where token_ttl is given in seconds and the expires_at_seconds is the expiry time for the token, given as a Unix timestamp. The token value then can be used as a HTTP Authorization Bearer token in requests to Google Cloud APIs.
- Use your token and run the following API call to retrieve details of your storage bucket. Replace
<OATH2_TOKEN>with the token you retrieved from Vault and<BUCKET_NAME>with the name of your storage bucket (your Project ID):
curl \
  'https://storage.googleapis.com/storage/v1/b/<BUCKET_NAME>' \
  --header 'Authorization: Bearer <OAUTH2_TOKEN>' \
  --header 'Accept: application/json'
Your output should resemble the following:
{
  "kind": "storage#bucket",
  "selfLink": "https://www.googleapis.com/storage/v1/b/qwiklabs-gcp-04-1a020f51186f",
  "id": "qwiklabs-gcp-04-1a020f51186f",
  "name": "qwiklabs-gcp-04-1a020f51186f",
  "projectNumber": "22434749478",
  .....
}
- Next, use your token and run the following API call to download the
sample.txtfile from your storage bucket. Replace<OATH2_TOKEN>with the token you retrieved from Vault and<BUCKET_NAME>with the name of your storage bucket (your Project ID):
curl -X GET \
  -H "Authorization: Bearer <OAUTH2_TOKEN>" \
  -o "sample.txt" \
  "https://storage.googleapis.com/storage/v1/b/<BUCKET_NAME>/o/sample.txt?alt=media"
- Read the contents of the file:
cat sample.txt
Hello, world!
Great! You successfully used the token OAuth2 token created by Vault to make a couple of API calls.
Configure a roleset that generates service account keys
- Run the following command to configure a roleset that generates service account keys. Replace
<project-id>with your Project ID:
vault write gcp/roleset/my-key-roleset \
    project="<project-id>" \
    secret_type="service_account_key"  \
    bindings=@bindings.hcl
If it ran successfully, you should see the following output:
Success! Data written to: gcp/roleset/my-key-roleset
To generate service account keys, read from gcp/key/.... The roleset must have been created as type service_account_key.
- Run the following command to generate a service account key:
vault read gcp/roleset/my-key-roleset/key
Key                 Value
---                 -----
lease_id            gcp/key/my-key-roleset/ce563a99-5e55-389b...
lease_duration      30m
lease_renewable     true
key_algorithm       KEY_ALG_RSA_2048
key_type            TYPE_GOOGLE_CREDENTIALS_FILE
private_key_data    ewogICJ0eXBlIjogInNlcnZpY2VfYWNjb3VudCIsC...
This endpoint generates a new Google Cloud IAM service account key associated with the roleset's service account. When the lease expires (or is revoked early), the Service Account key will be deleted.
There is a default limit of 10 keys per Service Account. For more information on this limit and recommended mitigation, please see the things to note section below.
Click Check my progress to verify the objective.
Configure a roleset that generates service account keys
Check my progress
Static Accounts
Static accounts are Google Cloud service accounts that are created outside of Vault and then provided to Vault to generate access tokens or keys. You can also use Vault to optionally manage IAM bindings for the service account.
From the Navigation menu, go to IAM & Admin > Service Accounts.
Copy the email address associated with the Qwiklabs User Service Account. It should resemble the following:
qwiklabs-gcp-04-5baf1f70e4f8@qwiklabs-gcp-04-5baf1f70e4f8.iam.gserviceaccount.com
- To configure a static account that generates OAuth2 access tokens, run the following command. Be sure to update
<service-account-email>with the email you retrieved in the previous step:
vault write gcp/static-account/my-token-account \
    service_account_email="<service-account-email>" \
    secret_type="access_token"  \
    token_scopes="https://www.googleapis.com/auth/cloud-platform" \
    bindings=@bindings.hcl
If it ran successfully, you should see the following output:
Success! Data written to: gcp/static-account/my-token-account
- To configure a static account that generates Google Cloud service account keys, run the following command. Be sure to update
<service-account-email>with the email you retrieved in the previous step:
vault write gcp/static-account/my-key-account \
    service_account_email="<service-account-email>" \
    secret_type="service_account_key"  \
    bindings=@bindings.hcl
If it ran successfully, you should see the following output:
Success! Data written to: gcp/static-account/my-key-account
Click Check my progress to verify the objective.
Configure static accounts
Solution of Lab
Quick
curl -LO raw.githubusercontent.com/ePlus-DEV/storage/refs/heads/main/labs/GSP1007/lab.sh
source lab.sh
Script Alternative
curl -LO https://raw.githubusercontent.com/Itsabhishek7py/GoogleCloudSkillsboost/refs/heads/main/Creating%20Dynamic%20Secrets%20for%20Google%20Cloud%20with%20Vault1/abhishek.sh
sudo chmod +x abhishek.sh
./abhishek.sh
Manual
curl -fsSL https://apt.releases.hashicorp.com/gpg | sudo apt-key add -
sudo apt-add-repository "deb [arch=amd64] https://apt.releases.hashicorp.com $(lsb_release -cs) main"
sudo apt-get update
sudo apt-get install vault --y
vault
touch config.hcl

storage "raft" {
  path    = "./vault/data"
  node_id = "node1"
}

listener "tcp" {
  address     = "127.0.0.1:8200"
  tls_disable = true
}

api_addr = "http://127.0.0.1:8200"
cluster_addr = "https://127.0.0.1:8201"
ui = true

disable_mlock = true

Ctrl + S
mkdir -p ./vault/data
vault server -config=config.hcl

export VAULT_ADDR='http://127.0.0.1:8200'
vault operator init

vault operator unseal

vault login <Initial_Root_Token>

vault secrets enable gcp
IAM & Admin > Service Accounts (https://console.cloud.google.com/iam-admin/serviceaccounts)


cd ~
ls


vault write gcp/config \
credentials=@path/to/creds.json \
 ttl=3600 \
 max_ttl=86400

touch bindings.hcl

resource "buckets/<my-bucket>" {
  roles = [
    "roles/storage.objectAdmin",
    "roles/storage.legacyBucketReader",
  ]
}


CTRL + S
vault write gcp/roleset/my-token-roleset \
    project="<project-id>" \
    secret_type="access_token"  \
    token_scopes="https://www.googleapis.com/auth/cloud-platform" \
    bindings=@bindings.hcl


vault read gcp/roleset/my-token-roleset/token

curl \
  'https://storage.googleapis.com/storage/v1/b/<BUCKET_NAME>' \
  --header 'Authorization: Bearer <OAUTH2_TOKEN>' \
  --header 'Accept: application/json'

curl -X GET \
  -H "Authorization: Bearer <OAUTH2_TOKEN>" \
  -o "sample.txt" \
  "https://storage.googleapis.com/storage/v1/b/<BUCKET_NAME>/o/sample.txt?alt=media"

cat sample.txt

vault write gcp/roleset/my-key-roleset \
    project="<project-id>" \
    secret_type="service_account_key"  \
    bindings=@bindings.hcl

vault read gcp/roleset/my-key-roleset/key
vault write gcp/static-account/my-token-account \
    service_account_email="<service-account-email>" \
    secret_type="access_token"  \
    token_scopes="https://www.googleapis.com/auth/cloud-platform" \
    bindings=@bindings.hcl


vault write gcp/static-account/my-key-account \
    service_account_email="<service-account-email>" \
    secret_type="service_account_key"  \
    bindings=@bindings.hcl


