Get Started with Vibe Coding and Gemini CLI - GSP1348

A passionate full-stack developer from @ePlus.DEV
Overview
Vibe coding is an emerging software development practice that uses artificial intelligence (AI) to generate functional code from natural language prompts, accelerating development, and making app building more accessible, especially for those with limited programming experience.
The term, coined by AI researcher Andrej Karpathy in early 2025, describes a workflow where the primary role shifts from writing code line-by-line to guiding an AI assistant such as Gemini CLI to generate, refine, and debug an application through a more conversational process. This frees you up to think about the big picture, or the main goal of your app, while the AI handles writing the actual code.
Gemini CLI is an open-source AI agent that brings the power of Gemini directly into your terminal. The Gemini CLI project is open source and you can view the public roadmap to learn more about functionality enhancements, upcoming features, and bug fixes.
What you'll learn
In this lab, you learn how to perform the following tasks:
Configure and interact with Gemini CLI.
Use built-in tools and shell mode.
Configure a Model Context Protocol (MCP) server for extended functionality.
Build and deploy an app using vibe coding.
What you'll need
This lab can be run entirely within Google Cloud Shell, which comes pre-installed with Gemini CLI.
This lab is designed for users and developers of all levels (including beginners).
Setup and requirements
Before you click the Start Lab button
Read these instructions. Labs are timed and you cannot pause them. The timer, which starts when you click Start Lab, shows how long Google Cloud resources are made available to you.
This hands-on lab lets you do the lab activities in a real cloud environment, not in a simulation or demo environment. It does so by giving you new, temporary credentials you use to sign in and access Google Cloud for the duration of the lab.
To complete this lab, you need:
- Access to a standard internet browser (Chrome browser recommended).
Note: Use an Incognito (recommended) or private browser window to run this lab. This prevents conflicts between your personal account and the student account, which may cause extra charges incurred to your personal account.
- Time to complete the lab—remember, once you start, you cannot pause a lab.
Note: Use only the student account for this lab. If you use a different Google Cloud account, you may incur charges to that account.
Activate Cloud Shell
Cloud Shell is a virtual machine that is loaded with development tools. It offers a persistent 5GB home directory and runs on the Google Cloud. Cloud Shell provides command-line access to your Google Cloud resources.
Click Activate Cloud Shell
at the top of the Google Cloud console.
Click through the following windows:
Continue through the Cloud Shell information window.
Authorize Cloud Shell to use your credentials to make Google Cloud API calls.

When you are connected, you are already authenticated, and the project is set to your Project_ID, PROJECT_ID. The output contains a line that declares the Project_ID for this session:
Your Cloud Platform project in this session is set to "PROJECT_ID"
gcloud is the command-line tool for Google Cloud. It comes pre-installed on Cloud Shell and supports tab-completion.
- (Optional) You can list the active account name with this command:
gcloud auth list
Copied!
- Click Authorize.
Output:
ACTIVE: *
ACCOUNT: "ACCOUNT"

To set the active account, run:
    $ gcloud config set account `ACCOUNT`
- (Optional) You can list the project ID with this command:
gcloud config list project
Output:
[core]
project = "PROJECT_ID"
Note: For full documentation of gcloud, in Google Cloud, refer to the gcloud CLI overview guide.
Task 1. Configure Gemini CLI for your needs
Enable Cloud Logging for Gemini CLI
To support scoring for some of the tasks in this lab, you need to enable Cloud Logging on Gemini CLI.
- In Cloud Shell, run the following commands to configure Cloud Logging for Gemini CLI:
export NODE_NO_WARNINGS=1
export GOOGLE_CLOUD_LOCATION=global
export ZONE=$(gcloud compute instances list \
  --filter "name="lab-vm"" --format "value(zone.basename())")
export EXTERNAL_IP=$(gcloud compute instances describe \
  lab-vm --zone=$ZONE \
  --format='get(networkInterfaces[0].accessConfigs[0].natIP)')
Gemini CLI configuration options
The Gemini CLI's behavior is controlled by configuration files and environment variables. There are two key files:
.gemini/settings.json: This file controls the configuration of the CLI including how to connect to external tools.GEMINI.md: This file provides natural language guidelines and context to the model. The CLI reads this file to understand your project's coding standards and conventions.
Gemini CLI configuration via settings.json
When you use Cloud Shell to run Gemini, a default theme for Gemini CLI and the authentication method is already selected and configured for you. The file that Gemini CLI uses to "remember" your preferences is called settings.json and you can also use it to customize Gemini CLI.
In Cloud Shell, this file is located in the following directory:
~/.gemini/settings.json.
Gemini CLI configuration via GEMINI.md
While you can configure some of Gemini CLI's behavior through the settings.json file located in the ~/.gemini/ directory, another file you can use to configure Gemini CLI's behavior is GEMINI.md.
The GEMINI.md file is the context file (defaulting to GEMINI.md but configurable via the contextFileName property in settings.json file) that is crucial for configuring the instructional context (also referred to as "memory") provided to the Gemini model.
This file allows you to give project-specific instructions, coding style guides, or any relevant background information to the AI, making its responses more tailored and accurate to your needs.
The GEMINI.md file is in Markdown format.
What does a GEMINI.md file contain? Here is the content from an example produced based on the official Gemini CLI documentation.
Sample GEMINI.md file:
# Project: My Awesome TypeScript Library

## General Instructions:

- When generating new TypeScript code, please follow the existing coding style.
- Ensure all new functions and classes have JSDoc comments.
- Prefer functional programming paradigms where appropriate.
- All code should be compatible with TypeScript 5.0 and Node.js 20+.

## Coding Style:

- Use 2 spaces for indentation.
- Interface names should be prefixed with `I` (e.g., `IUserService`).
- Private class members should be prefixed with an underscore (`_`).
- Always use strict equality (`===` and `!==`).

## Specific Component: `src/api/client.ts`

- This file handles all outbound API requests.
- When adding new API call functions, ensure they include robust error handling and logging.
- Use the existing `fetchWithRetry` utility for all GET requests.

## Regarding Dependencies:

- Avoid introducing new external dependencies unless absolutely necessary.
- If a new dependency is required, please state the reason.
You may notice that the sample GEMINI.md file provides some general instructions plus specific instructions for coding style, dependency management and more. In a similar manner, you could write your own guidelines based on your programming language, framework, coding style, and other project-specific preferences.
The GEMINI.md file is the key to making Gemini CLI follow your preferences. For more information, you can refer to the Practical Gemini CLI series, which dives deeper into how you can auto-generate such a file for your project, customize the System Prompt, and more.
Set up the project-specific configuration
Before you get started in Gemini CLI, you need to create a folder to use as your home folder for all the projects that you may create inside of it. This is a starting point for the Gemini CLI to work with, although it may reference some other folders on your system, as needed.
Run the following commands in Cloud Shell to create a sample folder,
gemini-cli-projects, and navigate to it:mkdir gemini-cli-projects cd gemini-cli-projectsNow run the following command to create a
.geminisubdirectory that contains asettings.jsonconfiguration file:mkdir -p .gemini echo '{ "telemetry": { "enabled": true, "target": "gcp", "otlpEndpoint": "http://${EXTERNAL_IP}:4318", "otlpProtocol": "http", "logPrompts": true, "useCollector": true } }' > .gemini/settings.jsonIn Cloud Shell, Gemini CLI is pre-installed.
Task 2. Interact with Gemini CLI
In this task, you interact with Gemini CLI.
Run the following command to launch Gemini CLI and start a new session:
gemini -m "gemini-2.5-flash"Note: You may be prompted with Do you trust this folder? since you are running Gemini CLI in a new folder. Select 1. Trust folder (gemini-cli-projects) to continue.
Copy and paste the following and then press ENTER to prompt Gemini CLI with your first query:
Give me a famous quote on Artificial Intelligence and who said that?
The expected response is as follows.Output:
 ╭─────────────────────────────────────────────────────────────────────────────────────────────────────────────────────────────────╮
 │ ✓  GoogleSearch Searching the web for: "famous quote on Artificial Intelligence"                                                │
 │                                                                                                                                 │
 │    Search results for "famous quote on Artificial Intelligence" returned.                                                       │
 ╰─────────────────────────────────────────────────────────────────────────────────────────────────────────────────────────────────╯
✦ "The development of full artificial intelligence could spell the end of the human race." - Stephen Hawking.
You may notice that your query resulted in a
GoogleSearchtool (a built-in tool in Gemini CLI) that gets invoked. You learn more about built-in tools later in this lab.A quick way to understand Gemini CLI and the various commands that it supports is to type
/help(forward slash) to receive a variety of commands and keyboard shortcuts as follows:
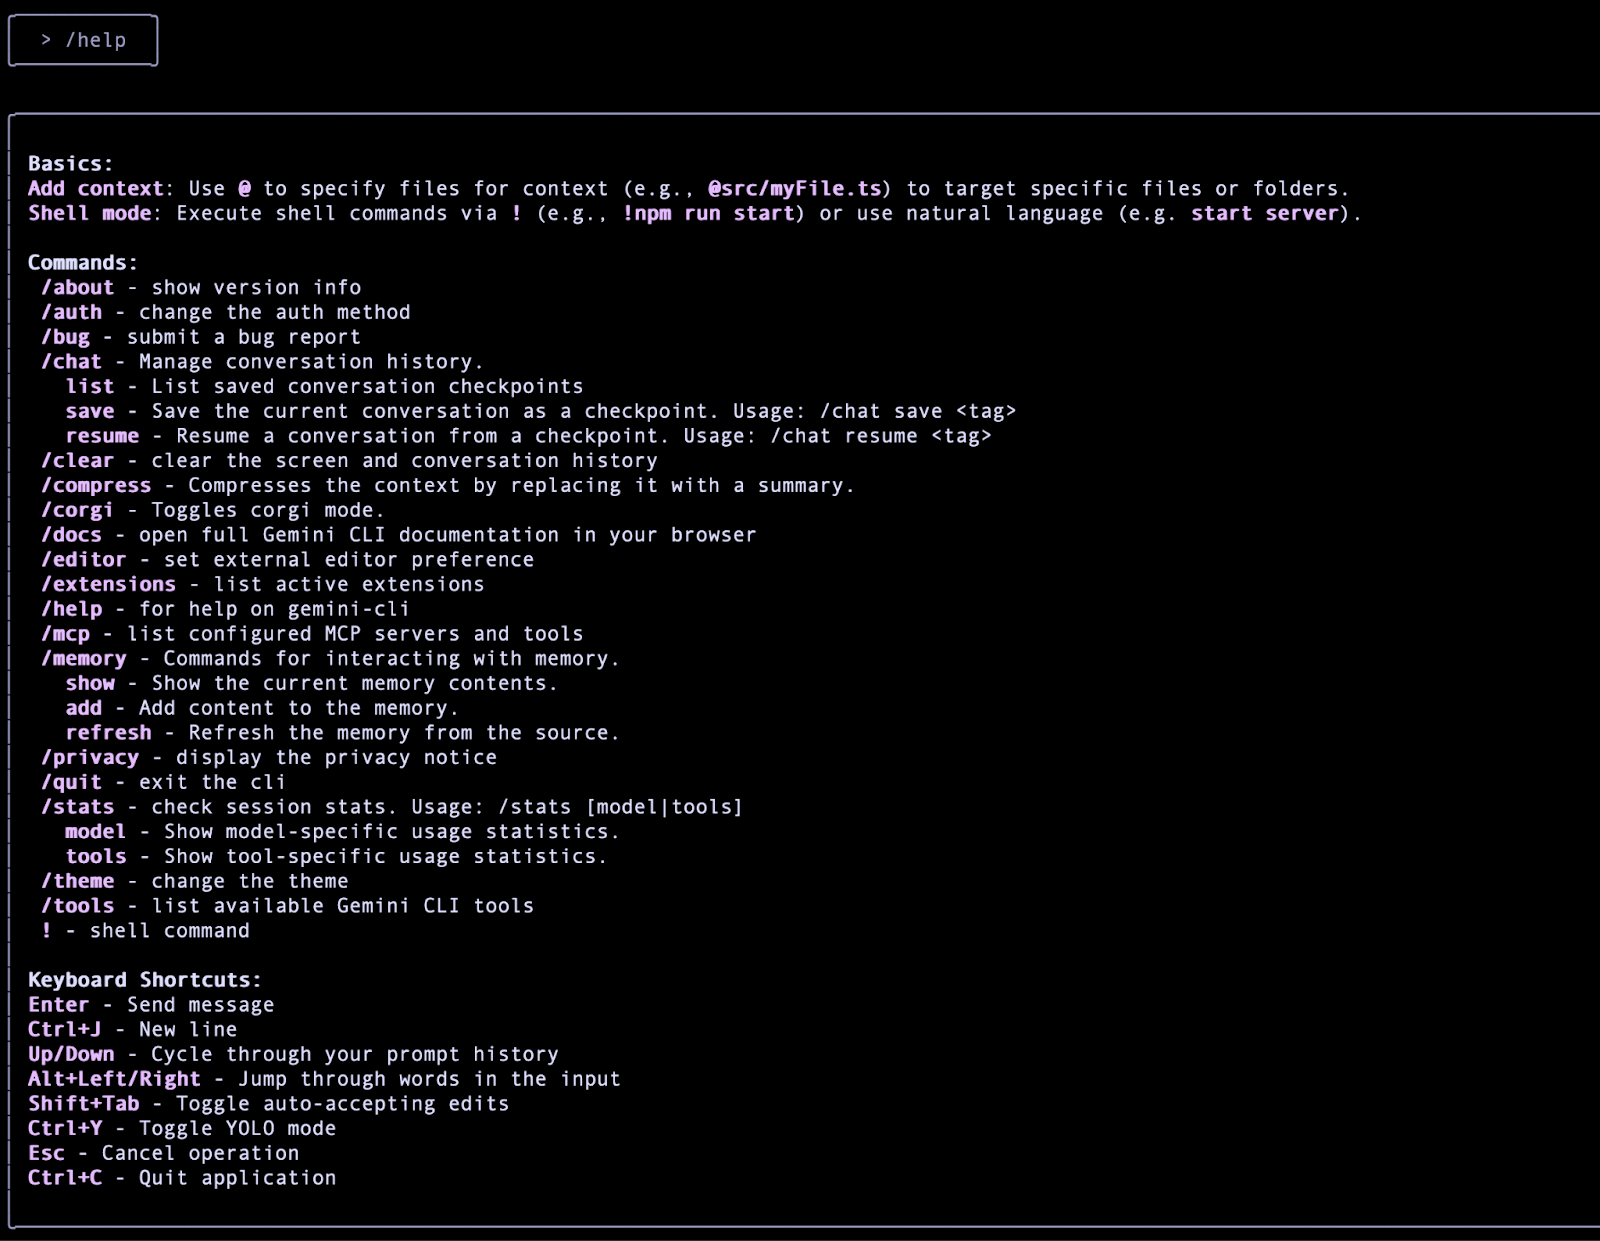
The /help command is one example of a so-called slash command. To learn more about these built-in Gemini CLI commands, refer to the Slash Commands (/) documentation.
Task 3. Explore Gemini CLI built-in tools
Gemini CLI comes with a set of built-in tools, which the Gemini model uses to interact with your local environment, access information, and perform actions. These tools enhance the CLI's capabilities, enabling it to go beyond text generation and assist with a wide range of tasks.
For more detail, refer to the tools documentation.
To get a list of current built-in tools, invoke the
/toolscommand/tools
Sample output:
ℹ Available Gemini CLI tools:
- Edit
- FindFiles
- GoogleSearch
- ReadFile
- ReadFolder
- ReadManyFiles
- Save Memory
- SearchText
- Shell
- WebFetch
- WriteFile
Can Gemini CLI simply call these tools, when it wants to? The simple answer is no. By default, the model always asks for permission when it comes to sensitive operations that might involve writing to the local system, reading from an external system, going to the external network, and so on.
While there is a --yolomode available when you start the CLI (not typically recommended), you may find that Gemini CLI prompts you for permission to run the tool that it has chosen. You can refuse permission, let it run once, or give it blanket permission to always run. You are and should be in full control of things.
Prompt the CLI to use a built-in tool In this section, you give Gemini CLI a prompt to make Gemini choose and execute one of its built-in tools for you to gain a better understanding of how it all works.
Say you want to get information on the dates of the next total solar eclipse and save that into a file in the local working directory from where you launched Gemini CLI.
Give Gemini CLI the following prompt:
Search for the dates of the next total solar eclipse and save them in a file named eclipse-dates.txt
Copied!
The first thing Gemini does is to invoke the GoogleSearch tool to search the web.

Once the search is complete, Gemini retrieves the data and Gemini CLI returns the following:

Once that is done, Gemini is ready to write this to the file and it uses the WriteFile tool, but since that is a sensitive operation (write), it asks for your permission. You can decide the permission type i.e. allow once, allow always, etc.
- Go ahead and press ENTER to allow once for now.
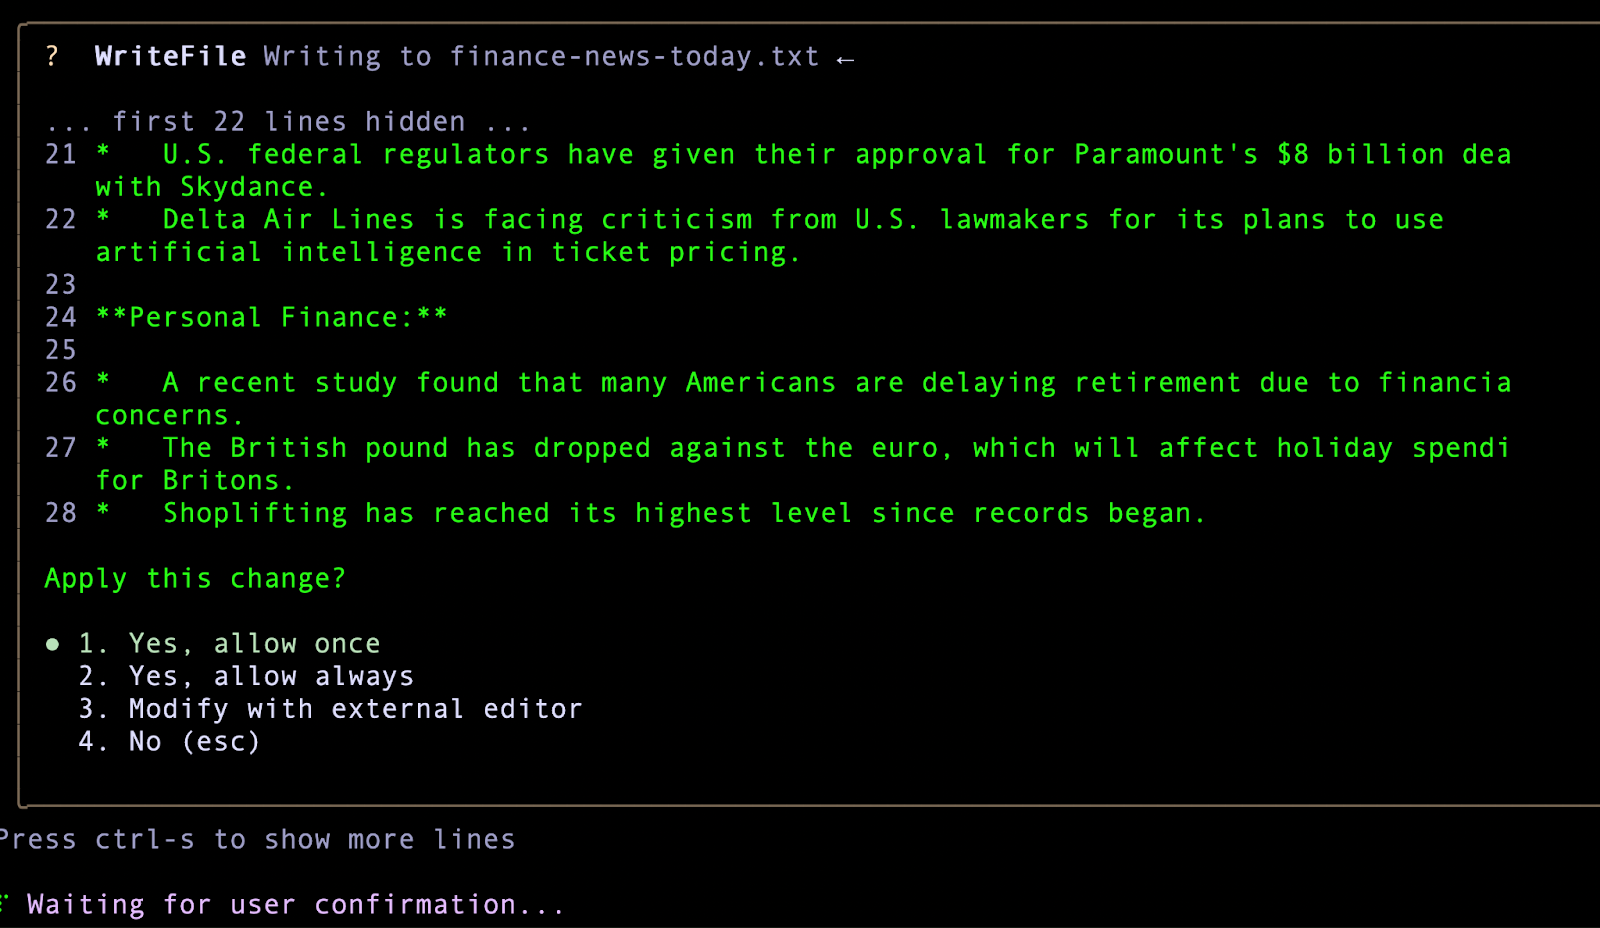
This then writes the information to the file and a success message is shown as follows.
Expected output:
✦ I have saved the dates of the next total solar eclipse in eclipse-dates.txt.
To check if a file is written or not, you can use the @file to ask it to read the content. As you type @, it displays a list of files in the current folder, including the file it has just created.
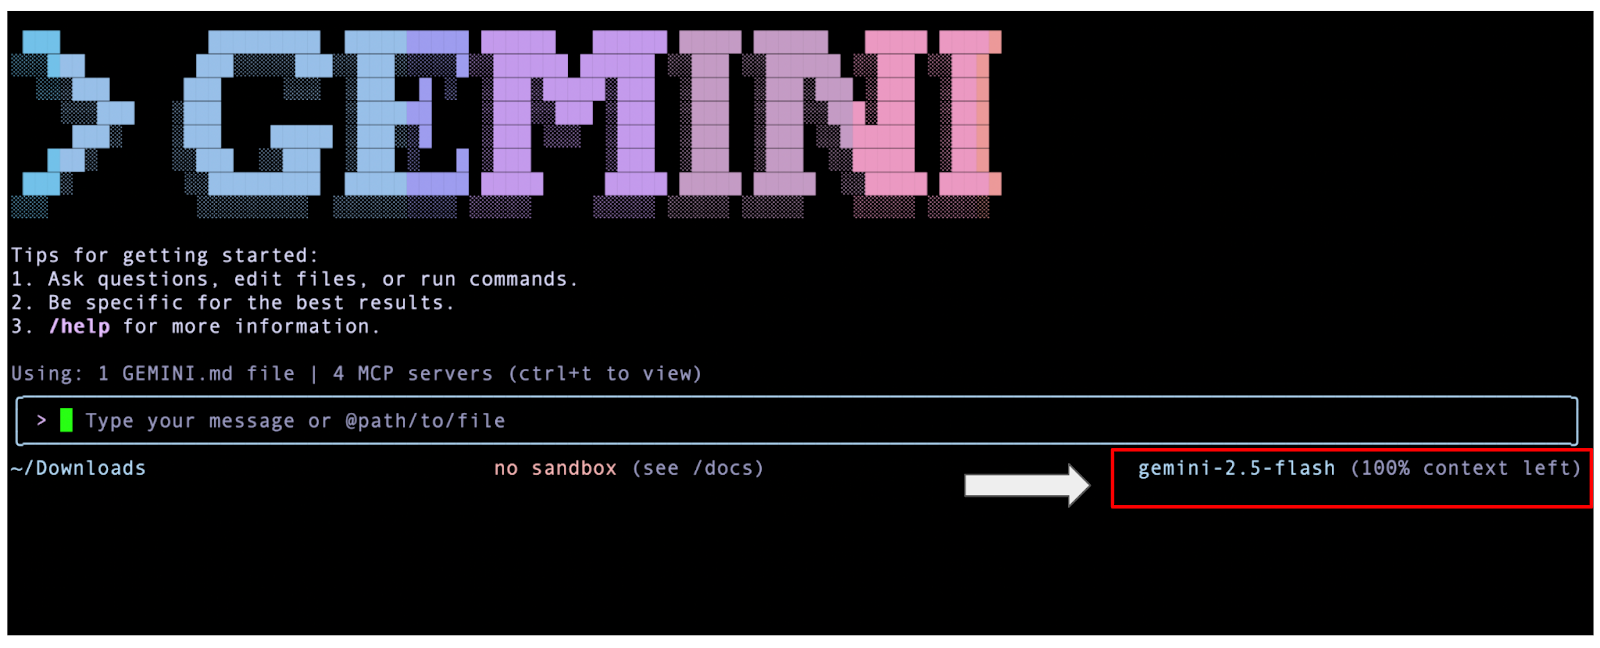
Note: You can try other models by using the /model command in the Gemini CLI.
While Gemini is running, you can verify the model that's running at the bottom right of the Gemini CLI terminal as in the following screenshot:
Use non-interactive mode
An interesting option is to run Gemini CLI in a non-interactive mode. This means that you directly provide it the prompt and it goes ahead and responds to it, without the Gemini CLI interactive terminal opening up. This is useful if you use Gemini CLI in an automated fashion as part of a script or any other automation process.
Quit the session (press CTRL+D or CTRL+C twice, or issue the
/quitprompt).In Cloud Shell, run the following command with the
-pparameter:
gemini -m "gemini-2.5-flash" -p "What is the gcloud command to deploy to Cloud Run?"
Copied!
Do keep in mind that in non-interactive mode, there is no scope to continue the conversation with follow-up questions. This mode also does not allow you to authorize tools (including WriteFile) or to run shell commands.
Click Check my progress to verify the objective.
Use Gemini non-interactive mode
Task 4. Use Gemini CLI in shell mode
It's also possible to work directly with the shell from within Gemini CLI.
- Restart Gemini CLI with the following command:
gemini -m "gemini-2.5-flash"
Copied!
- Press
!in the prompt box. This toggles to shell mode.
When in shell mode, you see the ! at the start of the prompt as shown in the following:

When in shell mode, you can use standard commands like pwd, cat, and ls, for example.
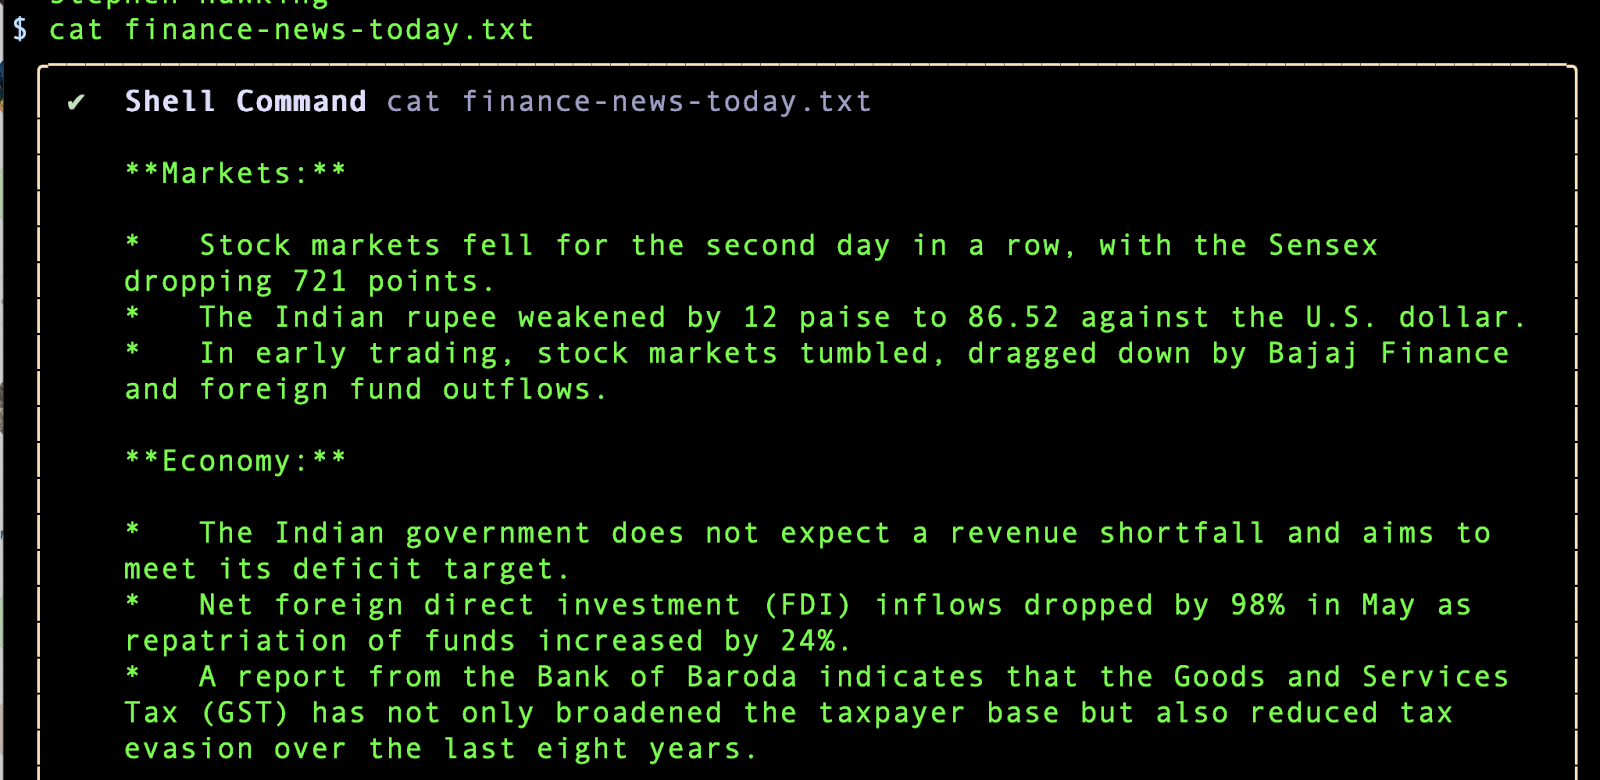
Now try printing the contents of a file via the cat command.
- Give the following prompt to Gemini CLI:
cat eclipse-dates.txt
Copied!
Example output:
- Press
!again or press theESCkey to exit shell mode.
Task 5. Configure an MCP server
An MCP server is an application that exposes tools and resources to the Gemini CLI through MCP, allowing it to interact with external systems and data sources. MCP servers act as a bridge between the Gemini model and your local environment or other services like APIs.
An MCP server enables the Gemini CLI to discover and execute tools thereby extending Gemini CLI's capabilities to perform actions beyond its built-in features, such as interacting with databases, APIs, custom scripts, or specialized workflows.
Gemini CLI supports configuring MCP servers for discovering and using custom tools.
- If you've launched Gemini CLI, you can check the MCP servers configured via the
/mcpcommand as follows:
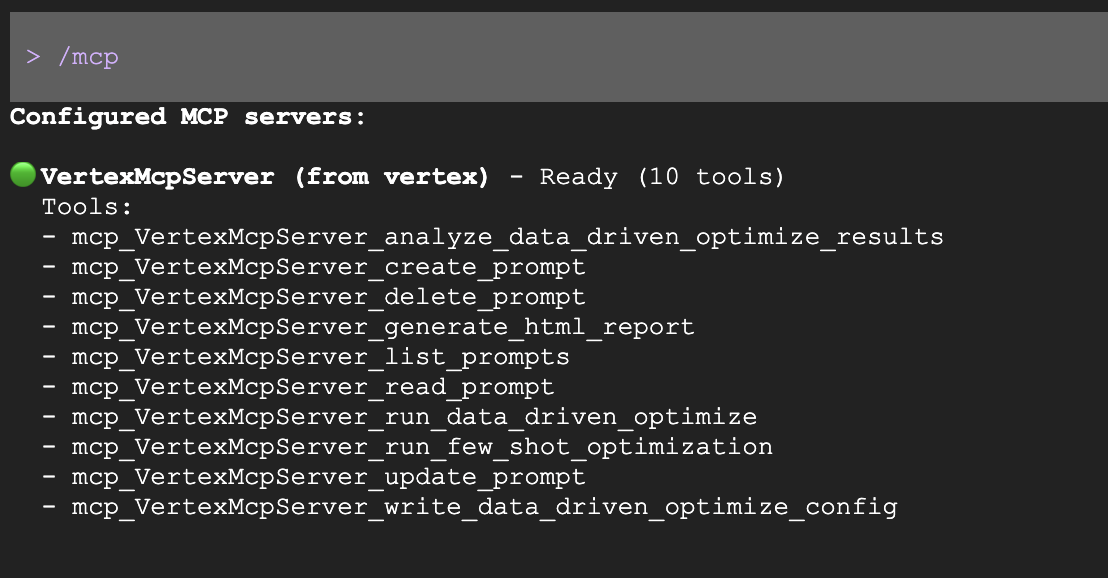
If you don't have any MCP servers configured, it launches Gemini CLI's MCP server documentation.
You can configure MCP servers at the global level in the ~/.gemini/settings.json file or in your project's root directory.
If you have Gemini CLI running, you can quit the session by pressing CTRL+D or CTRL+C twice.
From the Cloud Shell terminal, click Open Editor on the toolbar to launch the Cloud Shell Editor.
Because the
.geminisubdirectory is hidden by default, select View > Toggle hidden files to show hidden files and directories.In the Cloud Shell Editor, browse to and open the
.gemini/settings.jsonfile within your project-specific folder, gemini-cli-projects.
Within the ~/.gemini/settings.json file, you need to configure the mcpServers configuration block. It takes the following syntax:
"mcpServers": {
    "server_name_1": {},
    "server_name_2": {},
    "server_name_n": {}
 }
You configure this file to support an MCP server in the next task.
Each server configuration supports the following properties, as per the Reference documentation:
Required (one of the following)
command (string): Path to the executable for Stdio transport
url (string): SSE endpoint URL (e.g., "http://localhost:8080/sse")
httpUrl (string): HTTP streaming endpoint URL
Optional
args (string[]): Command-line arguments for Stdio transport
headers (object): Custom HTTP headers when using url or httpUrl
env (object): Environment variables for the server process. Values can reference environment variables using VARNAMEor{VAR_NAME} syntax
cwd (string): Working directory for Stdio transport
timeout (number): Request timeout in milliseconds (default: 600,000ms = 10 minutes)
trust (boolean): When true, bypasses all tool call confirmations for this server (default: false)
includeTools (string[]): List of tool names to include from this MCP server. When specified, only the tools listed here will be available from this server (whitelist behavior). If not specified, all tools from the server are enabled by default.
excludeTools (string[]): List of tool names to exclude from this MCP server. Tools listed here will not be available to the model, even if they are exposed by the server. Note: excludeTools takes precedence over includeTools - if a tool is in both lists, it will be excluded.
Note: Before you proceed, know that you should always exercise caution when connecting to or integrating with third-party MCP servers. To protect your information and system integrity, it is advised that you only integrate with MCP servers from trusted and thoroughly vetted sources.
Set up a GitHub MCP server
The GitHub official MCP server provides sufficient documentation on the tools that it exposes and how to configure those tools. Since Gemini CLI supports remote MCP servers, you can run local or remote MCP servers.
In this section, you set up a Remote MCP server in GitHub. For this, you must first have a Personal Access Token (PAT) from GitHub.
Then, you need to add the MCP server object in the settings.json file to point to the GitHub MCP server configuration.
Create a classic GitHub PAT
In this section, you create your classic GitHub PAT, set the token lifetime to never expire, and allow it all available permissions.
Go to the GitHub Developer Settings page, expand the Personal access tokens dropdown, and choose Tokens (classic).
Click Generate new token and select Generate new token (classic) in the dropdown.
Enter a unique name for the token in the Note field, set the Expiration to No expiration, and select the checkboxes under Select scopes to allow all available permissions.
Click Generate token.
Click the Copy (⧉) icon to copy the token to the clipboard and save it for later use.
For more detail, refer to the Creating a personal access token (classic) GitHub documentation to create your own PAT.
Proceed with the GitHub MCP server configuration
Run the following command in Cloud Shell to open the
settings.jsonfile in the Cloud Shell Editor:edit .gemini/settings.jsonEdit the
settings.jsonfile (yours should currently resemble the following example):{ "telemetry": { "enabled": true, "target": "gcp", "otlpEndpoint": "http://${EXTERNAL_IP}:4318", "otlpProtocol": "http", "logPrompts": true, "useCollector": true } }Now insert your PAT to replace the
[placeholder]after"Bearer "and insert this JSON after the first brace at the top of the file:"theme": "Default", "mcpServers": { "github": { "httpUrl": "https://api.githubcopilot.com/mcp/", "trust": false, "headers": { "Authorization": "Bearer [replace-with-your-github-PAT]" } } },You might have additional settings in
settings.json, but the final result should be formatted similar to the following:{ "theme": "Default", "mcpServers": { "github": { "httpUrl": "https://api.githubcopilot.com/mcp/", "trust": false, "headers": { "Authorization": "Bearer [replace-with-your-github-PAT]" } } }, "telemetry": { "enabled": true, "target": "gcp", "otlpEndpoint": "http://${EXTERNAL_IP}:4318", "otlpProtocol": "http", "logPrompts": true, "useCollector": true } }Click Open Terminal on the toolbar to return to the Cloud Shell terminal and run the following command to start Gemini CLI with the updated
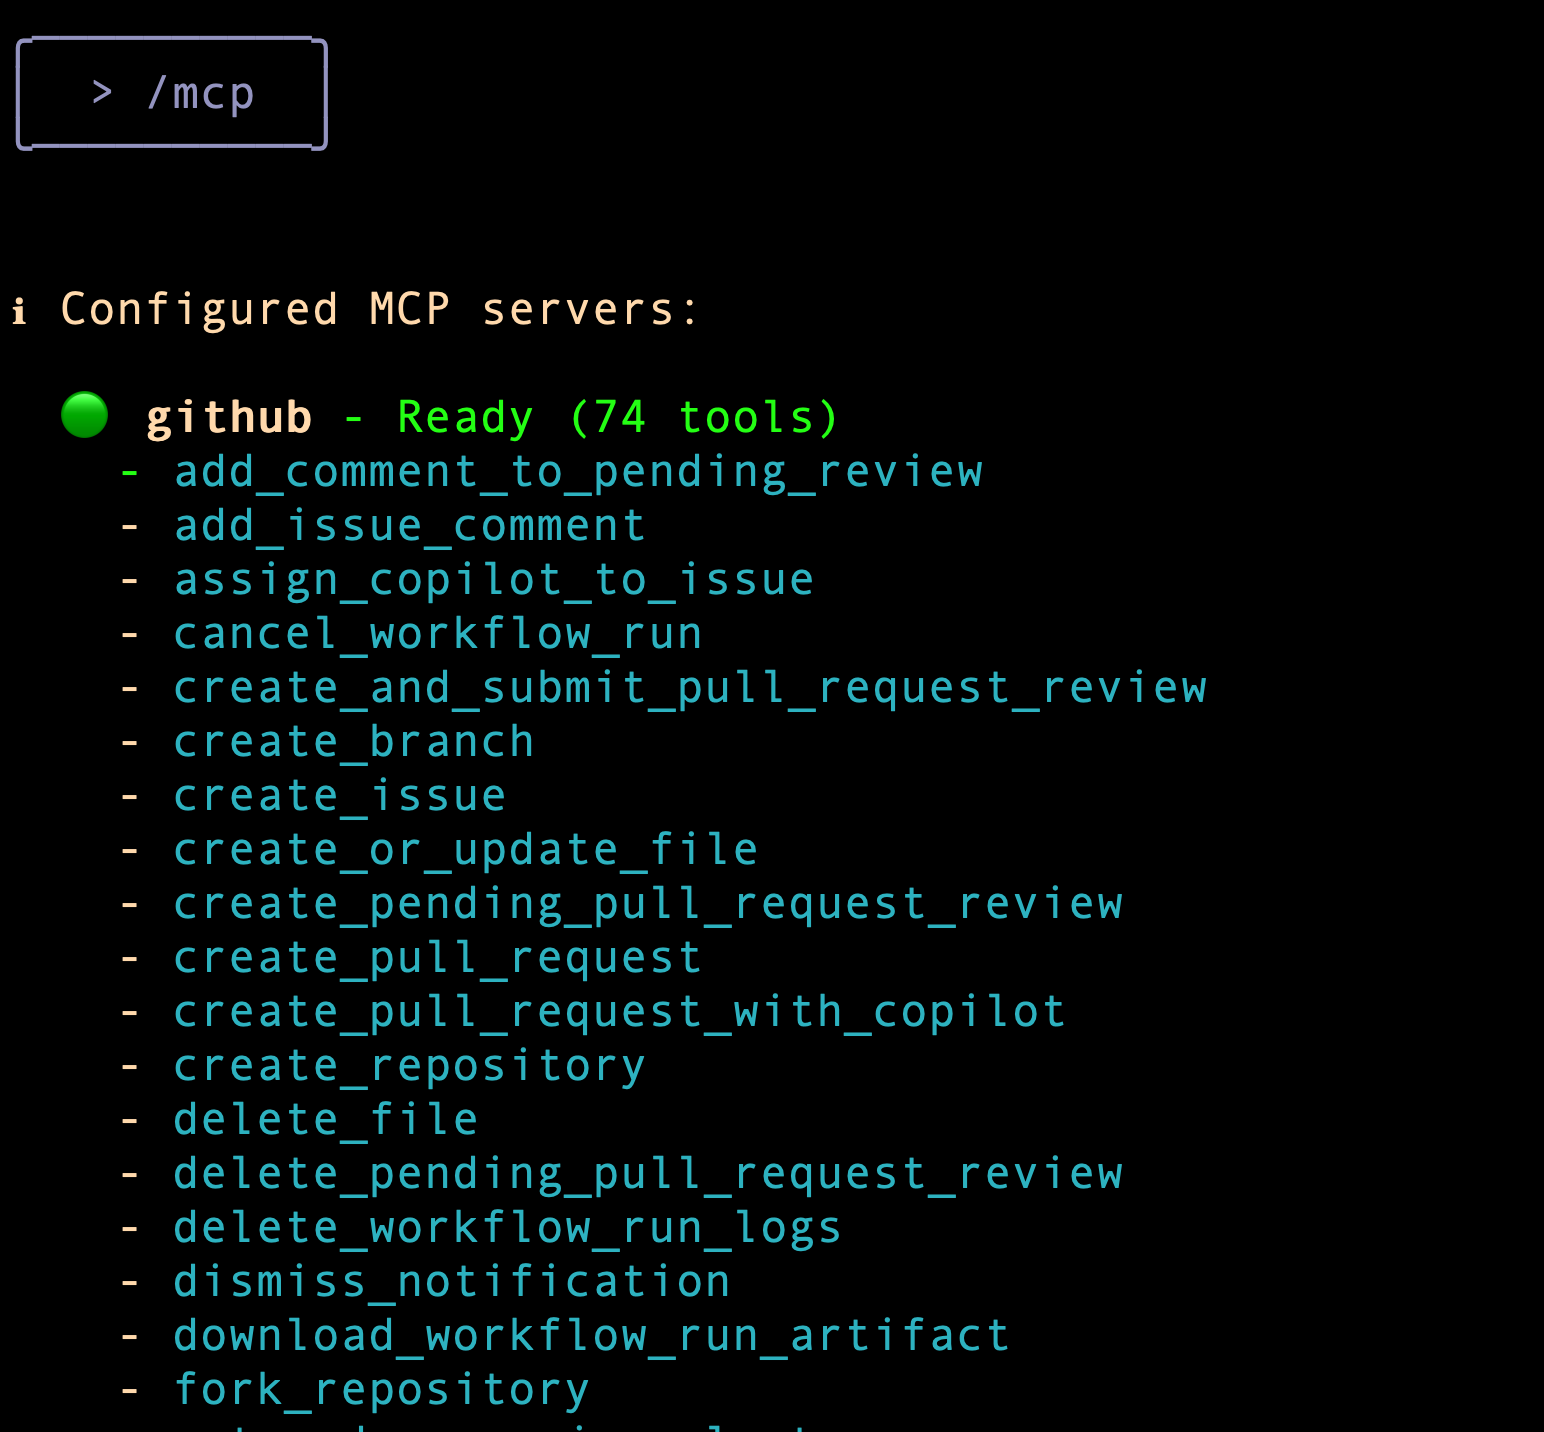
settings.jsonfile loaded at startup, which activates the configured GitHub MCP server:gemini -m "gemini-2.5-flash"To verify that the MCP server is configured and ready, you can issue the
/mcpprompt. The screenshot below highlights the GitHub MCP server that is configured on a machine and the various tools that are now available to the Gemini CLI to work with MCP.Sample output:
Next, you issue a prompt to invoke one of the tools from the GitHub MCP server.
Give the following prompt:
Who am I on github?Expected output:
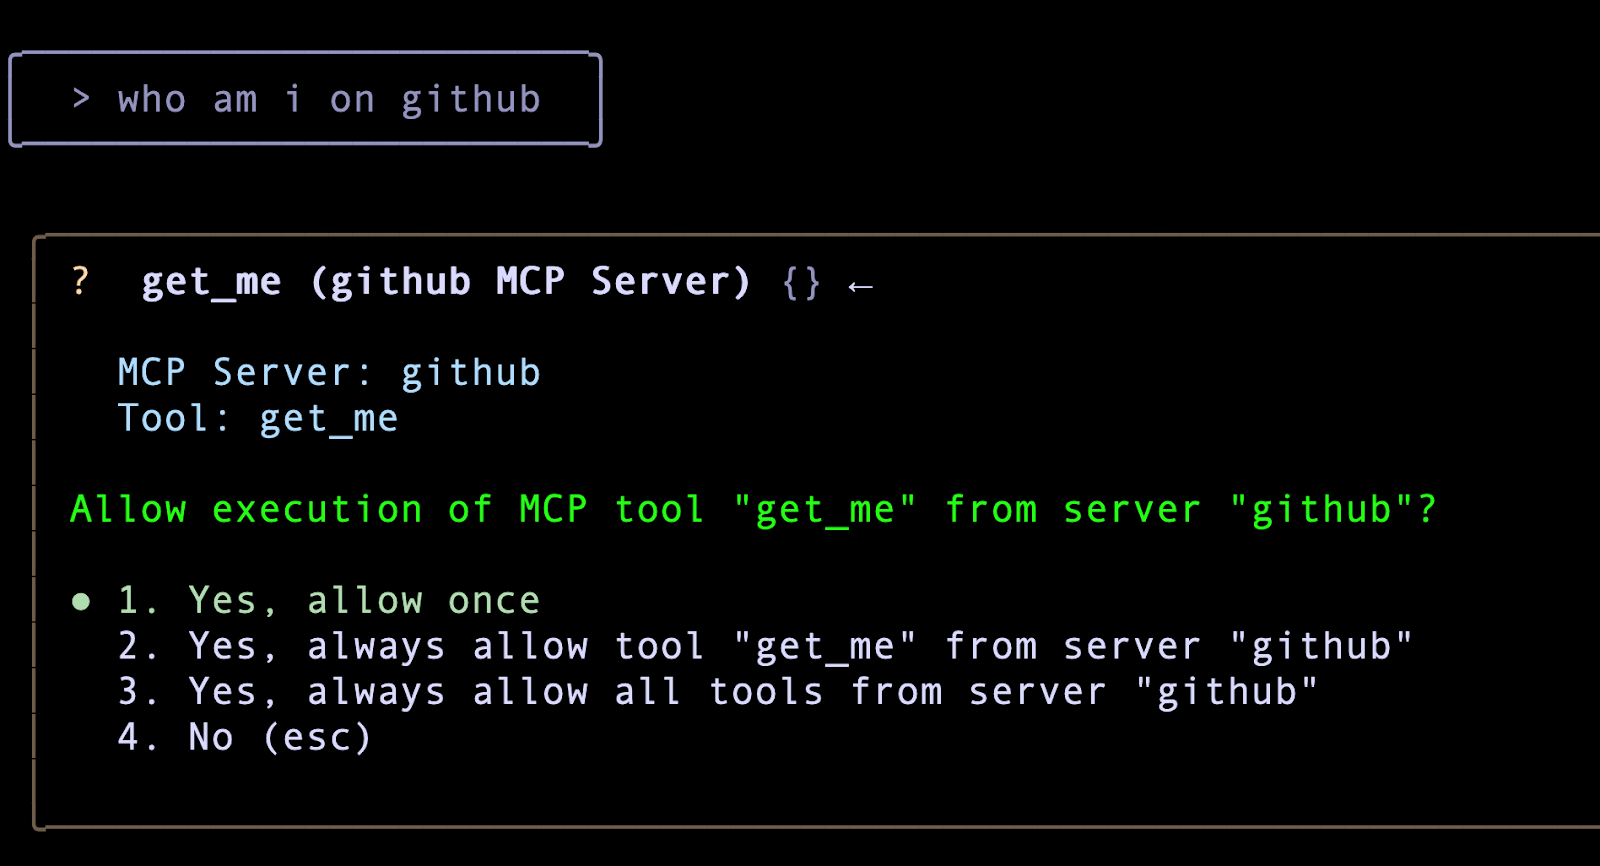
Notice that it picks the correct tool from the GitHub MCP server but as with other built-in tools, this also requires that you provide explicit permission to invoke the tool.
- Press ENTER to choose 1. Yes, allow once so the "get_me" tool from the GitHub server can execute the query.
Note: You must choose Yes, allow once in this instance to obtain the score for this task.
Now that you configured the GitHub MCP server, you could give your queries in natural language to work with one of your GitHub projects. For example:
Describe the to me?
Clone the on my local machine.
Describe @ or @/
What are the different components of this repository?
I have made the necessary changes. Can you push the changes to GitHub and use the GitHub MCP server tools to do that.
More MCP servers
Here is an additional list of MCP servers that you might be interested in:
MCP Toolbox for Databases (work with Firestore, BigQuery, Google Cloud databases)
Google Workspace MCP server (work with Docs, Sheets, Calendar, Gmail)
Set up instructions for these MCP servers are published in this blog post.
Task 6. Perform vibe coding with Gemini CLI
In this task, you use Gemini CLI to vibe code a website. You ask Gemini CLI to generate the structure of the website and set it up.
Note: Even when you are being precise in your instructions, when vibe coding the model can sometimes deviate from what you told it to do, hallucinate, or get stuck in a loop. If the model gets stuck, press ESC and prompt it with updated instructions or repeat your previous instructions, as needed.
Note: If you encounter quota or capacity issues, use the /model command to select a different model (such as a Flash model).
In the Gemini CLI, issue the following prompt:
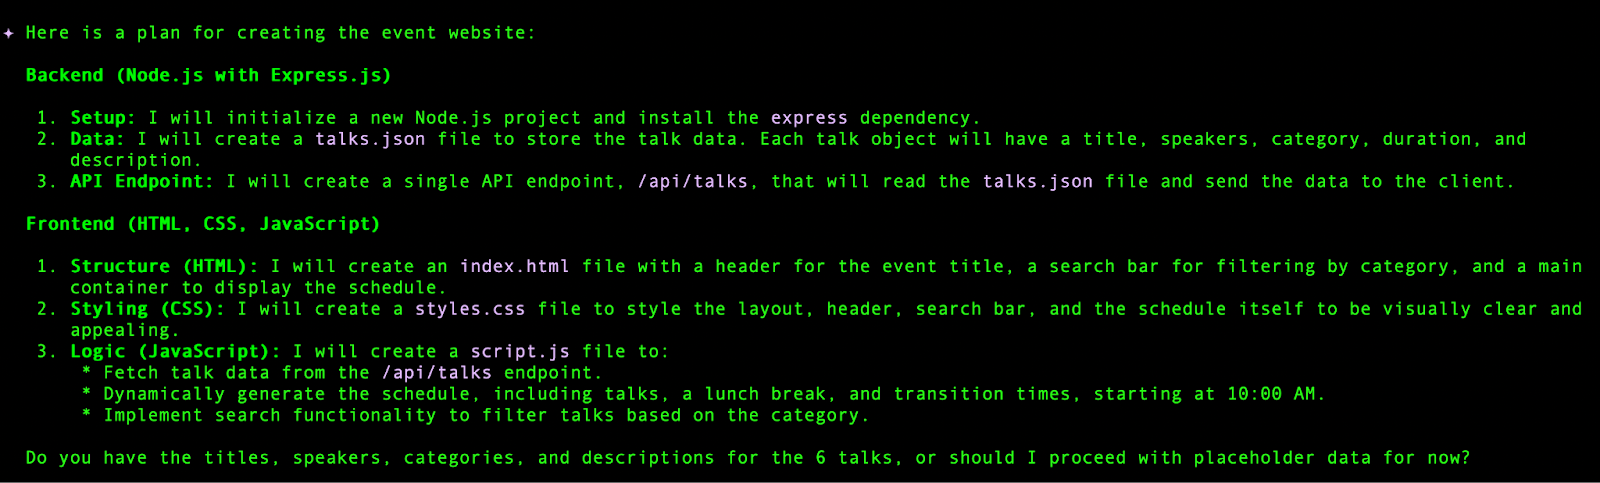
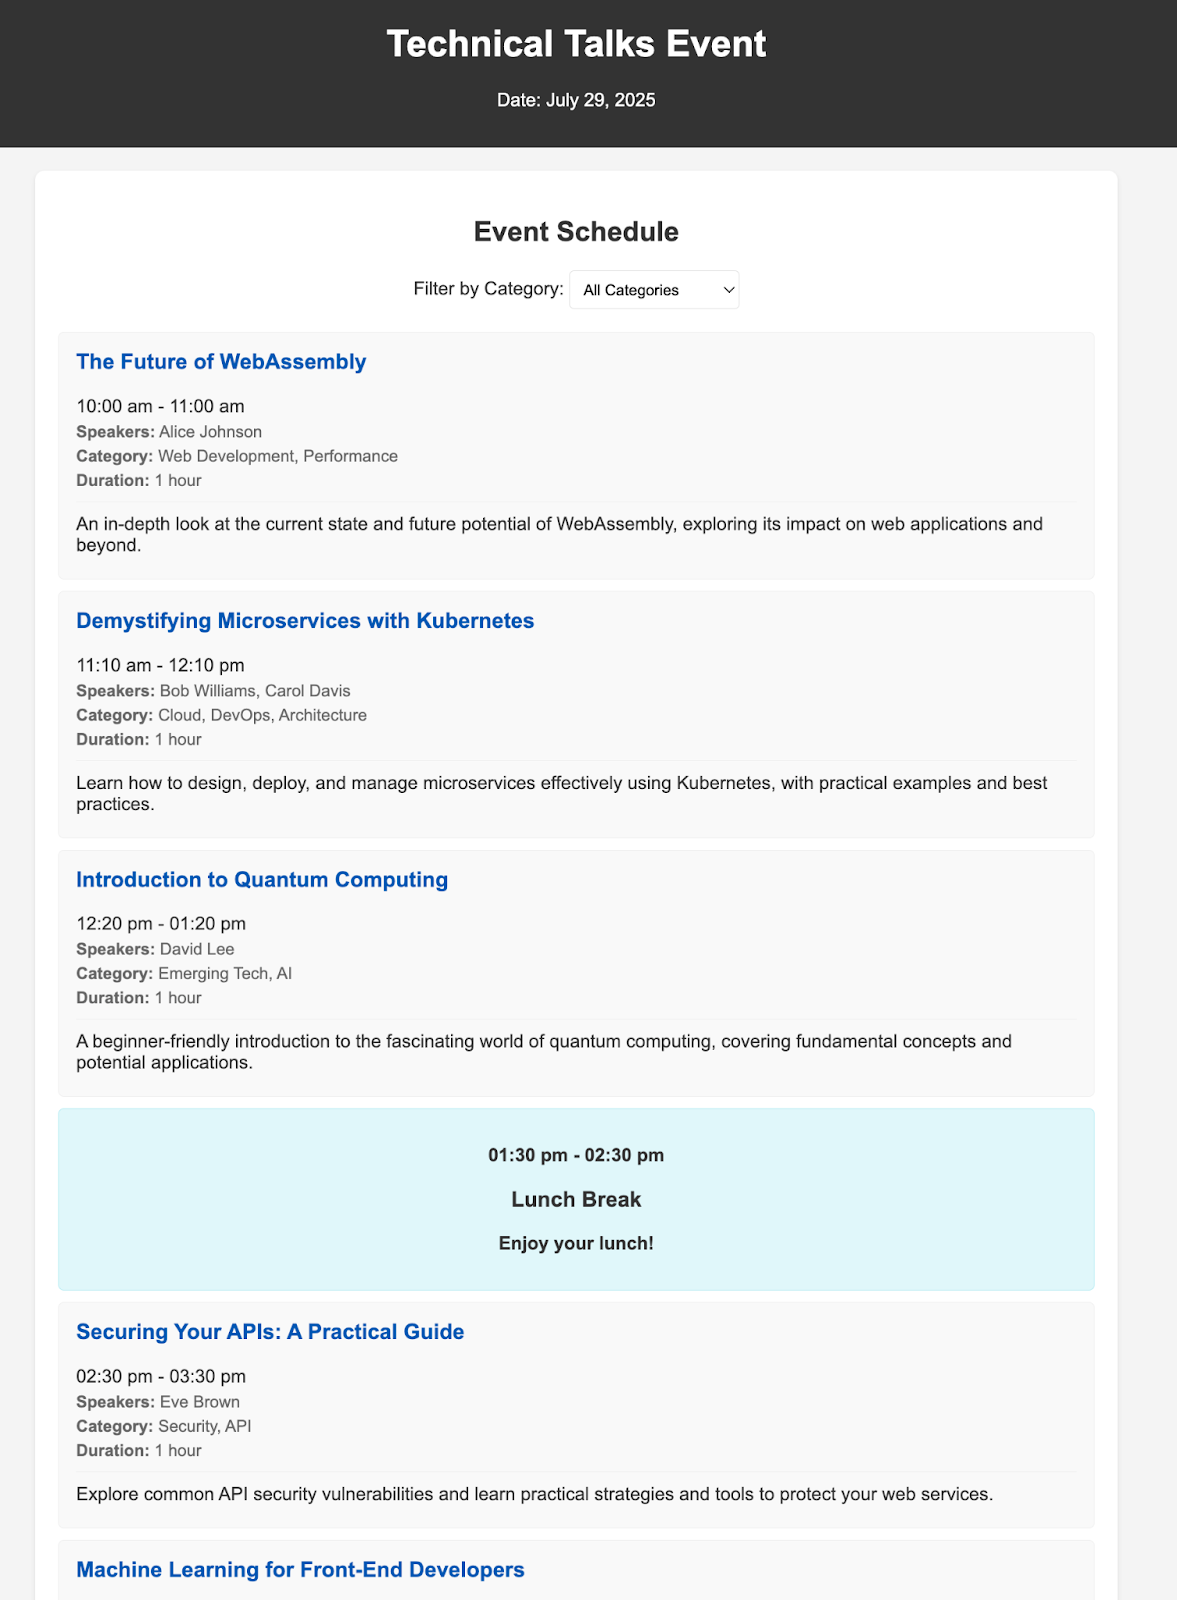
Generate a website for a 1-day event filled with technical talks. There are going to be 6 talks in a single track of 1 hour each. Each talk has the following information: title, 1 or maximum of 2 speakers, category (1 or maximum of 3 keywords), duration and a description. The website has a single page where users can see the schedule for the entire day with the timings. There will be one lunch break of an hour and the event starts at 10:00 AM. Keep a 10 minute transition between talks. I would like to use Node.js on the server side and standard HTML, JavaScript, and CSS on the front-end. The users should be able to search the talks based on category.

I would like you to proceed in the following way:

1. Plan out how you would design and code this application.
2. Ask me for any clarifications along the way.
3. Once I am fine with it, do generate the code, and compile the website into a single, serverless HTML file.
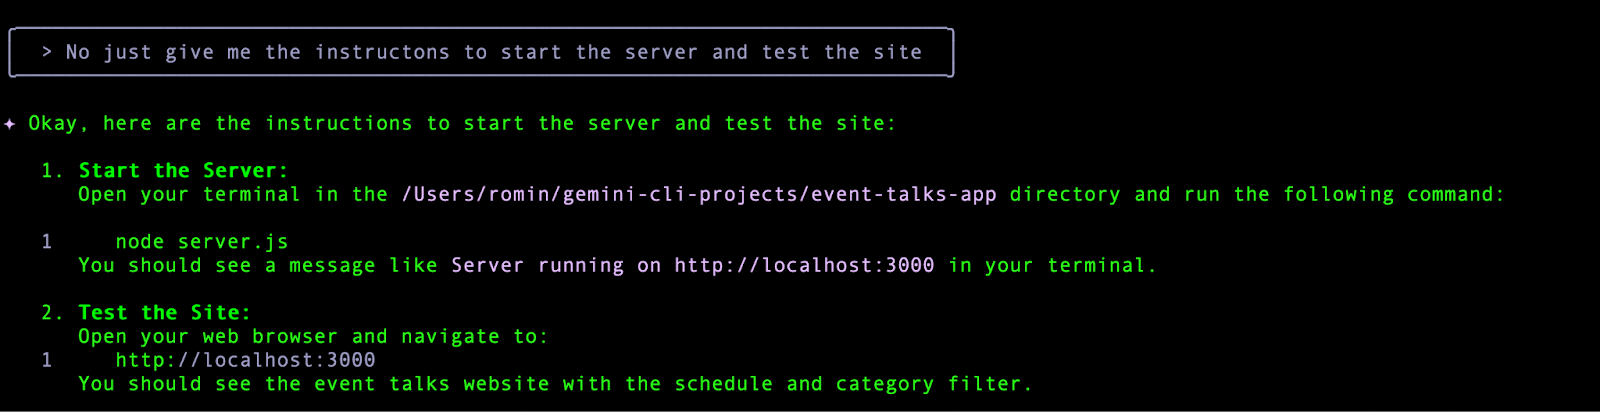
4. Provide me with instructions to run and test the website (serve the index.html file to me using a simple Python server so I can preview it locally).
Gemini CLI proceeds to go through a series of actions at this point.
If the model wants you to confirm what actions it should take next, or asks how to proceed, prompt it as follows:
Create the website using placeholder data and proceed as per your plan suggestions.Note: It may happen that the Gemini CLI experiences a timeout or uses an incorrect username, etc. Do interact with it and suggest the fixes, as needed.
The next few prompts and responses are a sample flow that was observed. You might get a completely different response.
You need to interact back-and-forth with Gemini CLI, as needed.
At times, Gemini CLI may suggest a command that it would like to execute. For the purposes of this lab, you should exert control over the task.
If the model offers to run a command, you can simply press ESC to escape out and redirect its approach with a message such as the following:
On following the instructions to start the server and navigate to the home page, you get a sample site as shown (you should see a variant of a similar site if you used the same prompt):
Feel free to make more changes with the help of Gemini CLI.
Push changes to a GitHub repository
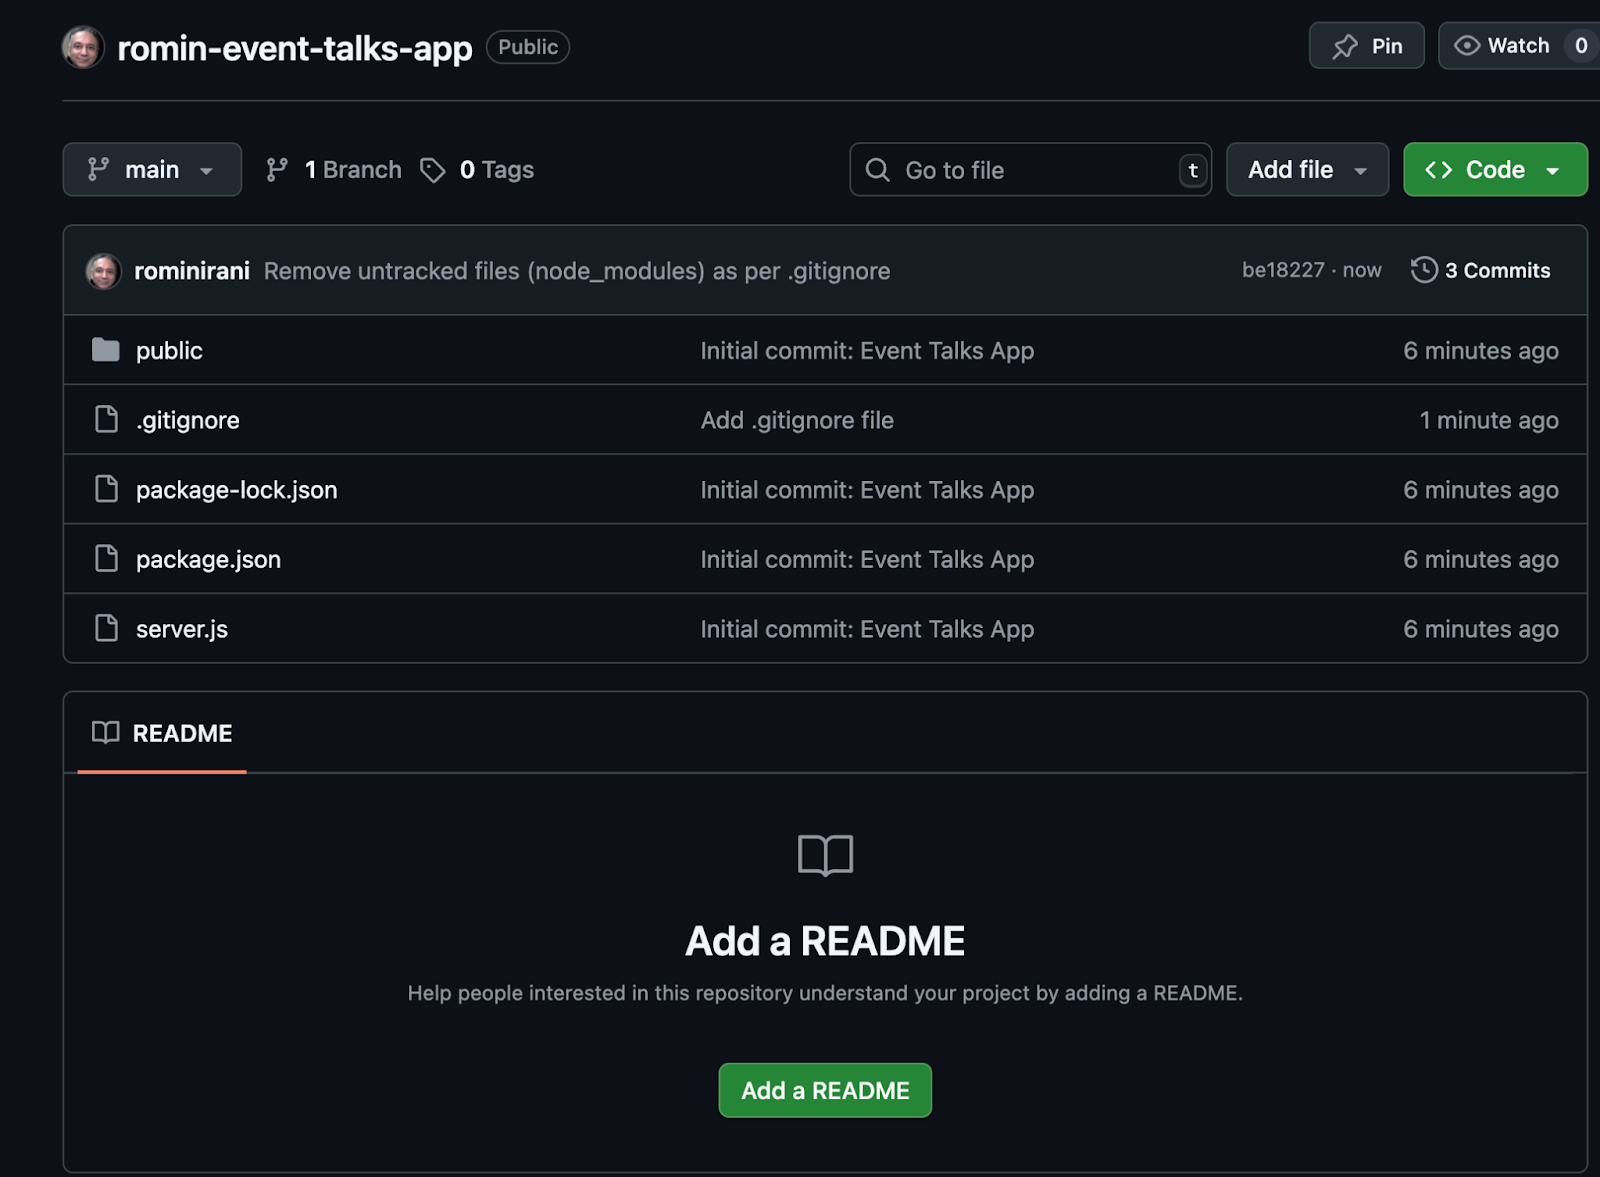
Now that you are satisfied with the website, in this section you use the remote GitHub MCP server to push your changes to a GitHub repository that you create.
First up, you create a .gitignore file with the help of Gemini CLI.
Give Gemini CLI the following prompt:
Create a .gitignore file for this project.Next, you give instructions to Gemini CLI to push this repository under the GitHub account (this should exercise the GitHub MCP server tools in the background).Give a prompt similar to the following (be sure to replace the [Your-name] placeholder with your name):
Great! I now need you to use the GitHub MCP server with the 'push_files' tool to push this to a new repository in my GitHub account. Ensure you use the personal access token (PAT) configured for the GitHub MCP server to authenticate to GitHub via HTTPS. I would like you to name this repository [Your-Name]-event-talks-app.This causes Gemini CLI to run a number of commands to perform the following:
Create the repository.
Use multiple Git commands: init, add, commit to manage the local Git repository.
Set up the Git remote and does a push.
Note: There are instances where Gemini CLI might time out or use an incorrect username, etc. Interact with it and suggest the applicable fixes, as needed.
If Gemini CLI encounters problems with authentication when pushing your changes, remind it to use the tools of the GitHub MCP server.
If all goes well, you should have a GitHub repository in place. A sample screenshot is as follows:
Well done! You have created a website with the help of Gemini CLI and pushed changes to a GitHub repository that you created.
Note: You have not completed a user-friendly
README.mdfile for the project in this lab, but doing so would be recommended in a real-life production environment. If you'd like, you can ask Gemini CLI to do so for you.