
Gmail: Getting Started - GSP465
A passionate full-stack developer from @ePlus.DEV
Overview
Gmail is an email service developed by Google. Gmail stores your email safely in the cloud, allowing you to access it from any computer or device with a web browser. You can also quickly organize and find important email, as well as read and draft email without an internet connection.
What you'll do
In this lab you:
Create and send email
Manage your inbox
Create signatures
Access your calendar, notes, and tasks
Setup and requirements
Before you click the Start Lab button
Read these instructions. Labs are timed and you cannot pause them. The timer, which starts when you click Start Lab, shows how long lab resources are made available to you.
This hands-on lab lets you do the lab activities yourself in a real cloud environment, not in a simulation or demo environment. It does so by giving you new, temporary credentials that you use to sign in and access Gmail for the duration of the lab.
What you need
To complete this lab, you need:
Access to a standard internet browser (Chrome browser recommended).
Time to complete the lab.
Note: Use an Incognito or private browser window to run this lab. This avoids conflicts between your personal account and the student account.
How to start your lab and sign in to Gmail
When ready, click Start Lab.
The Lab Details pane appears with the temporary credentials that you must use to sign into Gmail for this lab.
If you need to pay for the lab, a pop-up opens for you to select your payment method.
Click Open Gmail.
The lab spins up resources, and then opens another tab that shows the Sign in page.
Tip: Arrange the tabs in separate windows, side-by-side.
If necessary, copy the Username below and paste it into the Sign in dialog.
student-04-913c0f0f9a87@qwiklabs.netClick Next.
Copy the Password below and paste it into the Welcome dialog.
TAj2dp3y5nyOClick Next.
If needed, click I understand to accept the terms.
Gmail opens.
Click Get started, and then close any further information windows.
You are now in Gmail, looking at your Inbox.
Task 1. Gmail layout
You can choose how Gmail presents your email to you.
In the upper right, click Settings
, then select the Density: Default, Comfortable, or Compact.

Tip: To get more space for your email, click Main menu to close the left panel.
Task 2. Create, send, and receive email
Create and send an email message
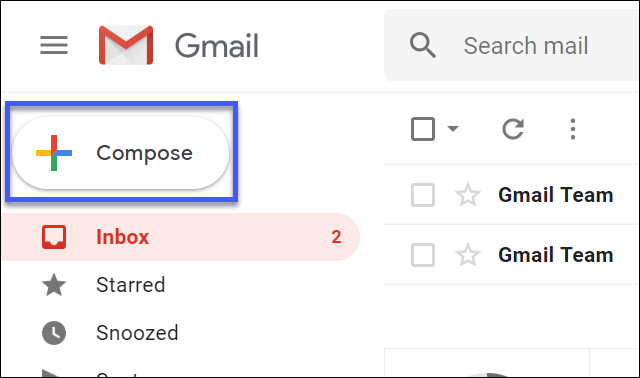
- In Gmail, on the left, click Compose.
- (Optional) Change your window using the buttons in the upper corner:
| Icon | Description |
| Minimize the message | |
| Exit-full-screen (shift for pop-out) | |
| Save and close the message |
- Add recipients (feel free to use your personal email), a subject, and then enter your message.
Note: Gmail automatically saves all unsent messages in Drafts on the left.
- (Optional) Click the icons on the bottom of the email message to add attachments, links, images, and more:
| Icon | Description |
| Formatting options | |
| Attach files | |
| Insert link (Ctrl-K) | |
| Insert emoji (Ctrl-Shift-2) | |
| Insert files using Drive | |
| Insert photo | |
| Toggle confidential mode | |
| Insert signature | |
| Discard draft |
- Click Send.
Undo sending your mail
Oh no....you made a mistake! In your message you said to meet in the lunchroom, but the meeting location changed to outside under the maple tree, and you already clicked Send.
Not to worry, you can undo sending an email! By default, you have 5 seconds to undo sending an email.
Try it:
Create and send another email message.
Click Undo at the bottom of the page.
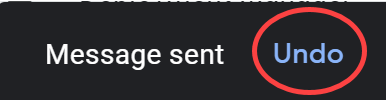
By default, you have 5 seconds to undo sending an email.
To change the Undo Send cancellation period:
Minimize the email message to see more of the gmail window, then, in the top right, click Settings > See All Settings.
On the General tab, scroll to the Undo Send feature.
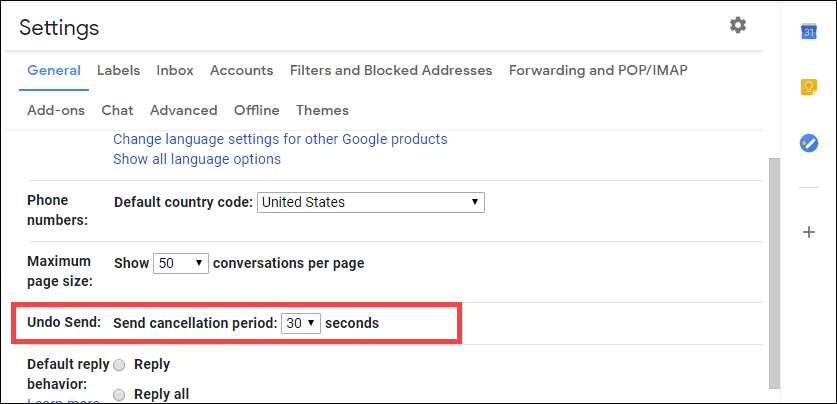
Change the cancellation period to 30 seconds.
Scroll to the bottom and click Save Changes.
Click on Drafts folder and then click on your email to restore it to screen, then click Send.
Notice that you have more time to undo sending the email.
See new email
- Click Inbox in the left pane. Unread emails are bold.
For example, if you have not yet opened the email from the Gmail Team, they are bold.
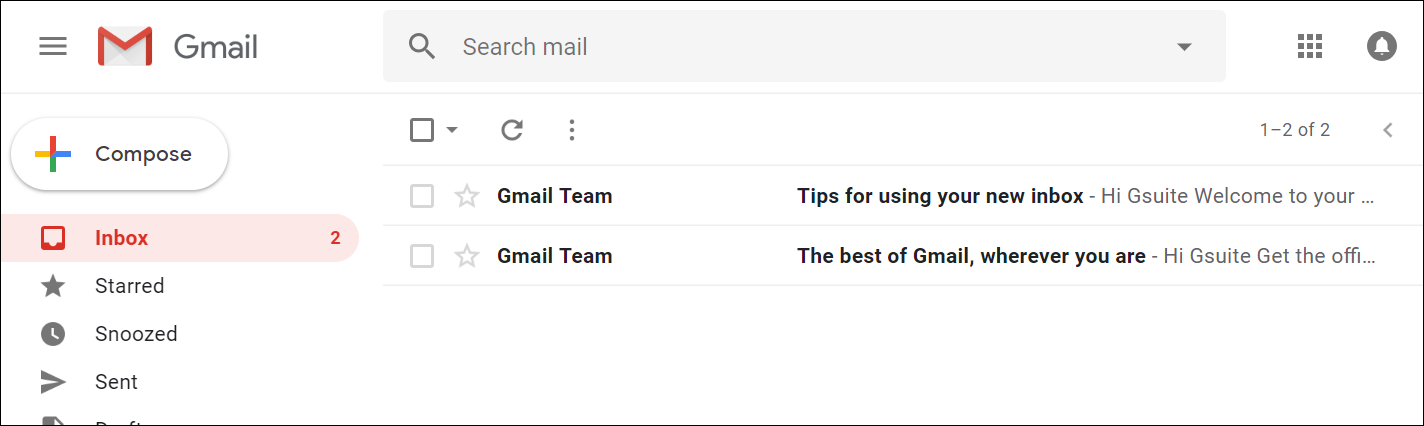
- To open an email, click the email.
By default, replies to email are grouped into conversations. If you prefer to separate your existing email from future email, turn off conversation view.
Turn off conversation view
In the top right, click Settings > See All Settings.
In the General tab, scroll down to Conversation View and select Conversation view off.
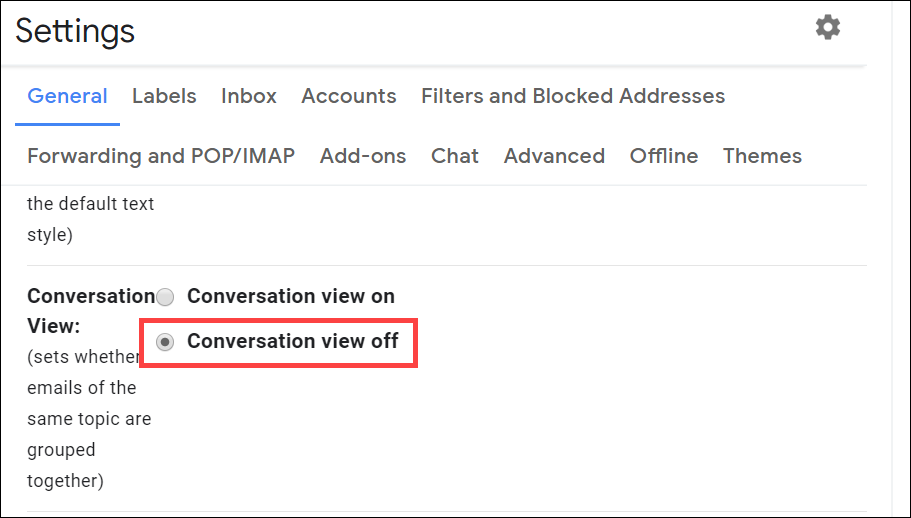
- Scroll to the bottom and click Save Changes.
Reply to or forward an email
Note: In this lab, you cannot receive email from an external account. You can use the email from the Gmail Team to check out various ways to reply to an email.
Click an email to open it to view the buttons. Experiment adding your username or your personal email in the recipient field.
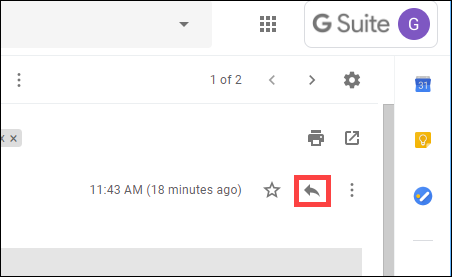
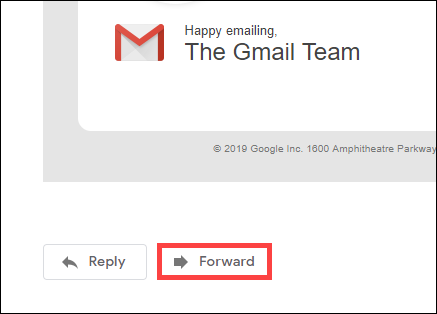
To reply to a single email (or the last email in a thread), click Reply at the bottom of the message window.
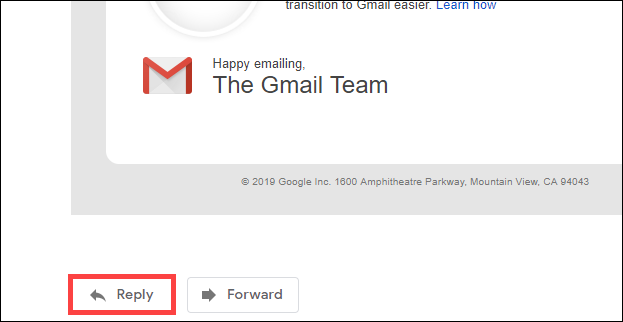
Or click Reply in the upper right of the message window.
- To forward a single email (or the last email in a thread), click Forward.
Note: You've stepped through the basics, see Reply to email to see what else you can do:
Forward an email within a thread
See previous email in a thread
Forward an entire conversation
Use Smart Reply
Add and remove recipients
Click Compose to create a new email message.
To add a recipient to the email, type their email address in the To field, then press Enter.
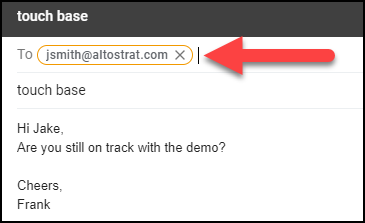
To add more recipients, type the email addresses of the additional recipients, pressing Enter after each address.
To remove recipients, click X next to their email address.
Add a subject and a short message and click Send.
Click compose to create a new email message.
Start typing the email address you just used, the email address you previously used should display as an option.
Click X in the top corner of the email to delete the email.
Change an email subject
Click Reply to an email message from the Gmail Team.
In the response message, next to the recipient email addresses, click Type of response (the Down arrow) > Edit subject.
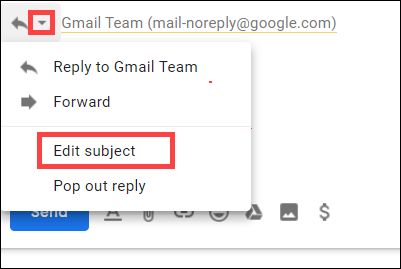
- Type in a new subject.
The email now has a new subject.
- Click X in the top corner of the email to delete the email.
Save or download attachments
When someone sends you an attachment, such as a photo or document, you see a preview of the attachment in the email.
- Send yourself an email message with an attachment.
Click Compose.
Use your lab Username as the recipient.
Click the paperclip icon at the bottom of the email, then browse an image from your local computer.
Click Send. The email arrives in your inbox.
Click on Inbox, then click the email to open it.
View attachment options:
- Download an image or save it to Drive. Hover over the attachment preview and click Download or Add to Drive.
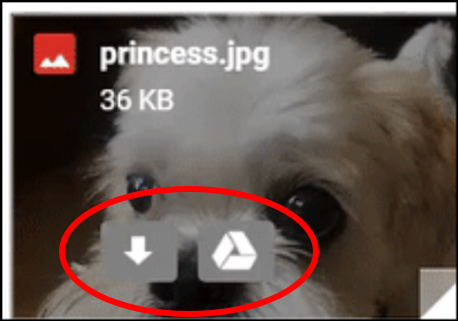
- Alternatively, click the attachment to open a full-screen view. In the upper right, choose to Add to my drive or Download the attached file.
Example:

Learn more about Gmail attachments at Open & download attachments in Gmail.
Note: You can also email without an internet connection, click Use Gmail offline to see how.
Click Check my progress to verify the objective.
Create, send, and receive email
Check my progress
Turn your vacation responder on or off
In the top right, click Settings > See all settings.
In the General tab, scroll down to Vacation responder then select Vacation responder on or Vacation responder off.

When you turn on the vacation responder, enter the dates you're away, add a message that people will see if they email you when you're out, and select who should get a response.
Scroll to the bottom and click Save Changes.
The Vacation Settings header opens at the top of the page.

Click Check my progress to verify the objective.
Turn your vacation responder on
Check my progress
Task 3. Organize your inbox
Switch to labels from folders
Other email programs use folders to store email. Gmail uses labels to categorize email. You can apply several labels to an email, then later find the email by clicking any of its labels from the left panel.
You can also:
Open a label in the left pane to see all email with that label
Nest labels within labels
Search for all email with a label
Set up your inbox as you prefer
Inbox preference choices:
See labels on email in your inbox to quickly identify different types of email.
Auto-archive email to route it away from your inbox.
Create labels
Create a label from the Settings menu
In the top right, click Settings > See all settings.
Click the Labels tab.
Scroll to the bottom. In the Labels section click Create new label.
Enter "Gmail Team" as the new label name, and then click Create.
In the left pane, the label Gmail Team is added to the list.
Note: You can also create nested labels, which are like subfolders.
Create a label from an email
Click on any email in your inbox.
From an email, click Labels > Create new.
Name the label "Tips" and click Create. The new label automatically applies to your email.
Apply labels to email
In your inbox, check the boxes next to the email from the Gmail Team.
Click Labels.
Check the boxes next to the "Tips" label. Both emails are now labeled "Tips".
Add a color to a label
In the left panel, point to a label and click More (
).
Point to Label color and choose a color. Or, click Add custom color. The change instantly applies to all email with that label.
(Optional) To remove a label color, point to Label color and click Remove color.
To see all email with a particular label, in the left panel, click the label’s name. For this lab, click Tips

Move email from your inbox to a label
Move email out of your inbox to labels the same way you did with folders.
In your inbox, check the boxes next to one of the emails from the Gmail Team.
Click the Move to icon in the top menu.
Click the Gmail Team label.
The email messages are now located in the Gmail Team label and removed from the inbox.
- Move both emails back to the inbox to use later in the lab.
Add filters
Manage your incoming email automatically with Gmail’s filters.
For example, create a filter that automatically moves email coming from an address containing "gmail" out of your inbox and archived for later access:
In the Gmail search box, click Show search options
.
For search criteria, in the From field, type gmail, then click Create filter.
Click OK in the confirmation dialog.
Check Skip the Inbox (Archive it) then click Create filter.

For tips on applying common filters, refer to the Advanced Gmail filters for work or school.
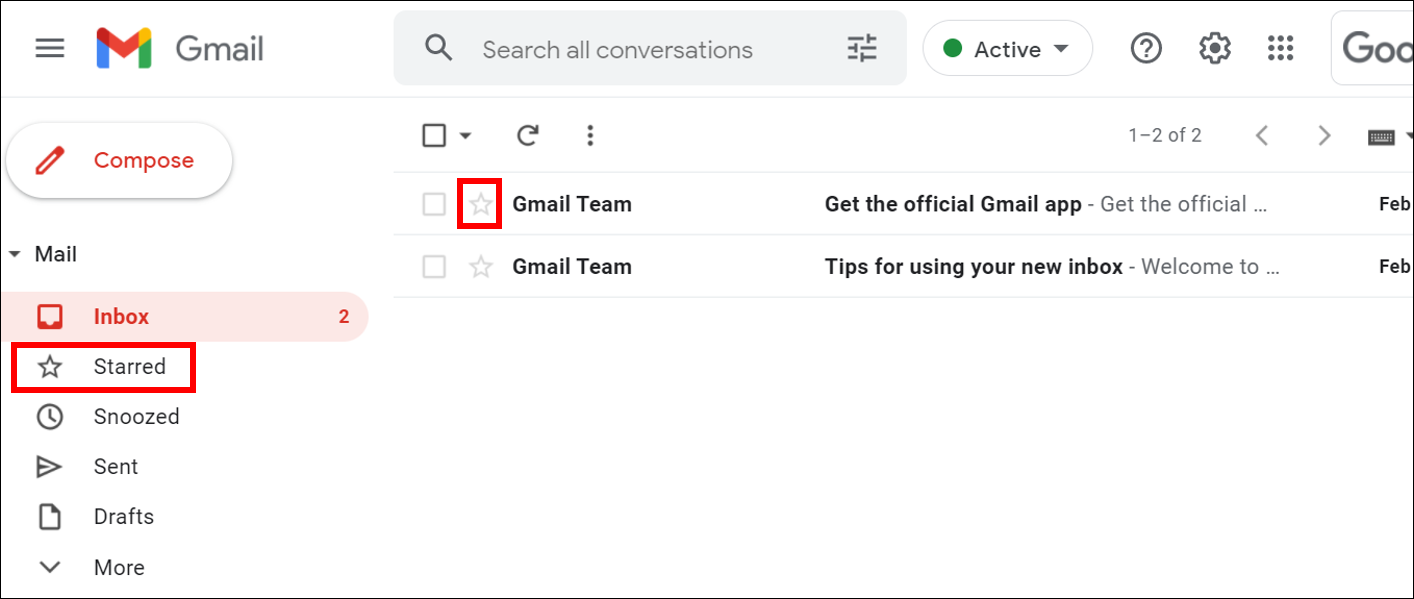
Star important email
Want to flag an important email?
- Click the Star next to an email in your inbox or an email within a conversation.
Star mail from the Gmail Team:
In the inbox, click the star next to the 2 messages from the Gmail Team.
To see all your starred email, in the left pane, click Starred.
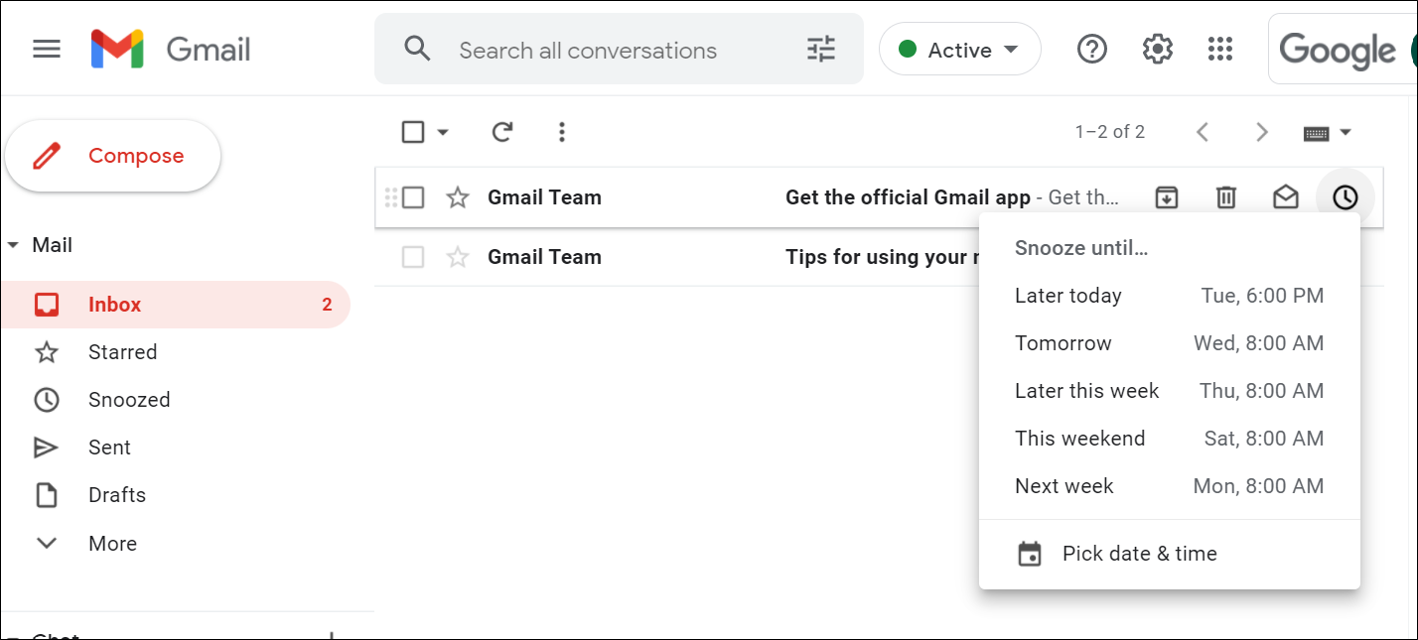
Snooze email
Snooze emails to temporarily remove them from your inbox until you need them.
Your email comes back to the top of your inbox when you want it to, whether that's tomorrow, or next week. You can always see your snoozed items under Snoozed in the left menu.
To snooze an email:
Point to an email.
On the right, click Snooze.
Under Snooze until, click Pick date & time and set the time for 2 minutes from now.
The email moves from your inbox to the snooze folder.
(Optional) To see the snoozed email, click Snoozed in the left pane.
See the email returns to Inbox after the 2 minutes has passed.
Archive or delete email
Archived email moves out of your inbox, but stays under All mail so you can find them later. Deleted email moves to Trash and, by default, gets permanently deleted after 30 days.
To archive or delete email, check to select one or more emails.
At the top, click Archive or Delete .
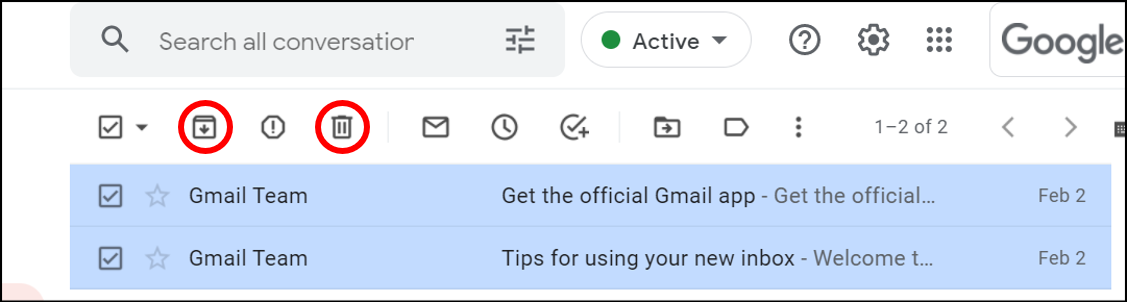
Or, you can point to a single email and click Archive or Delete .

- Scroll down to All Mail or Trash and look for the email you just moved.
Click Check my progress to verify the objective.
Organize your inbox
Check my progress
Task 4. Find email
Search your Inbox
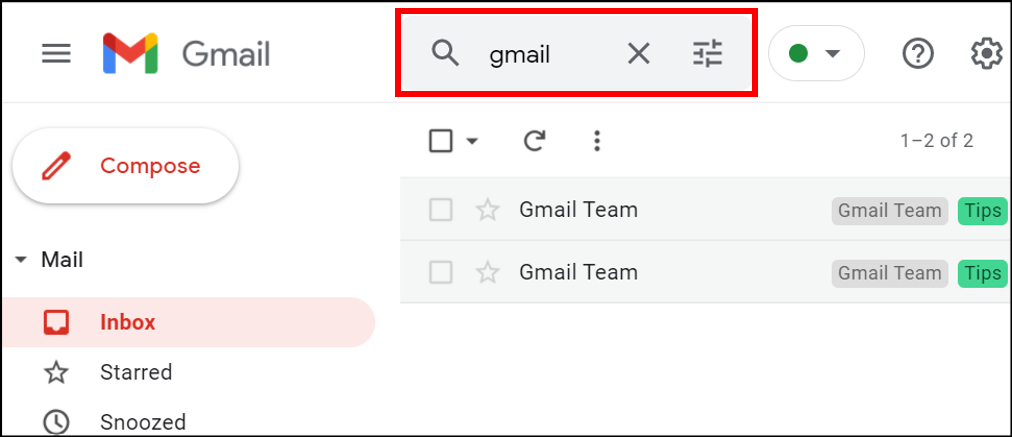
To search for keywords, type the word or phrase you’re looking for into the search box, for example, "gmail". Gmail suggests search terms as you type.
Click a suggestion or press Enter.
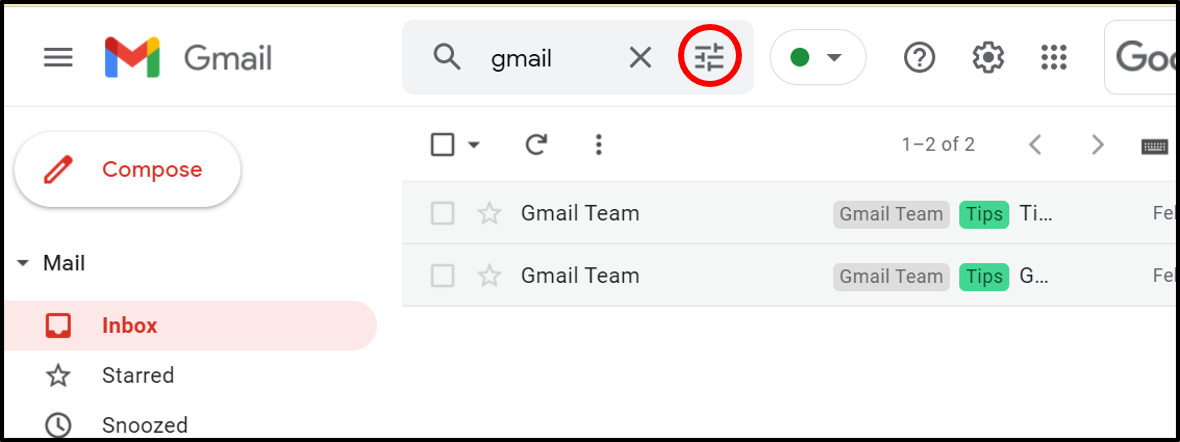
Narrow your search
To narrow your search, at the right of the Gmail search box, click Show search options
.
- Add specific search criteria. For example, you can find an email from Alice that has an attachment within a particular time frame.
To search for an email from Gmail Team that mentions "inbox" and was mailed in the last day:
In the Search box, click Show search options .
Type "Gmail" in the From field and "inbox" in the Has the words field, and the Date within field to "1 day".
Click Search.
To learn more about advanced searches, refer to the Search operators you can use with Gmail documentation.
Task 5. Create signatures
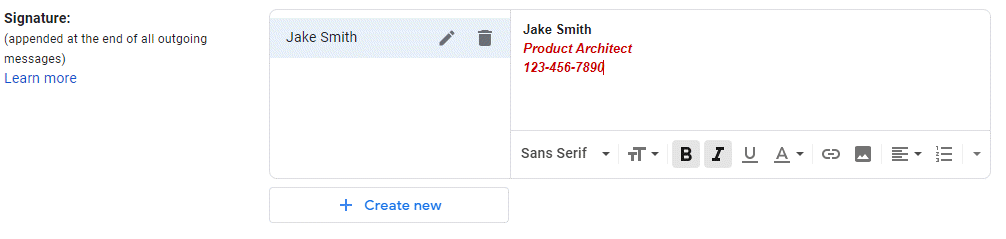
Your signature can include your name, title, and contact information.
Click Settings > See all Settings.
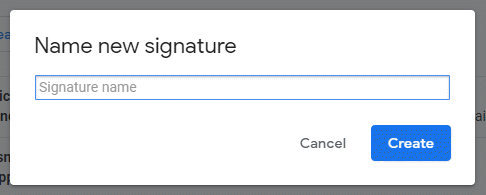
In the General tab, scroll down to the Signature section and click Create New.
Give this signature a name, then click Create.
- Use the format bar to add text colors, styles, links, or a picture.
In the Signature defaults section, use the dropdown menu under For New Emails Use and select the name of your signature.
Scroll to the bottom and click Save Changes.
Compose a new email and notice your signature when you create the email. Use your lab email to send yourself an email, and notice the signature is visible in your Inbox.
To create multiple signatures, refer to the Get started with Gmail Create signatures documentation.
Click Check my progress to verify the objective.
Create signatures
Check my progress
Task 6. Access your calendar, notes, and tasks
Use the app icons in the right pane to view your schedule, reply to invitations, and keep track of your to-do lists without leaving Gmail.
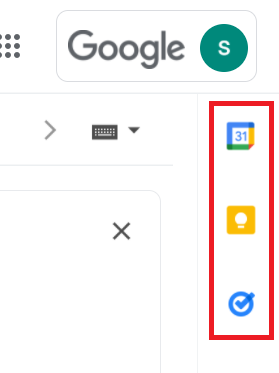
| Icon | App | Description |
| Calendar | Check your schedule, make, or update events, respond to invitations | |
| Keep | Take or check notes | |
| Tasks | Make, update, or check items off your to-do list |
For information on how to open your Google Calendar and events, refer to the Get started with Google Calendar documentation.
To do more with Keep, refer to the How to use Google Keep documentation.
To do more with Tasks, refer to the What can you do with Tasks? documentation.
Solution of Lab
Solution 1
Solution 2
📧 Task 1. Gmail Layout
Open Gmail with your student credentials.
Top right → Settings (⚙️) → choose Density: Default, Comfortable, or Compact.
(Optional) Click Main menu icon (≡) to close the left panel for more space.
📝 Task 2. Create, Send, and Receive Email
Compose & send
Left side → Compose.
Add recipient (your personal email), subject, and message.
(Optional) Add attachments, links, images, Drive files, emojis.
Click Send.
Undo send
Send a new email.
Quickly click Undo at bottom of screen.
To change time window: Settings > See all settings > General > Undo Send → set 30 seconds → Save.
Read & manage emails
Click Inbox → unread messages are bold.
Turn off conversation view: Settings > General > Conversation View off → Save.
Reply or forward
Open email → click Reply or Forward.
To change subject: Reply → dropdown near recipient → Edit subject.
Attachments
Compose → send email to yourself with an attachment (paperclip icon).
Open Inbox → open email → preview, Download or Add to Drive.
Vacation responder
Settings > General > Vacation responder → turn on.
Add start/end dates and message → Save.
✅ Check my progress: Turn your vacation responder on
📂 Task 3. Organize Your Inbox
Labels
Create: Settings > Labels > Create new label → name = Gmail Team.
From email: open → Labels > Create new → name = Tips.
Apply labels: select email → Labels > check Tips.
Add label color: left panel → hover label → More > Label color.
Move emails
- Select email → Move to > Gmail Team.
Filters
In search box → Show search options.
Example: From = gmail → Create filter → check Skip Inbox (Archive it) → Create.
Starred email
Click star next to Gmail Team emails.
View under Starred in left panel.
Snooze email
Hover email → Snooze → pick date/time (e.g., 2 minutes).
Appears under Snoozed, returns to inbox later.
Archive/Delete
Select email → click Archive or Delete.
Find under All mail or Trash.
✅ Check my progress: Organize your inbox
🔍 Task 4. Find Email
Search bar: type keyword (e.g., “gmail”).
Narrow search: Show search options → From = Gmail, Has words = inbox, Date = 1 day → Search.
✒️ Task 5. Create Signatures
Settings > General > Signature > Create new.
Add name, title, contact info, or image.
In Signature defaults, set for New Emails Use.
Save changes.
Compose new email → signature auto-applies.
✅ Check my progress: Create signatures
🗓️ Task 6. Access Calendar, Notes, and Tasks
Right sidebar in Gmail → icons for:
Calendar (check/add events, respond to invites).
Keep (take notes).
Tasks (to-do lists).


