
Google Workspace for Education: Challenge Lab - GSP362
A passionate full-stack developer from @ePlus.DEV
Overview
In a challenge lab you’re given a scenario and a set of tasks. Instead of following step-by-step instructions, you will use the skills learned from the labs in the course to figure out how to complete the tasks on your own! An automated scoring system (shown on this page) will provide feedback on whether you have completed your tasks correctly.
When you take a challenge lab, you will not be taught new Google Cloud concepts. You are expected to extend your learned skills, like changing default values and reading and researching error messages to fix your own mistakes.
To score 100% you must successfully complete all tasks within the time period!
Topics tested
Setting up a role-oriented structure
Create access groups
Adding users and managing credentials
Enable/disable services
Configure user access to services
Setup and requirements
Before you click the Start Lab button
Read these instructions. Labs are timed and you cannot pause them. The timer, which starts when you click Start Lab, shows how long Google Cloud resources will be made available to you.
This hands-on lab lets you do the lab activities yourself in a real cloud environment, not in a simulation or demo environment. It does so by giving you new, temporary credentials that you use to sign in and access Google Cloud for the duration of the lab.
To complete this lab, you need:
- Access to a standard internet browser (Chrome browser recommended).
Note: Use an Incognito or private browser window to run this lab. This prevents any conflicts between your personal account and the Student account, which may cause extra charges incurred to your personal account.
- Time to complete the lab---remember, once you start, you cannot pause a lab.
Note: If you already have your own personal Google Cloud account or project, do not use it for this lab to avoid extra charges to your account.
Start your lab
When you are ready, click Start Lab in the upper left.
Sign in to the Google Workspace Admin Console
To access the Google Workspace Admin Console, you must find your credentials and then sign in.
Find your lab's User Email and Password
To access the resources and console for this lab, locate the User Email and Password in the Lab Details panel. This panel is on the left or at the top, depending on the width of the browser window. Use these credentials to log in to the Google Workspace Admin Console.
If your lab requires other resource identifiers or connection-related information, they appear on this panel as well.
Sign in to the Admin Console
- Click Open Google Workspace Admin Console.
Tip: Open the tabs in separate windows, side-by-side.
Note: If you see the Verify your account dialog:
Click Next.
Click the prefilled user.
Click Use another account.
On the Sign in page, log in using the User Email and Password details provided.
When prompted, click I understand and ACCEPT TERMS OF SERVICE to accept all terms and conditions.
After a few seconds, the Admin Console opens.
Right-click VERIFY DOMAIN in either the yellow box at the top or the red box in the Domains card, and select Open link in new tab.
Note: To complete this step in a real-life scenario, you'd need to add an actual DNS record.
Click the new tab, called Domain setup, to complete the Google Workspace domain verification steps.
On the Let's set up your domain page, click Get Started.
Select the My domain uses a different host checkbox and then click Continue.
At the bottom of the Add verification code page, select the Come back here and confirm once you have updated the code on your domain host checkbox, and then click Confirm.
Wait until it says Your domain is verified! and then close the Domain setup tab.
Note: Do not click Activate Gmail.
Return to the Admin Console tab and refresh the page.
Challenge scenario
A school wants to use distance learning for:
Students not able to attend classes in person
Supervision of
advanced projects
The school, using Google Workspace for Education, will test this approach across one grade level. As the system administrator, you are responsible for:
Setting up the structure
Adding users
Configuring access to apps and services using organizational units (OUs) and groups.
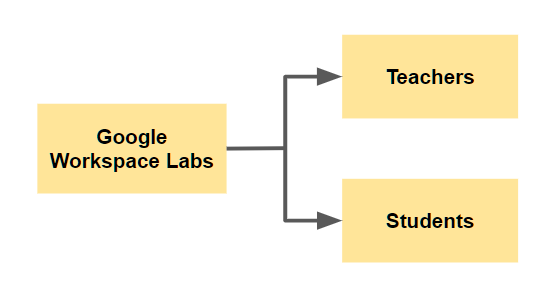
Task 1. Set up the structure
- Set up a role-oriented structure that will have two child OUs "Students" and "Teachers".
Click Check my progress to verify the objective.
Set up the structure
Check my progress
Task 2. Assign access to OUs
- To help teachers effectively present to the classes, assign access so that: Jamboard is disabled for all users.
Hint: The settings of parent OU are inherited by the child OUs by default.
Only teachers can use Jamboard.
Click Check my progress to verify the objective.
Assign access to OUs
Check my progress
Task 3. Create access groups
To address the needs of different classes, create these access groups:
Chemistry- for thechemistryclassHistory- for thehistoryclassComputer Science- for thecomputer scienceclassAdvanced Projects- for work onadvanced projects
Click Check my progress to verify the objective.
Create access groups
Check my progress
Task 4. Password recovery
To reduce admin support calls, set password recovery so that:
Teachers can reset their own passwords.
Students in the
Advanced Projectsgroup can reset their own passwords.All other students must contact the admin to reset their passwords.
Click Check my progress to verify the objective.
Password recovery
Check my progress
Task 5. Set up services
To provide the collaboration services required for remote learning, configure the following:
Classroom - enabled for all
Google Meet - enabled for all
Calendar - enable for the
historyteacher andhistorystudents so they can see the schedule for museum tripsGmail - enable for teachers and only students working on
Advanced ProjectsProjectsDrive - disable external files sharing for teachers and students
Click Check my progress to verify the objective.
Setup services
Check my progress
Task 6. Configure Google Meet
- To ensure class sessions can be managed effectively and securely, configure Google Meet as follows:
Dial-in access is not allowed.
Only teachers and
chemistrystudents can record.
Hint: Disable this option for everyone prior to configuring the above setting.
Only users from your domain (organization) can join.
Only teachers can replace background with an image.
Hint: Disable this option for everyone prior to configuring the above setting.
Click Check my progress to verify the objective.
Configure Google Meet
Check my progress
Task 7. Configure Classroom
- To prevent unauthorized changes to classrooms, configure Classroom so that only teachers can unenroll students from classes.
Click Check my progress to verify the objective.
Configure Classroom
Check my progress
Task 8. Add users
- Add users to the Teachers OU and Students OU as follows:
| -- | Teachers | Students |
| Oliver Fry | X | - |
| Amelia Hill | X | - |
| Jade Miller | - | X |
| Simon Patel | - | X |
| Hannah Moon | - | X |
| Nathan Sims | - | X |
| Amelia Clark | - | X |
| Jonas Kane | - | X |
- Assign teachers and students to access groups as follows:
| -- | Chemistry | History | Computer Science | Advanced Projects |
| Oliver Fry | X | - | - | X |
| Amelia Hill | - | X | X | X |
| Jade Miller | X | X | X | X |
| Simon Patel | X | - | X | - |
| Hannah Moon | X | X | - | X |
| Nathan Sims | X | X | - | - |
| Amelia Clark | X | X | X | X |
| Jonas Kane | - | X | - | - |
Click Check my progress to verify the objective.
Add users
Check my progress
Solution of Lab
Download file: File CSV


