Hosting a Web App on Google Cloud Using Compute Engine - GSP662

A passionate full-stack developer from @ePlus.DEV
Overview
There are many ways to deploy web sites within Google Cloud. Each solution offers different features, capabilities, and levels of control. Compute Engine offers a deep level of control over the infrastructure used to run a web site, but also requires a little more operational management compared to solutions like Google Kubernetes Engines (GKE), App Engine, or others. With Compute Engine, you have fine-grained control of aspects of the infrastructure, including the virtual machines, load balancers, and more.
In this lab you will deploy a sample application, the "Fancy Store" ecommerce website, to show how a website can be deployed and scaled easily with Compute Engine.
What you'll learn
In this lab you learn how to:
Create Compute Engine instances
Create instance templates from source instances
Create managed instance groups
Create and test managed instance group health checks
Create HTTP(S) Load Balancers
Create load balancer health checks
Use a Content Delivery Network (CDN) for Caching
At the end of the lab, you will have instances inside managed instance groups to provide autohealing, load balancing, autoscaling, and rolling updates for your website.
Task 1. Enable Compute Engine API
- Enable the Compute Engine API by executing the following:
gcloud services enable compute.googleapis.com
Task 2.Create Cloud Storage bucket
You will use a Cloud Storage bucket to house your built code as well as your startup scripts.
- FromCloud Shell, execute the followingto createa new Cloud Storage bucket:
gsutil mb gs://fancy-store-$DEVSHELL_PROJECT_ID
Note: Use of the $DEVSHELL_PROJECT_ID environment variable within Cloud Shell is tohelp ensure the names of objectsare unique. Since all Project IDs within Google Cloud must be unique, appending the ProjectID should make other names unique as well.
Click Check my progress to verify the objective.
Create Cloud Storage bucket
Check myprogress
Task3.Clone source repository
Use the existing Fancy Store ecommerce website based on the monolith-to-microservices repository as the basis for your website.
Clone the source code so you can focus on the aspects of deploying to Compute Engine. Later on in this lab, you will perform a small update to the code to demonstrate the simplicity of updating on Compute Engine.
- Clone the source code and then navigate to the
monolith-to-microservicesdirectory:
git clone https://github.com/googlecodelabs/monolith-to-microservices.git
cd ~/monolith-to-microservices
- Run the initial build of the code to allow the application to run locally:
./setup.sh
It will take a few minutes for this script to finish.
- Once completed, ensure Cloud Shell is running a compatible nodeJS version with the following command:
nvm install --lts
- Next, run the following to test the application, switch to the
microservicesdirectory, and start the web server:
cd microservices
npm start
You should see the following output:
Products microservice listening on port 8082!
Frontend microservice listening on port 8080!
Orders microservice listening on port 8081!
- Preview your application by clicking the web preview icon then selecting Preview on port 8080.
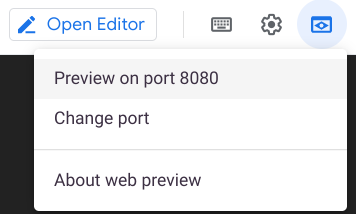
This opens a new window where you can see the frontend of Fancy Store.
Note: Within the Preview option, you should be able to see the Frontend; however, the Products and Orders functions will not work, as those services are not yet exposed.
- Close this window after viewing the website and then press CTRL+C in the terminal window to stop the web server process.
Task 4. Create Compute Engine instances
Now it's time to start deploying some Compute Engine instances!
In the following steps you will:
Create a startup script to configure instances.
Clone source code and upload to Cloud Storage.
Deploy a Compute Engine instance to host the backend microservices.
Reconfigure the frontend code to utilize the backend microservices instance.
Deploy a Compute Engine instance to host the frontend microservice.
Configure the network to allow communication.
Create the startup script
A startup script will be used to instruct the instance what to do each time it is started. This way the instances are automatically configured.
- In Cloud Shell, run the following command to create a file called
startup-script.sh:
touch ~/monolith-to-microservices/startup-script.sh
- Click Open Editor in the Cloud Shell ribbon to open the Code Editor.

Navigate to the
monolith-to-microservicesfolder.Add the following code to the
startup-script.shfile. You will edit some of the code after it's added:
#!/bin/bash

# Install logging monitor. The monitor will automatically pick up logs sent to
# syslog.
curl -s "https://storage.googleapis.com/signals-agents/logging/google-fluentd-install.sh" | bash
service google-fluentd restart &

# Install dependencies from apt
apt-get update
apt-get install -yq ca-certificates git build-essential supervisor psmisc

# Install nodejs
mkdir /opt/nodejs
curl https://nodejs.org/dist/v16.14.0/node-v16.14.0-linux-x64.tar.gz | tar xvzf - -C /opt/nodejs --strip-components=1
ln -s /opt/nodejs/bin/node /usr/bin/node
ln -s /opt/nodejs/bin/npm /usr/bin/npm

# Get the application source code from the Google Cloud Storage bucket.
mkdir /fancy-store
gsutil -m cp -r gs://fancy-store-[DEVSHELL_PROJECT_ID]/monolith-to-microservices/microservices/* /fancy-store/

# Install app dependencies.
cd /fancy-store/
npm install

# Create a nodeapp user. The application will run as this user.
useradd -m -d /home/nodeapp nodeapp
chown -R nodeapp:nodeapp /opt/app

# Configure supervisor to run the node app.
cat >/etc/supervisor/conf.d/node-app.conf << EOF
[program:nodeapp]
directory=/fancy-store
command=npm start
autostart=true
autorestart=true
user=nodeapp
environment=HOME="/home/nodeapp",USER="nodeapp",NODE_ENV="production"
stdout_logfile=syslog
stderr_logfile=syslog
EOF

supervisorctl reread
supervisorctl update
- Find the text
[DEVSHELL_PROJECT_ID]in the file and replace it with your Project ID:qwiklabs-gcp-00-dfaa462bfe4f
The line of code within startup-script.sh should now resemble:
gs://fancy-store-qwiklabs-gcp-00-dfaa462bfe4f/monolith-to-microservices/microservices/* /fancy-store/
Save the
startup-script.shfile, but do not close it yet.Look at the bottom right of Cloud Shell Code Editor, and ensure "End of Line Sequence" is set to "LF" and not "CRLF".

If this is set to CRLF, click CRLF and then select LF in the drop down.
If this is already set to LF, then leave as is.
Close the
startup-script.shfile.Return to Cloud Shell Terminal and run the following to copy the
startup-script.shfile into your bucket:
gsutil cp ~/monolith-to-microservices/startup-script.sh gs://fancy-store-$DEVSHELL_PROJECT_ID
It will now be accessible at: https://storage.googleapis.com/[BUCKET_NAME]/startup-script.sh.
[BUCKET_NAME] represents the name of the Cloud Storage bucket. This will only be viewable by authorized users and service accounts by default, therefor inaccessible through a web browser. Compute Engine instances will automatically be able to access this through their service account.
The startup script performs the following tasks:
Installs the Logging agent. The agent automatically collects logs from syslog.
Installs Node.js and Supervisor. Supervisor runs the app as a daemon.
Clones the app's source code from Cloud Storage Bucket and installs dependencies.
Configures Supervisor to run the app. Supervisor makes sure the app is restarted if it exits unexpectedly or is stopped by an admin or process. It also sends the app's stdout and stderr to syslog for the Logging agent to collect.
Copy code into the Cloud Storage bucket
When instances launch, they pull code from the Cloud Storage bucket, so you can store some configuration variables within the .env file of the code.
Note: You could also code this to pull environment variables from elsewhere, but for demonstration purposes, this is a simple method to handle configuration. In production, environment variables would likely be stored outside of the code.
- Copy the cloned code into your bucket:
cd ~
rm -rf monolith-to-microservices/*/node_modules
gsutil -m cp -r monolith-to-microservices gs://fancy-store-$DEVSHELL_PROJECT_ID/
Note: The node_modules dependencies directories are deleted to ensure the copy is as fast and efficient as possible. These are recreated on the instances when they start up.
Click Check my progress to verify the objective.
Copy startup script and code to Cloud Storage bucket
Check my progress
Deploy the backend instance
The first instance to be deployed will be the backend instance which will house the Orders and Products microservices.
Note: In a production environment, you may want to separate each microservice into their own instance and instance group to allow them to scale independently. For demonstration purposes, both backend microservices (Orders & Products) will reside on the same instance and instance group.
- Execute the following command to create an
e2-standard-2instance that is configured to use the startup script. It is tagged as abackendinstance so you can apply specific firewall rules to it later:
gcloud compute instances create backend \
    --zone=$ZONE \
    --machine-type=e2-standard-2 \
    --tags=backend \
   --metadata=startup-script-url=https://storage.googleapis.com/fancy-store-$DEVSHELL_PROJECT_ID/startup-script.sh
Configure a connection to the backend
Before you deploy the frontend of the application, you need to update the configuration to point to the backend you just deployed.
- Retrieve the external IP address of the backend with the following command, look under the
EXTERNAL_IPtab for the backend instance:
gcloud compute instances list
Example output:
NAME: backend
ZONE: us-east4-c
MACHINE_TYPE: e2-standard-2
PREEMPTIBLE:
INTERNAL_IP: 10.142.0.2
EXTERNAL_IP: 35.237.245.193
STATUS: RUNNING
Copy the External IP for the backend.
In the Cloud Shell Explorer, navigate to
monolith-to-microservices>react-app.In the Code Editor, select View > Toggle Hidden Files in order to see the
.envfile.
In the next step, you edit the .env file to point to the External IP of the backend. [BACKEND_ADDRESS] represents the External IP address of the backend instance determined from the above gcloud command.
- In the
.envfile, replacelocalhostwith your[BACKEND_ADDRESS]:
REACT_APP_ORDERS_URL=http://[BACKEND_ADDRESS]:8081/api/orders
REACT_APP_PRODUCTS_URL=http://[BACKEND_ADDRESS]:8082/api/products
Save the file.
In Cloud Shell, run the following to rebuild
react-app, which will update the frontend code:
cd ~/monolith-to-microservices/react-app
npm install && npm run-script build
- Then copy the application code into the Cloud Storage bucket:
cd ~
rm -rf monolith-to-microservices/*/node_modules
gsutil -m cp -r monolith-to-microservices gs://fancy-store-$DEVSHELL_PROJECT_ID/
Deploy the frontend instance
Now that the code is configured, deploy the frontend instance.
- Execute the following to deploy the
frontendinstance with a similar command as before. This instance is tagged asfrontendfor firewall purposes:
gcloud compute instances create frontend \
    --zone=$ZONE \
    --machine-type=e2-standard-2 \
    --tags=frontend \
    --metadata=startup-script-url=https://storage.googleapis.com/fancy-store-$DEVSHELL_PROJECT_ID/startup-script.sh
Note: The deployment command and startup script is used with both the frontend and backend instances for simplicity, and because the code is configured to launch all microservices by default. As a result, all microservices run on both the frontend and backend in this sample. In a production environment you'd only run the microservices you need on each component.
Configure the network
- Create firewall rules to allow access to port 8080 for the frontend, and ports 8081-8082 for the backend. These firewall commands use the tags assigned during instance creation for application:
gcloud compute firewall-rules create fw-fe \
    --allow tcp:8080 \
    --target-tags=frontend
gcloud compute firewall-rules create fw-be \
    --allow tcp:8081-8082 \
    --target-tags=backend
The website should now be fully functional.
- In order to navigate to the external IP of the
frontend, you need to know the address. Run the following and look for the EXTERNAL_IP of thefrontendinstance:
gcloud compute instances list
Example output:
NAME: backend
ZONE: us-central1-f
MACHINE_TYPE: e2-standard-2
PREEMPTIBLE:
INTERNAL_IP: 10.128.0.2
EXTERNAL_IP: 34.27.178.79
STATUS: RUNNING

NAME: frontend
ZONE: us-central1-f
MACHINE_TYPE: e2-standard-2
PREEMPTIBLE:
INTERNAL_IP: 10.128.0.3
EXTERNAL_IP: 34.172.241.242
STATUS: RUNNING
It may take a couple minutes for the instance to start and be configured.
Wait 3 minutes and then open a new browser tab and browse to
http://[FRONTEND_ADDRESS]:8080to access the website, where [FRONTEND_ADDRESS] is the frontend EXTERNAL_IP determined above.Try navigating to the Products and Orders pages; these should now work.

Click Check my progress to verify the objective.
Deploy instances and configure network
Check my progress
Task 5. Create managed instance groups
To allow the application to scale, managed instance groups will be created and will use the frontend and backend instances as Instance Templates.
A managed instance group (MIG) contains identical instances that you can manage as a single entity in a single zone. Managed instance groups maintain high availability of your apps by proactively keeping your instances available, that is, in the RUNNING state. You will be using managed instance groups for your frontend and backend instances to provide autohealing, load balancing, autoscaling, and rolling updates.
Create instance template from source instance
Before you can create a managed instance group, you have to first create an instance template that will be the foundation for the group. Instance templates allow you to define the machine type, boot disk image or container image, network, and other instance properties to use when creating new VM instances. You can use instance templates to create instances in a managed instance group or even to create individual instances.
To create the instance template, use the existing instances you created previously.
- First, stop both instances:
gcloud compute instances stop frontend --zone=$ZONE
gcloud compute instances stop backend --zone=$ZONE
- Then, create the instance template from each of the source instances:
gcloud compute instance-templates create fancy-fe \
    --source-instance-zone=$ZONE \
    --source-instance=frontend
gcloud compute instance-templates create fancy-be \
    --source-instance-zone=$ZONE \
    --source-instance=backend
- Confirm the instance templates were created:
gcloud compute instance-templates list
Example output:
NAME: fancy-be
MACHINE_TYPE: e2-standard-2
PREEMPTIBLE:
CREATION_TIMESTAMP: 2023-07-25T14:52:21.933-07:00

NAME: fancy-fe
MACHINE_TYPE: e2-standard-2
PREEMPTIBLE:
CREATION_TIMESTAMP: 2023-07-25T14:52:15.442-07:00
- With the instance templates created, delete the
backendvm to save resource space:
gcloud compute instances delete backend --zone=$ZONE
- Type and enter y when prompted.
Normally, you could delete the frontend vm as well, but you will use it to update the instance template later in the lab.
Create managed instance group
- Next, create two managed instance groups, one for the frontend and one for the backend:
gcloud compute instance-groups managed create fancy-fe-mig \
    --zone=$ZONE \
    --base-instance-name fancy-fe \
    --size 2 \
    --template fancy-fe
gcloud compute instance-groups managed create fancy-be-mig \
    --zone=$ZONE \
    --base-instance-name fancy-be \
    --size 2 \
    --template fancy-be
These managed instance groups will use the instance templates and are configured for two instances each within each group to start. The instances are automatically named based on the base-instance-name specified with random characters appended.
- For your application, the
frontendmicroservice runs on port 8080, and thebackendmicroservice runs on port 8081 forordersand port 8082 for products:
gcloud compute instance-groups set-named-ports fancy-fe-mig \
    --zone=$ZONE \
    --named-ports frontend:8080
gcloud compute instance-groups set-named-ports fancy-be-mig \
    --zone=$ZONE \
    --named-ports orders:8081,products:8082
Since these are non-standard ports, you specify named ports to identify these. Named ports are key:value pair metadata representing the service name and the port that it's running on. Named ports can be assigned to an instance group, which indicates that the service is available on all instances in the group. This information is used by the HTTP Load Balancing service that will be configured later.
Configure autohealing
To improve the availability of the application itself and to verify it is responding, configure an autohealing policy for the managed instance groups.
An autohealing policy relies on an application-based health check to verify that an app is responding as expected. Checking that an app responds is more precise than simply verifying that an instance is in a RUNNING state, which is the default behavior.
Note: Separate health checks for load balancing and for autohealing will be used. Health checks for load balancing can and should be more aggressive because these health checks determine whether an instance receives user traffic. You want to catch non-responsive instances quickly so you can redirect traffic if necessary. In contrast, health checking for autohealing causes Compute Engine to proactively replace failing instances, so this health check should be more conservative than a load balancing health check.
- Create a health check that repairs the instance if it returns "unhealthy" 3 consecutive times for the
frontendandbackend:
gcloud compute health-checks create http fancy-fe-hc \
    --port 8080 \
    --check-interval 30s \
    --healthy-threshold 1 \
    --timeout 10s \
    --unhealthy-threshold 3
gcloud compute health-checks create http fancy-be-hc \
    --port 8081 \
    --request-path=/api/orders \
    --check-interval 30s \
    --healthy-threshold 1 \
    --timeout 10s \
    --unhealthy-threshold 3
- Create a firewall rule to allow the health check probes to connect to the microservices on ports 8080-8081:
gcloud compute firewall-rules create allow-health-check \
    --allow tcp:8080-8081 \
    --source-ranges 130.211.0.0/22,35.191.0.0/16 \
    --network default
- Apply the health checks to their respective services:
gcloud compute instance-groups managed update fancy-fe-mig \
    --zone=$ZONE \
    --health-check fancy-fe-hc \
    --initial-delay 300
gcloud compute instance-groups managed update fancy-be-mig \
    --zone=$ZONE \
    --health-check fancy-be-hc \
    --initial-delay 300
Note: It can take 15 minutes before autohealing begins monitoring instances in the group.
- Continue with the lab to allow some time for autohealing to monitor the instances in the group. You will simulate a failure to test the autohealing at the end of the lab.
Click Check my progress to verify the objective.
Create managed instance groups
Task 6. Create load balancers
To complement your managed instance groups, use HTTP(S) Load Balancers to serve traffic to the frontend and backend microservices, and use mappings to send traffic to the proper backend services based on pathing rules. This exposes a single load balanced IP for all services.
You can learn more about the Load Balancing options on Google Cloud: Overview of Load Balancing.
Create HTTP(S) load balancer
Google Cloud offers many different types of load balancers. For this lab you use an HTTP(S) Load Balancer for your traffic. An HTTP load balancer is structured as follows:
A forwarding rule directs incoming requests to a target HTTP proxy.
The target HTTP proxy checks each request against a URL map to determine the appropriate backend service for the request.
The backend service directs each request to an appropriate backend based on serving capacity, zone, and instance health of its attached backends. The health of each backend instance is verified using an HTTP health check. If the backend service is configured to use an HTTPS or HTTP/2 health check, the request will be encrypted on its way to the backend instance.
Sessions between the load balancer and the instance can use the HTTP, HTTPS, or HTTP/2 protocol. If you use HTTPS or HTTP/2, each instance in the backend services must have an SSL certificate.
Note: For demonstration purposes in order to avoid SSL certificate complexity, use HTTP instead of HTTPS. For production, it is recommended to use HTTPS for encryption wherever possible.
- Create health checks that will be used to determine which instances are capable of serving traffic for each service:
gcloud compute http-health-checks create fancy-fe-frontend-hc \
  --request-path / \
  --port 8080
gcloud compute http-health-checks create fancy-be-orders-hc \
  --request-path /api/orders \
  --port 8081
gcloud compute http-health-checks create fancy-be-products-hc \
  --request-path /api/products \
  --port 8082
Note: These health checks are for the load balancer, and only handle directing traffic from the load balancer; they do not cause the managed instance groups to recreate instances.
- Create backend services that are the target for load-balanced traffic. The backend services will use the health checks and named ports you created:
gcloud compute backend-services create fancy-fe-frontend \
  --http-health-checks fancy-fe-frontend-hc \
  --port-name frontend \
  --global
gcloud compute backend-services create fancy-be-orders \
  --http-health-checks fancy-be-orders-hc \
  --port-name orders \
  --global
gcloud compute backend-services create fancy-be-products \
  --http-health-checks fancy-be-products-hc \
  --port-name products \
  --global
- Add the Load Balancer's backend services:
gcloud compute backend-services add-backend fancy-fe-frontend \
  --instance-group-zone=$ZONE \
  --instance-group fancy-fe-mig \
  --global
gcloud compute backend-services add-backend fancy-be-orders \
  --instance-group-zone=$ZONE \
  --instance-group fancy-be-mig \
  --global
gcloud compute backend-services add-backend fancy-be-products \
  --instance-group-zone=$ZONE \
  --instance-group fancy-be-mig \
  --global
- Create a URL map. The URL map defines which URLs are directed to which backend services:
gcloud compute url-maps create fancy-map \
  --default-service fancy-fe-frontend
- Create a path matcher to allow the
/api/ordersand/api/productspaths to route to their respective services:
gcloud compute url-maps add-path-matcher fancy-map \
   --default-service fancy-fe-frontend \
   --path-matcher-name orders \
   --path-rules "/api/orders=fancy-be-orders,/api/products=fancy-be-products"
- Create the proxy which ties to the URL map:
gcloud compute target-http-proxies create fancy-proxy \
  --url-map fancy-map
- Create a global forwarding rule that ties a public IP address and port to the proxy:
gcloud compute forwarding-rules create fancy-http-rule \
  --global \
  --target-http-proxy fancy-proxy \
  --ports 80
Click Check my progress to verify the objective.
Create HTTP(S) load balancers
Update the configuration
Now that you have a new static IP address, update the code on the frontend to point to this new address instead of the ephemeral address used earlier that pointed to the backend instance.
- In Cloud Shell, change to the
react-appfolder which houses the.envfile that holds the configuration:
cd ~/monolith-to-microservices/react-app/
- Find the IP address for the Load Balancer:
gcloud compute forwarding-rules list --global
Example output:
NAME: fancy-http-rule
REGION:
IP_ADDRESS: 34.111.203.235
IP_PROTOCOL: TCP
TARGET: fancy-proxy
- Return to the Cloud Shell Editor and edit the
.envfile again to point to Public IP of Load Balancer. [LB_IP] represents the External IP address of the backend instance determined above.
REACT_APP_ORDERS_URL=http://[LB_IP]/api/orders
REACT_APP_PRODUCTS_URL=http://[LB_IP]/api/products
Note: The ports are removed in the new address because the load balancer is configured to handle this forwarding for you.
Save the file.
Rebuild
react-app, which will update the frontend code:
cd ~/monolith-to-microservices/react-app
npm install && npm run-script build
- Copy the application code into your bucket:
cd ~
rm -rf monolith-to-microservices/*/node_modules
gsutil -m cp -r monolith-to-microservices gs://fancy-store-$DEVSHELL_PROJECT_ID/
Update the frontend instances
Now that there is new code and configuration, you want the frontend instances within the managed instance group to pull the new code.
Since your instances pull the code at startup, you can issue a rolling restart command:
gcloud compute instance-groups managed rolling-action replace fancy-fe-mig \
    --zone=$ZONE \
    --max-unavailable 100%
Note: In this example of a rolling replace, you specifically state that all machines can be replaced immediately through the --max-unavailable parameter. Without this parameter, the command would keep an instance alive while restarting others to ensure availability. For testing purposes, you specify to replace all immediately for speed.
Click Check my progress to verify the objective.
Update the frontend instances
Test the website
- Wait 3 minutes after issuing the
rolling-action replacecommand in order to give the instances time to be processed, and then check the status of the managed instance group. Run the following to confirm the service is listed as HEALTHY:
watch -n 2 gcloud compute backend-services get-health fancy-fe-frontend --global
- Wait until the 2 services are listed as HEALTHY.
Example output:
backend: https://www.googleapis.com/compute/v1/projects/my-gce-codelab/zones/us-central1-a/instanceGroups/fancy-fe-mig
status:
healthStatus:

- healthState: HEALTHY
  instance: https://www.googleapis.com/compute/v1/projects/my-gce-codelab/zones/us-central1-a/instances/fancy-fe-x151
  ipAddress: 10.128.0.7
  port: 8080
- healthState: HEALTHY
  instance: https://www.googleapis.com/compute/v1/projects/my-gce-codelab/zones/us-central1-a/instances/fancy-fe-cgrt
  ipAddress: 10.128.0.11
  port: 8080
  kind: compute#backendServiceGroupHealth
Note: If one instance encounters an issue and is UNHEALTHY it should automatically be repaired. Wait for this to happen.
If neither instance enters a HEALTHY state after waiting a little while, something is wrong with the setup of the frontend instances that accessing them on port 8080 doesn't work. Test this by browsing to the instances directly on port 8080.
- Once both items appear as HEALTHY on the list, exit the
watchcommand by pressing CTRL+C.
Note: The application will be accessible via http://[LB_IP] where [LB_IP] is the IP_ADDRESS specified for the Load Balancer, which can be found with the following command:
gcloud compute forwarding-rules list --global
You'll be checking the application later in the lab.
Task 7. Scaling Compute Engine
So far, you have created two managed instance groups with two instances each. This configuration is fully functional, but a static configuration regardless of load. Next, you create an autoscaling policy based on utilization to automatically scale each managed instance group.
Automatically resize by utilization
- To create the autoscaling policy, execute the following:
gcloud compute instance-groups managed set-autoscaling \
  fancy-fe-mig \
  --zone=$ZONE \
  --max-num-replicas 2 \
  --target-load-balancing-utilization 0.60
gcloud compute instance-groups managed set-autoscaling \
  fancy-be-mig \
  --zone=$ZONE \
  --max-num-replicas 2 \
  --target-load-balancing-utilization 0.60
These commands create an autoscaler on the managed instance groups that automatically adds instances when utilization is above 60% utilization, and removes instances when the load balancer is below 60% utilization.
Enable content delivery network
Another feature that can help with scaling is to enable a Content Delivery Network service, to provide caching for the frontend.
- Execute the following command on the frontend service:
gcloud compute backend-services update fancy-fe-frontend \
    --enable-cdn --global
When a user requests content from the HTTP(S) load balancer, the request arrives at a Google Front End (GFE) which first looks in the Cloud CDN cache for a response to the user's request. If the GFE finds a cached response, the GFE sends the cached response to the user. This is called a cache hit.
If the GFE can't find a cached response for the request, the GFE makes a request directly to the backend. If the response to this request is cacheable, the GFE stores the response in the Cloud CDN cache so that the cache can be used for subsequent requests.
Click Check my progress to verify the objective.
Scaling Compute Engine
Task 8. Update the website
Updating instance template
Existing instance templates are not editable; however, since your instances are stateless and all configuration is done through the startup script, you only need to change the instance template if you want to change the template settings . Now you're going to make a simple change to use a larger machine type and push that out.
Complete the following steps to:
Update the
frontendinstance, which acts as the basis for the instance template. During the update, put a file on the updated version of the instance template's image, then update the instance template, roll out the new template, and then confirm the file exists on the managed instance group instances.Modify the machine type of your instance template, by switching from the
e2-standard-2machine type toe2-small.
- Run the following command to modify the machine type of the frontend instance:
gcloud compute instances set-machine-type frontend \
  --zone=$ZONE \
  --machine-type e2-small
Copied!content_copy
- Create the new Instance Template:
gcloud compute instance-templates create fancy-fe-new \
    --region=$REGION \
    --source-instance=frontend \
    --source-instance-zone=$ZONE
Copied!content_copy
- Roll out the updated instance template to the Managed Instance Group:
gcloud compute instance-groups managed rolling-action start-update fancy-fe-mig \
  --zone=$ZONE \
  --version template=fancy-fe-new
Copied!content_copy
- Wait 3 minutes, and then run the following to monitor the status of the update:
watch -n 2 gcloud compute instance-groups managed list-instances fancy-fe-mig \
  --zone=$ZONE
This will take a few moments.
Once you have at least 1 instance in the following condition:
STATUS: RUNNING
ACTION set to None
INSTANCE_TEMPLATE: the new template name (fancy-fe-new)
Copy the name of one of the machines listed for use in the next command.
CTRL+C to exit the
watchprocess.Run the following to see if the virtual machine is using the new machine type (e2-small), where [VM_NAME] is the newly created instance:
gcloud compute instances describe [VM_NAME] --zone=$ZONE | grep machineType
Expected example output:
machineType: https://www.googleapis.com/compute/v1/projects/project-name/zones/us-central1-f/machineTypes/e2-small
Make changes to the website
Scenario: Your marketing team has asked you to change the homepage for your site. They think it should be more informative of who your company is and what you actually sell.
Task: Add some text to the homepage to make the marketing team happy! It looks like one of the developers has already created the changes with the file name index.js.new. You can just copy this file to index.js and the changes should be reflected. Follow the instructions below to make the appropriate changes.
- Run the following commands to copy the updated file to the correct file name:
cd ~/monolith-to-microservices/react-app/src/pages/Home
mv index.js.new index.js
- Print the file contents to verify the changes:
cat ~/monolith-to-microservices/react-app/src/pages/Home/index.js
The resulting code should look like this:
/*
Copyright 2019 Google LLC

Licensed under the Apache License, Version 2.0 (the "License");
you may not use this file except in compliance with the License.
You may obtain a copy of the License at

    https://www.apache.org/licenses/LICENSE-2.0

Unless required by applicable law or agreed to in writing, software
distributed under the License is distributed on an "AS IS" BASIS,
WITHOUT WARRANTIES OR CONDITIONS OF ANY KIND, either express or implied.
See the License for the specific language governing permissions and
limitations under the License.
*/
import React from "react";
import { Box, Paper, Typography } from "@mui/material";

export default function Home() {
  return (
    <Box sx={{ flexGrow: 1 }}>
      <Paper
        elevation={3}
        sx={{
          width: "800px",
          margin: "0 auto",
          padding: (theme) => theme.spacing(3, 2),
        }}
      >
        <Typography variant="h5">Welcome to the Fancy Store!</Typography>
        <br />
        <Typography variant="body1">
          Take a look at our wide variety of products.
        </Typography>
      </Paper>
    </Box>
  );
}
You updated the React components, but you need to build the React app to generate the static files.
- Run the following command to build the React app and copy it into the monolith public directory:
cd ~/monolith-to-microservices/react-app
npm install && npm run-script build
- Then re-push this code to the bucket:
cd ~
rm -rf monolith-to-microservices/*/node_modules
gsutil -m cp -r monolith-to-microservices gs://fancy-store-$DEVSHELL_PROJECT_ID/
Push changes with rolling replacements
- Now force all instances to be replaced to pull the update:
gcloud compute instance-groups managed rolling-action replace fancy-fe-mig \
  --zone=$ZONE \
  --max-unavailable=100%
Note: In this example of a rolling replace, you specifically state that all machines can be replaced immediately through the --max-unavailable parameter. Without this parameter, the command would keep an instance alive while replacing others. For testing purposes, you specify to replace all immediately for speed. In production, leaving a buffer would allow the website to continue serving the website while updating.
Click Check my progress to verify the objective.
Update the website
Check my progress
- Wait 3 minutes after issuing the
rolling-action replacecommand in order to give the instances time to be processed, and then check the status of the managed instance group. Run the following to confirm the service is listed as HEALTHY:
watch -n 2 gcloud compute backend-services get-health fancy-fe-frontend --global
- Wait a few moments for both services to appear and become HEALTHY.
Example output:
backend: https://www.googleapis.com/compute/v1/projects/my-gce-codelab/zones/us-central1-a/instanceGroups/fancy-fe-mig
status:
healthStatus:

- healthState: HEALTHY
  instance: https://www.googleapis.com/compute/v1/projects/my-gce-codelab/zones/us-central1-a/instances/fancy-fe-x151
  ipAddress: 10.128.0.7
  port: 8080
- healthState: HEALTHY
  instance: https://www.googleapis.com/compute/v1/projects/my-gce-codelab/zones/us-central1-a/instances/fancy-fe-cgrt
  ipAddress: 10.128.0.11
  port: 8080
  kind: compute#backendServiceGroupHealth
Once items appear in the list with HEALTHY status, exit the
watchcommand by pressing CTRL+C.Browse to the website via
http://[LB_IP]where [LB_IP] is the IP_ADDRESS specified for the Load Balancer, which can be found with the following command:
gcloud compute forwarding-rules list --global
The new website changes should now be visible.
Simulate failure
In order to confirm the health check works, log in to an instance and stop the services.
- To find an instance name, execute the following:
gcloud compute instance-groups list-instances fancy-fe-mig --zone=$ZONE
- Copy an instance name, then run the following to secure shell into the instance, where INSTANCE_NAME is one of the instances from the list:
gcloud compute ssh [INSTANCE_NAME] --zone=$ZONE
Type in "y" to confirm, and press Enter twice to not use a password.
Within the instance, use
supervisorctlto stop the application:
sudo supervisorctl stop nodeapp; sudo killall node
- Exit the instance:
exit
- Monitor the repair operations:
watch -n 2 gcloud compute operations list \
--filter='operationType~compute.instances.repair.*'
This will take a few minutes to complete.
Look for the following example output:
NAME                                                  TYPE                                       TARGET                                 HTTP_STATUS  STATUS  TIMESTAMP
repair-1568314034627-5925f90ee238d-fe645bf0-7becce15  compute.instances.repair.recreateInstance  us-central1-a/instances/fancy-fe-1vqq  200          DONE    2019-09-12T11:47:14.627-07:00
The managed instance group recreated the instance to repair it.
- You can also go to Navigation menu > Compute Engine > VM instances to monitor through the console.
Solution of Lab
New Solution
https://www.youtube.com/watch?v=kd4SI1Wlrpg
curl -LO raw.githubusercontent.com/ePlus-DEV/storage/refs/heads/main/labs/GSP662/lab.sh
source lab.sh
Script Alternative
curl -LO https://raw.githubusercontent.com/Itsabhishek7py/GoogleCloudSkillsboost/refs/heads/main/How%20to%20Use%20a%20Network%20Policy%20on%20Google%20Kubernetes%20Engine/drabhishek.sh
sudo chmod +x drabhishek.sh
./drabhishek.sh
Old Solution
https://www.youtube.com/watch?v=dkLTeZuNul4&ab_channel=QuickLab%E2%98%81%EF%B8%8F
NOTE ► Make sure you export the ZONE form Set your region and zone Task. As Shown in the video.

curl -LO raw.githubusercontent.com/quiccklabs/Labs_solutions/master/Hosting%20a%20Web%20App%20on%20Google%20Cloud%20Using%20Compute%20Engine%20updated/quicklabgsp662/task1.sh
sudo chmod +x task1.sh
./task1.sh
curl -LO raw.githubusercontent.com/quiccklabs/Labs_solutions/master/Hosting%20a%20Web%20App%20on%20Google%20Cloud%20Using%20Compute%20Engine%20updated/quicklabgsp662/task2.sh
sudo chmod +x task2.sh
./task2.sh