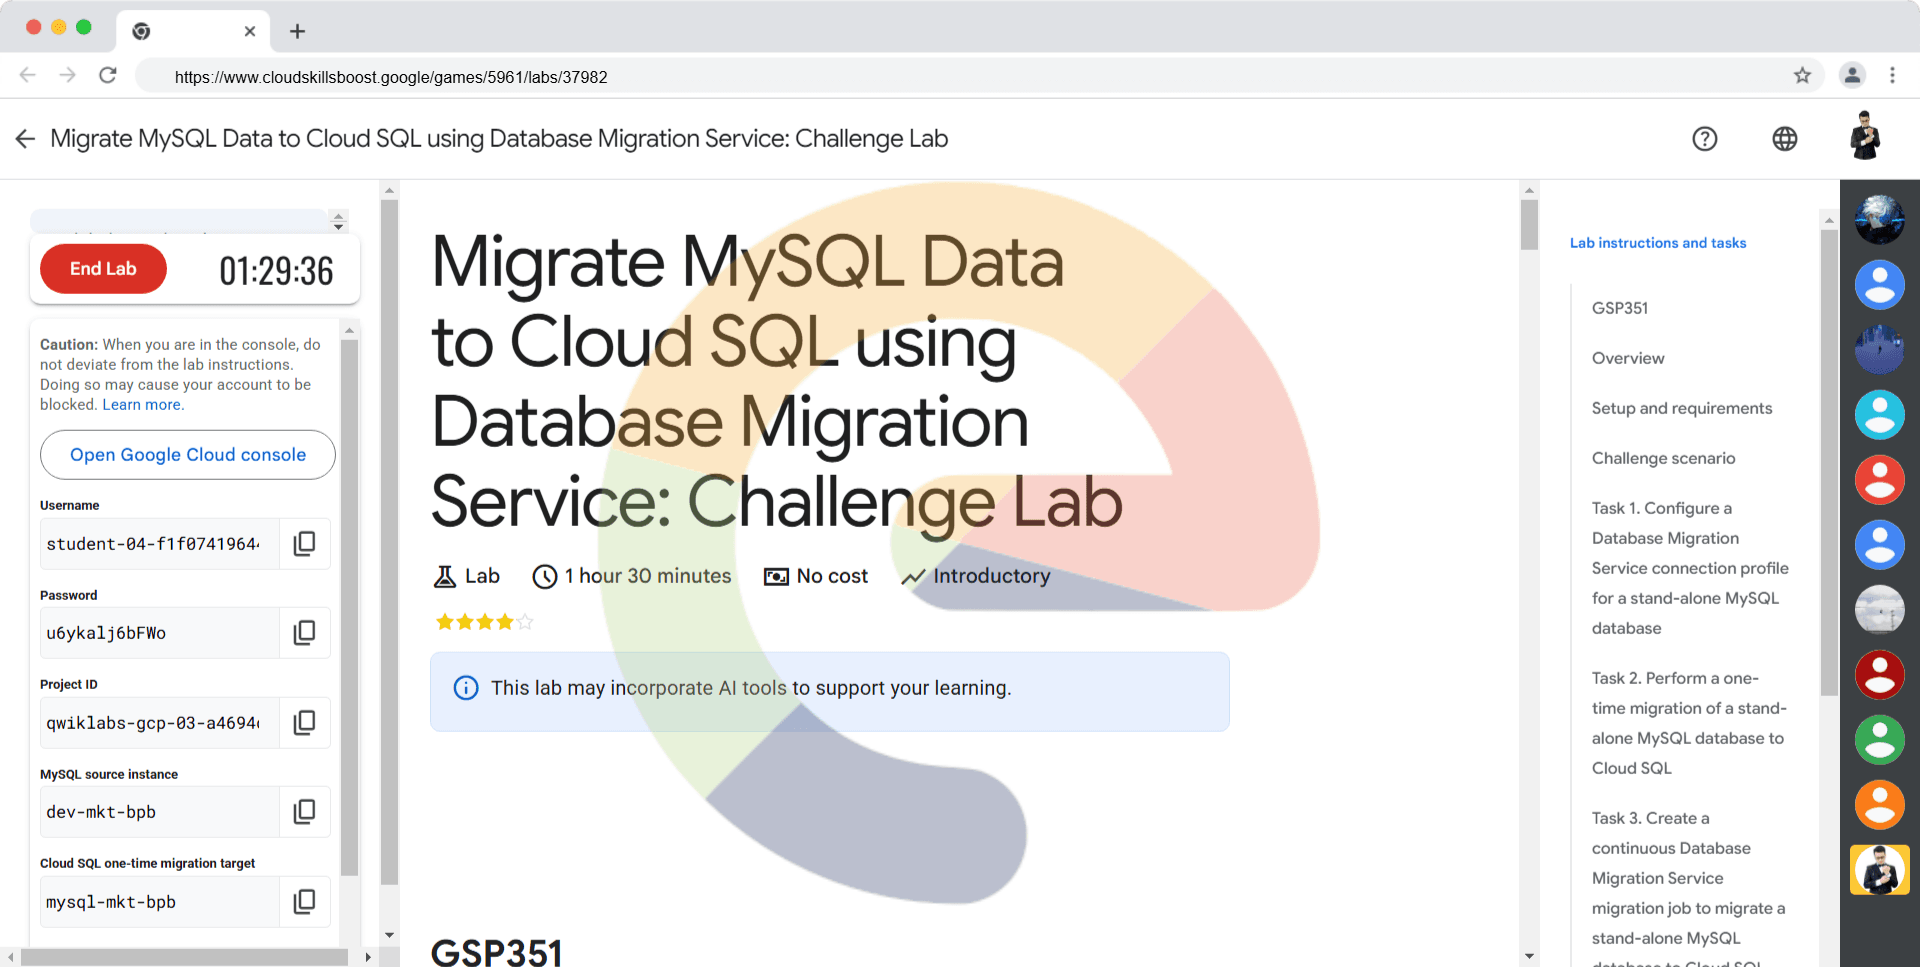
Migrate MySQL Data to Cloud SQL using Database Migration Service: Challenge Lab - GSP351
A passionate full-stack developer from @ePlus.DEV
Overview
In a challenge lab you’re given a scenario and a set of tasks. Instead of following step-by-step instructions, you will use the skills learned from the labs in the course to figure out how to complete the tasks on your own! An automated scoring system (shown on this page) will provide feedback on whether you have completed your tasks correctly.
When you take a challenge lab, you will not be taught new Google Cloud concepts. You are expected to extend your learned skills, like changing default values and reading and researching error messages to fix your own mistakes.
To score 100% you must successfully complete all tasks within the time period!
This lab is recommended for students enrolled in the Migrate MySQL Data to Cloud SQL using Database Migration Service skill badge. Are you ready for the challenge?
Setup and requirements
Before you click the Start Lab button
Read these instructions. Labs are timed and you cannot pause them. The timer, which starts when you click Start Lab, shows how long Google Cloud resources are made available to you.
This hands-on lab lets you do the lab activities in a real cloud environment, not in a simulation or demo environment. It does so by giving you new, temporary credentials you use to sign in and access Google Cloud for the duration of the lab.
To complete this lab, you need:
- Access to a standard internet browser (Chrome browser recommended).
Note: Use an Incognito (recommended) or private browser window to run this lab. This prevents conflicts between your personal account and the student account, which may cause extra charges incurred to your personal account.
- Time to complete the lab—remember, once you start, you cannot pause a lab.
Note: Use only the student account for this lab. If you use a different Google Cloud account, you may incur charges to that account.
Set your region and zone
Certain Compute Engine resources live in regions and zones. A region is a specific geographical location where you can run your resources. Each region has one or more zones.
Run the following gcloud commands in Cloud Shell to set the default region and zone for your lab:
gcloud config set compute/zone "us-west1-a"
export ZONE=$(gcloud config get compute/zone)

gcloud config set compute/region "us-west1"
export REGION=$(gcloud config get compute/region)
Challenge scenario
Your employer has existing MySQL databases running on a Compute Engine instance. They want to migrate this database to two new Cloud SQL instances using two different migration strategies. For the initial migration you must perform a one-time migration using the external IP address of the compute instance to gain access to the source database. For the second migration you have been instructed to use VPC Peering for access to the source database to remove the dependency on the external ip-address.
Before you cut over to the newly migrated database, you must carry out a test to confirm that the migration has been successful. To perform this final test you must make some changes to the source database after the continuous migration job has been started, and then check that those changes are propagated by the Database Migration Service. Finally the destination instance (Cloud SQL for MySQL) must be promoted to a stand-alone database for reading and writing data.
Note: For the purposes of this lab, all of your resources should be created in the following region: us-west1 and zone: us-west1-a.
Task 1. Configure a Database Migration Service connection profile for a stand-alone MySQL database
- To complete this task you must configure a connection profile for the migration of the MySQL source instance, running on a compute instance named
dev-mkt-bpb, to Cloud SQL using a Database Migration Service one-time migration and the external IP address of the source instance.
The credentials for this source database are provided in the table below:
| Property | Value |
| Username | admin |
| Password | changeme |
Note: You should use the external IP address of the MySQL source instance to provide access to the source database for this connection profile, and the following region: us-west1.
Configure a Database Migration Service connection profile for a stand-alone MySQL database.
Check my progress
Task 2. Perform a one-time migration of a stand-alone MySQL database to Cloud SQL
- You must migrate this compute instance based MySQL database to a Cloud SQL instance configured with the following properties:
| Property | Value |
| Cloud SQL Destination Instance ID | mysql-mkt-bpb |
| Root password | supersecret! |
| Choose a Cloud SQL edition | Enterprise |
| Database version | Cloud SQL for MySQL 8 |
| Machine Shape | 2 vCPU,8 GB |
| Storage type | SSD |
| Storage capacity | 10GB |
- Once you have migrated this database to a Cloud SQL instance you can confirm that the data has populated the Cloud SQL MySQL database by connecting to the new Cloud SQL MySQL database and running the following query:
use customers_data;
select count(*) from customers;
If the data are migrated, this query should return a row count of 5030.
Perform a one-time migration of a stand-alone MySQL database to Cloud SQL.
Check my progress
Task 3. Create a continuous Database Migration Service migration job to migrate a stand-alone MySQL database to Cloud SQL
To complete this task you must create a continuous Database Migration Service migration job to migrate a stand-alone MySQL database to a second Cloud SQL instance using VPC peering.
You must migrate the same stand-alone MySQL database to a second Cloud SQL instance configured with the following properties:
| Property | Value |
| Cloud SQL Destination Instance ID | mysql-mkt-bpb-cont |
| Root password | supersecret! |
| Choose a Cloud SQL edition | Enterprise |
| Database version | Cloud SQL for MySQL 8 |
| CPU | 2 vCPU,8 GB |
| Storage type | SSD |
| Storage capacity | 10GB |
Note: To streamline the creation process, you can set the Migration job name to the same name as the Cloud SQL Destination Instance ID provided above.
Be sure to use the same source connection profile that you created in Task 1. For the continuous migration job, you must use VPC Peering to provide access to the source compute instance and its database.
- To complete this task you must start the continuous migration job you have created. Wait until the job is in the
Runningstate before checking your progress below.
Migrate the stand-alone MySQL database to Cloud SQL using continuous migration.
Check my progress
Task 4. Test that the continuous Database Migration Service job replicates updated source data
- To complete this task you must connect to the source stand-alone MySQL instance and modify the database with the following query:
use customers_data;
update customers set gender = 'FEMALE' where addressKey = 934;
- Allow a minute for the change to be propagated by the continuous migration job and then check the changes at the destination.
Check that the updated source data in the stand-alone MySQL database has been migrated to continuous replication Cloud SQL instance.
Check my progress
Task 5. Promote the destination Cloud SQL for MySQL database to a stand-alone database
- In this task you must promote the Cloud SQL for MySQL instance to a stand-alone database for reading and writing data.
Check that the Cloud SQL for MySQL continuous migration job has been promoted to a stand-alone database for reading and writing.
Check my progress
Solution of Lab
New Solution
Enable the following Google APIs:
Task 4: Connect to the MySQL source instance
mysql -u admin -p
- Enter password:
changeme
- Copy and paste the password; the password will not be visible to you
use customers_data;
update customers set gender = 'FEMALE' where addressKey = 934;
Old Solution
Task 1: Enable APIs
Enable the following APIs in your Google Cloud project:
Database Migration API
Service Networking API
Use the Google Cloud Console or the gcloud command-line tool to enable these APIs.
Task 4.1: Connect to the MySQL Interactive Console
To connect to the MySQL interactive console, follow these steps:
Run the following command in your terminal:
mysql -u admin -pWhen prompted for the password, enter:
changeme
Task 4.2: Update Records in the Database
Once connected to the MySQL console:
Switch to the database named
customers_data:use customers_data;Run the following SQL command to update the gender field for a specific record:
update customers set gender = 'FEMALE' where addressKey = 934;