Optical Character Recognition (OCR) with Document AI (Python) - GSP1138

A passionate full-stack developer from @ePlus.DEV
Overview
Document AI is a document understanding solution that takes unstructured data (e.g. documents, emails, invoices, forms, etc.) and makes the data easier to understand, analyze, and consume. The API provides structure through content classification, entity extraction, advanced searching, and more.
In this lab, you will perform Optical Character Recognition (OCR) of PDF documents using Document AI and Python. You will explore how to make both Online (Synchronous) and Batch (Asynchronous) process requests.
We will utilize a PDF file of the classic novel "Winnie the Pooh" by A.A. Milne, which has recently become part of the Public Domain in the United States. This file was scanned and digitized by Google Books.
Objectives
In this lab, you will learn how to perform the following tasks:
Enable the Document AI API
Authenticate API requests
Install the client library for Python
Use the online and batch processing APIs
Parse text from a PDF file
Setup and requirements
Before you click the Start Lab button
Read these instructions. Labs are timed and you cannot pause them. The timer, which starts when you click Start Lab, shows how long Google Cloud resources are made available to you.
This hands-on lab lets you do the lab activities in a real cloud environment, not in a simulation or demo environment. It does so by giving you new, temporary credentials you use to sign in and access Google Cloud for the duration of the lab.
To complete this lab, you need:
- Access to a standard internet browser (Chrome browser recommended).
Note: Use an Incognito (recommended) or private browser window to run this lab. This prevents conflicts between your personal account and the student account, which may cause extra charges incurred to your personal account.
- Time to complete the lab—remember, once you start, you cannot pause a lab.
Note: Use only the student account for this lab. If you use a different Google Cloud account, you may incur charges to that account.
How to start your lab and sign in to the Google Cloud console
Click the Start Lab button. If you need to pay for the lab, a dialog opens for you to select your payment method. On the left is the Lab Details pane with the following:
The Open Google Cloud console button
Time remaining
The temporary credentials that you must use for this lab
Other information, if needed, to step through this lab
Click Open Google Cloud console (or right-click and select Open Link in Incognito Window if you are running the Chrome browser).
The lab spins up resources, and then opens another tab that shows the Sign in page.
Tip: Arrange the tabs in separate windows, side-by-side.
Note: If you see the Choose an account dialog, click Use Another Account.
If necessary, copy the Username below and paste it into the Sign in dialog.
student-00-3ec26a02ecde@qwiklabs.netYou can also find the Username in the Lab Details pane.
Click Next.
Copy the Password below and paste it into the Welcome dialog.
DAdqEwLUNcpzYou can also find the Password in the Lab Details pane.
Click Next.
Important: You must use the credentials the lab provides you. Do not use your Google Cloud account credentials.
Note: Using your own Google Cloud account for this lab may incur extra charges.
Click through the subsequent pages:
Accept the terms and conditions.
Do not add recovery options or two-factor authentication (because this is a temporary account).
Do not sign up for free trials.
After a few moments, the Google Cloud console opens in this tab.
Note: To access Google Cloud products and services, click the Navigation menu or type the service or product name in the Search field.

Activate Cloud Shell
Cloud Shell is a virtual machine that is loaded with development tools. It offers a persistent 5GB home directory and runs on the Google Cloud. Cloud Shell provides command-line access to your Google Cloud resources.
Click Activate Cloud Shell at the top of the Google Cloud console.
Click through the following windows:
Continue through the Cloud Shell information window.
Authorize Cloud Shell to use your credentials to make Google Cloud API calls.
When you are connected, you are already authenticated, and the project is set to your Project_ID, qwiklabs-gcp-04-1d70349cc55a. The output contains a line that declares the Project_ID for this session:
Your Cloud Platform project in this session is set to qwiklabs-gcp-04-1d70349cc55a
gcloud is the command-line tool for Google Cloud. It comes pre-installed on Cloud Shell and supports tab-completion.
- (Optional) You can list the active account name with this command:
gcloud auth list
- Click Authorize.
Output:
ACTIVE: *
ACCOUNT: student-00-3ec26a02ecde@qwiklabs.net

To set the active account, run:
    $ gcloud config set account `ACCOUNT`
- (Optional) You can list the project ID with this command:
gcloud config list project
Output:
[core]
project = qwiklabs-gcp-04-1d70349cc55a
Note: For full documentation of gcloud, in Google Cloud, refer to the gcloud CLI overview guide.
Task 1. Enable the Document AI API
Before you can begin using Document AI, you must enable the API.
- Using the Search Bar at the top of the console, search for "Document AI API", then click Enable to use the API in your Google Cloud project.
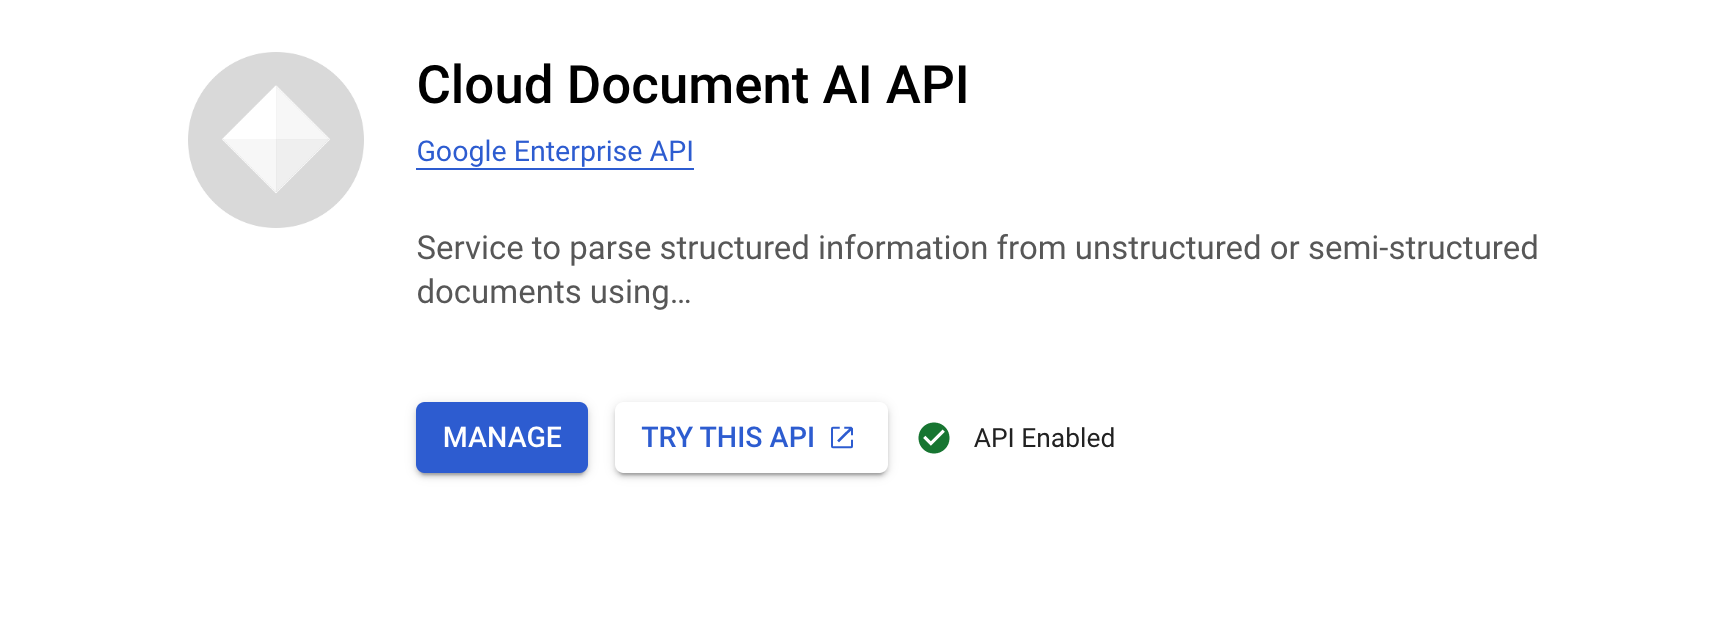
Use the search bar to search for "Cloud Storage API", if not already enabled, click Enable.
Alternatively, the APIs can be enabled using the following
gcloudcommands.
gcloud services enable documentai.googleapis.com
gcloud services enable storage.googleapis.com
You should see something like this:
Operation "operations/..." finished successfully.
Now, you can use Document AI!
Click Check my progress to verify the objective.
Assessment Completed!
Enable the Document AI API
Assessment Completed!
Task 2. Create and test a processor
You must first create an instance of the Document OCR processor that will perform the extraction. This can be completed using the Cloud Console or the Processor Management API.
- From the Navigation Menu, click View all Products. Under Artificial Intelligence, select Document AI.
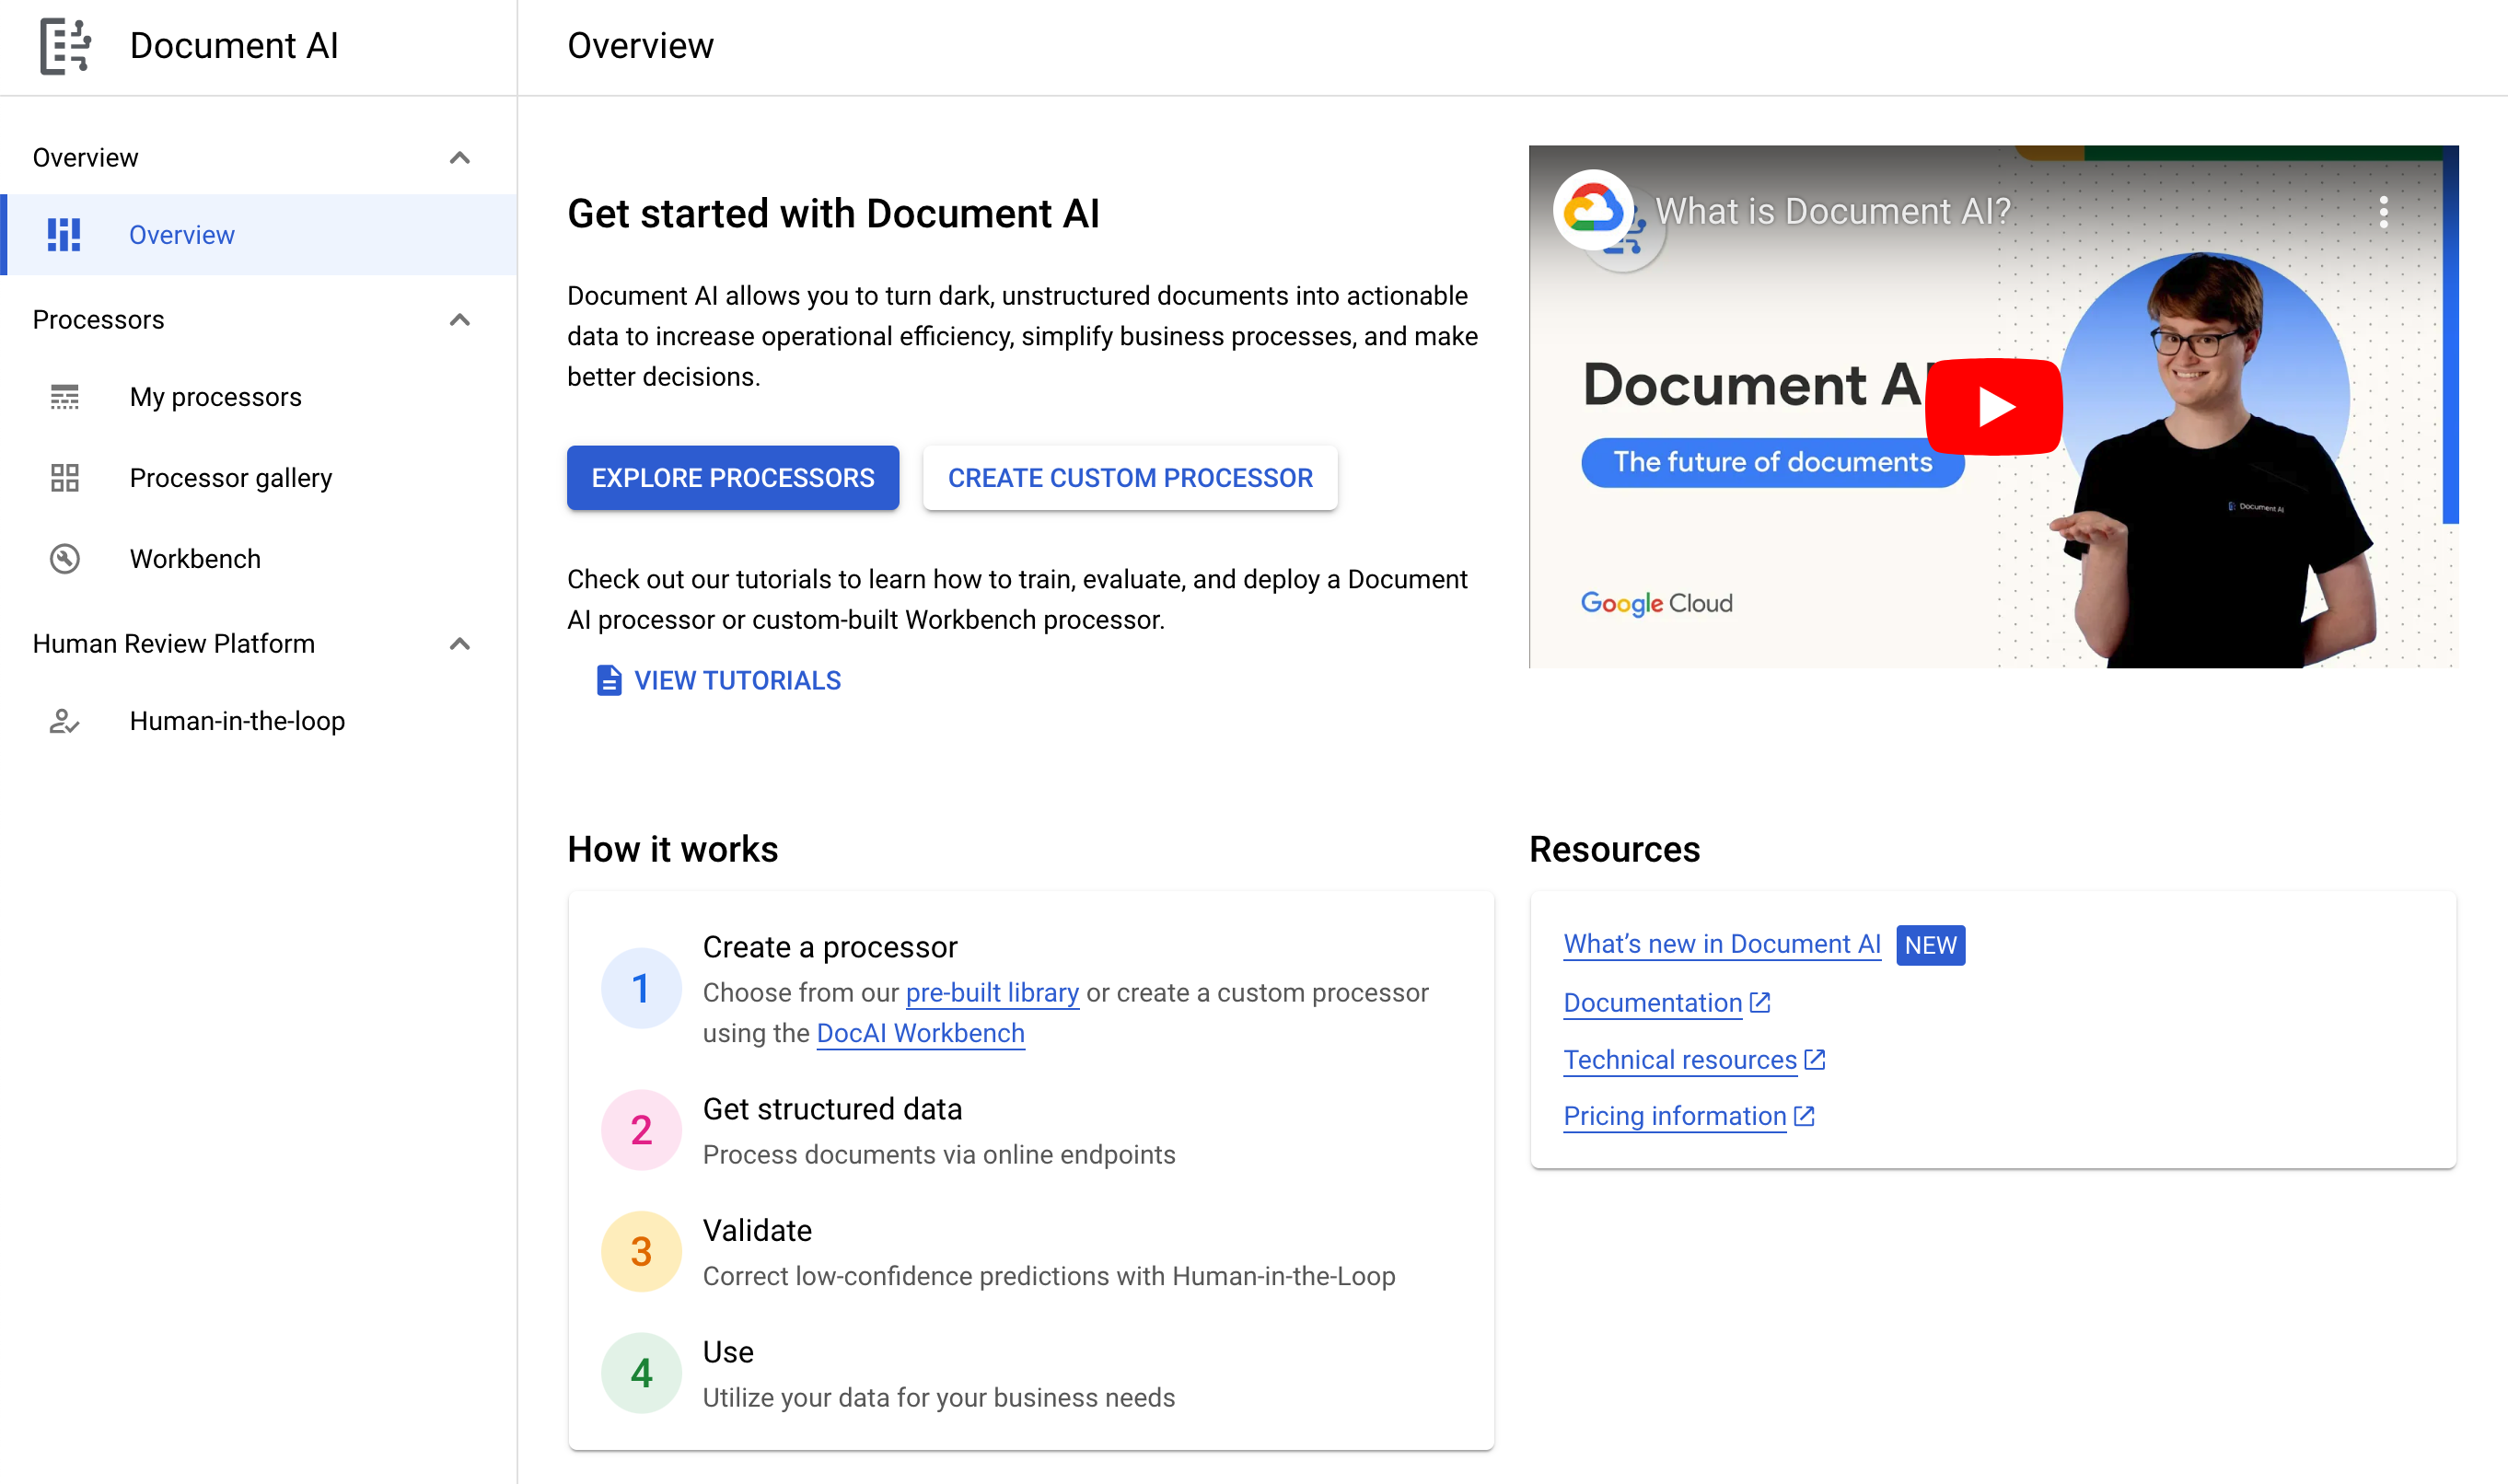
- Click Explore Processors, and click Document OCR.
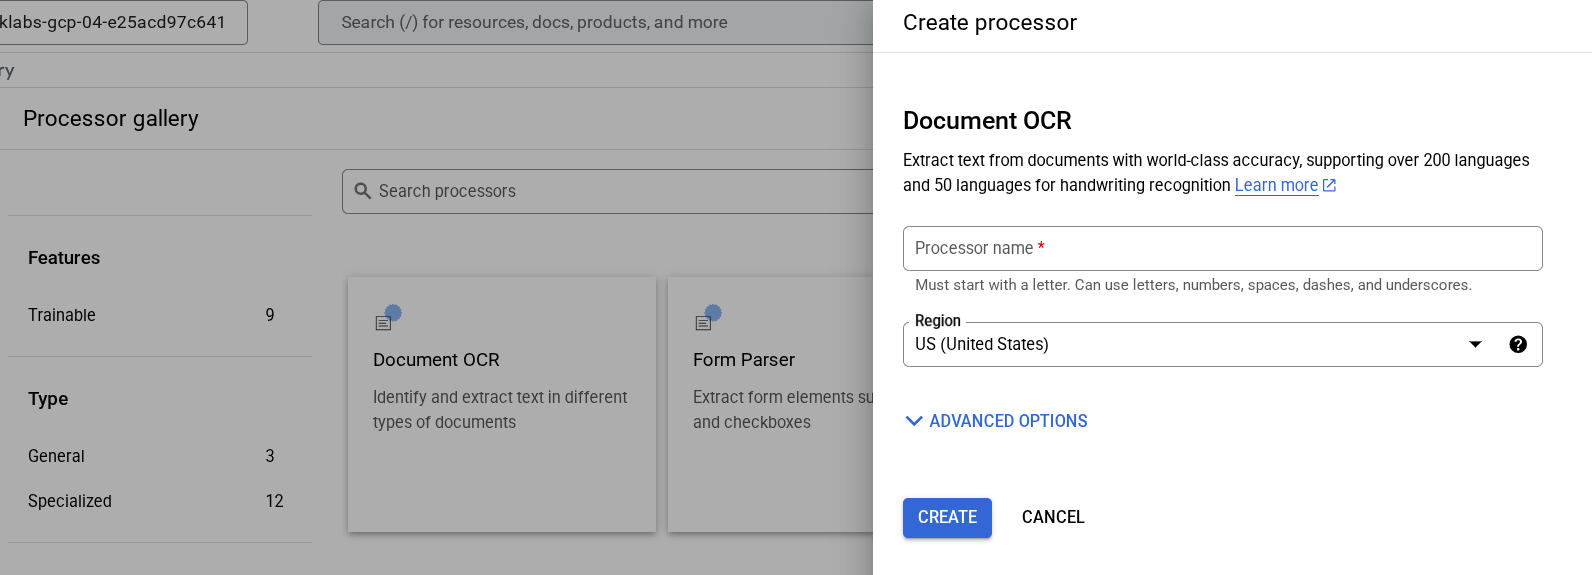
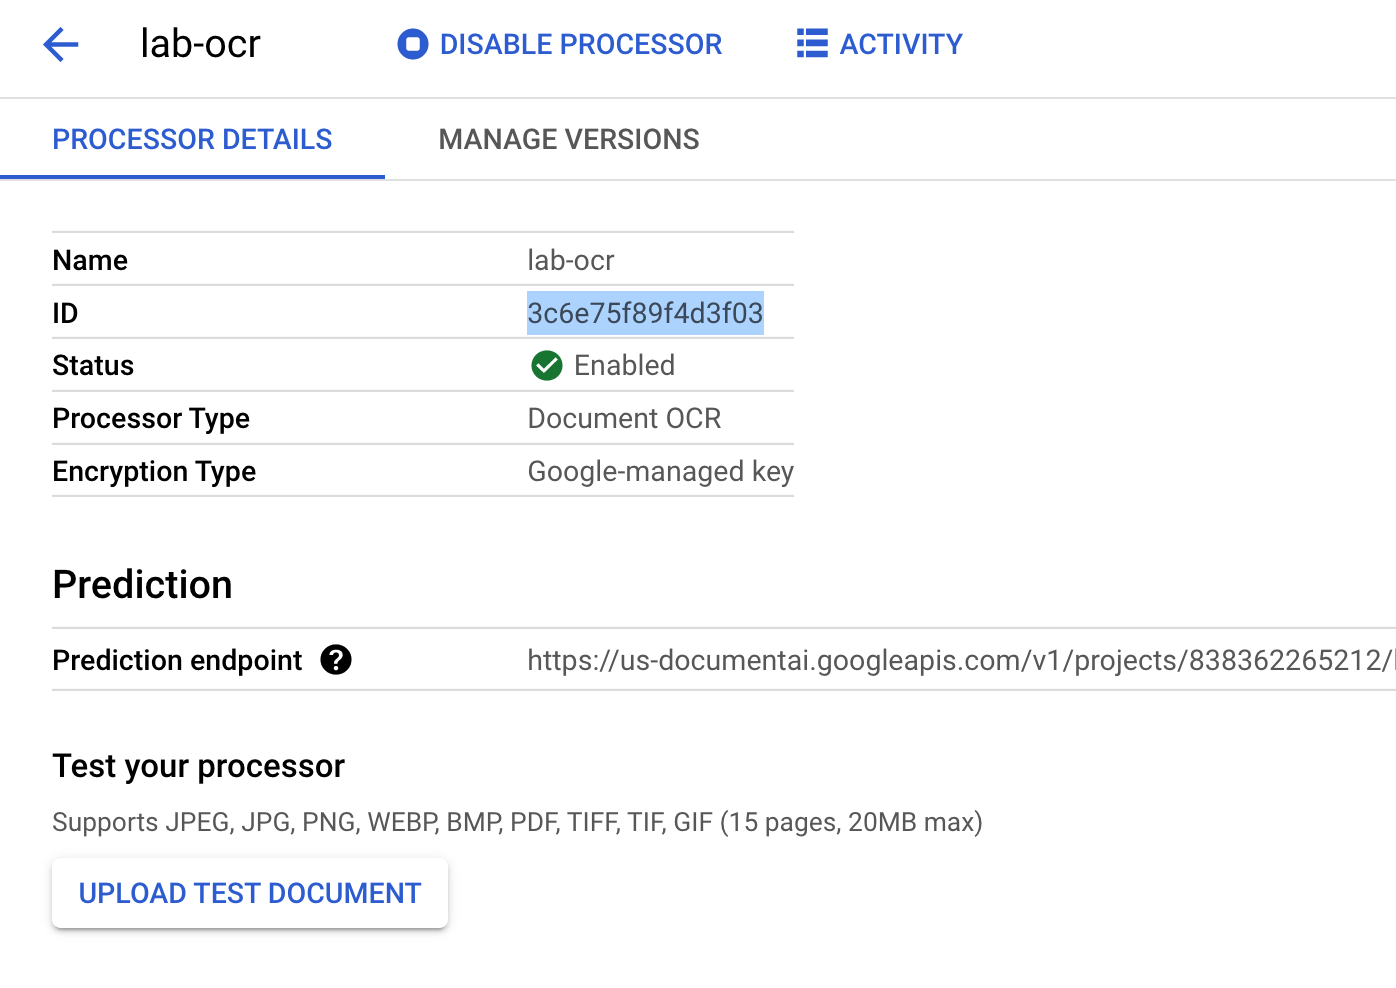
Give it the name
lab-ocrand select the closest region on the list.Click Create to create your processor
Copy your Processor ID. You must use this in your code later.
- Download the PDF file below, which contains the first 3 pages of the novel "Winnie the Pooh" by A.A. Milne.
Now you can test out your processor in the console by uploading a document.
- Click Upload Test Document and select the PDF file you downloaded.
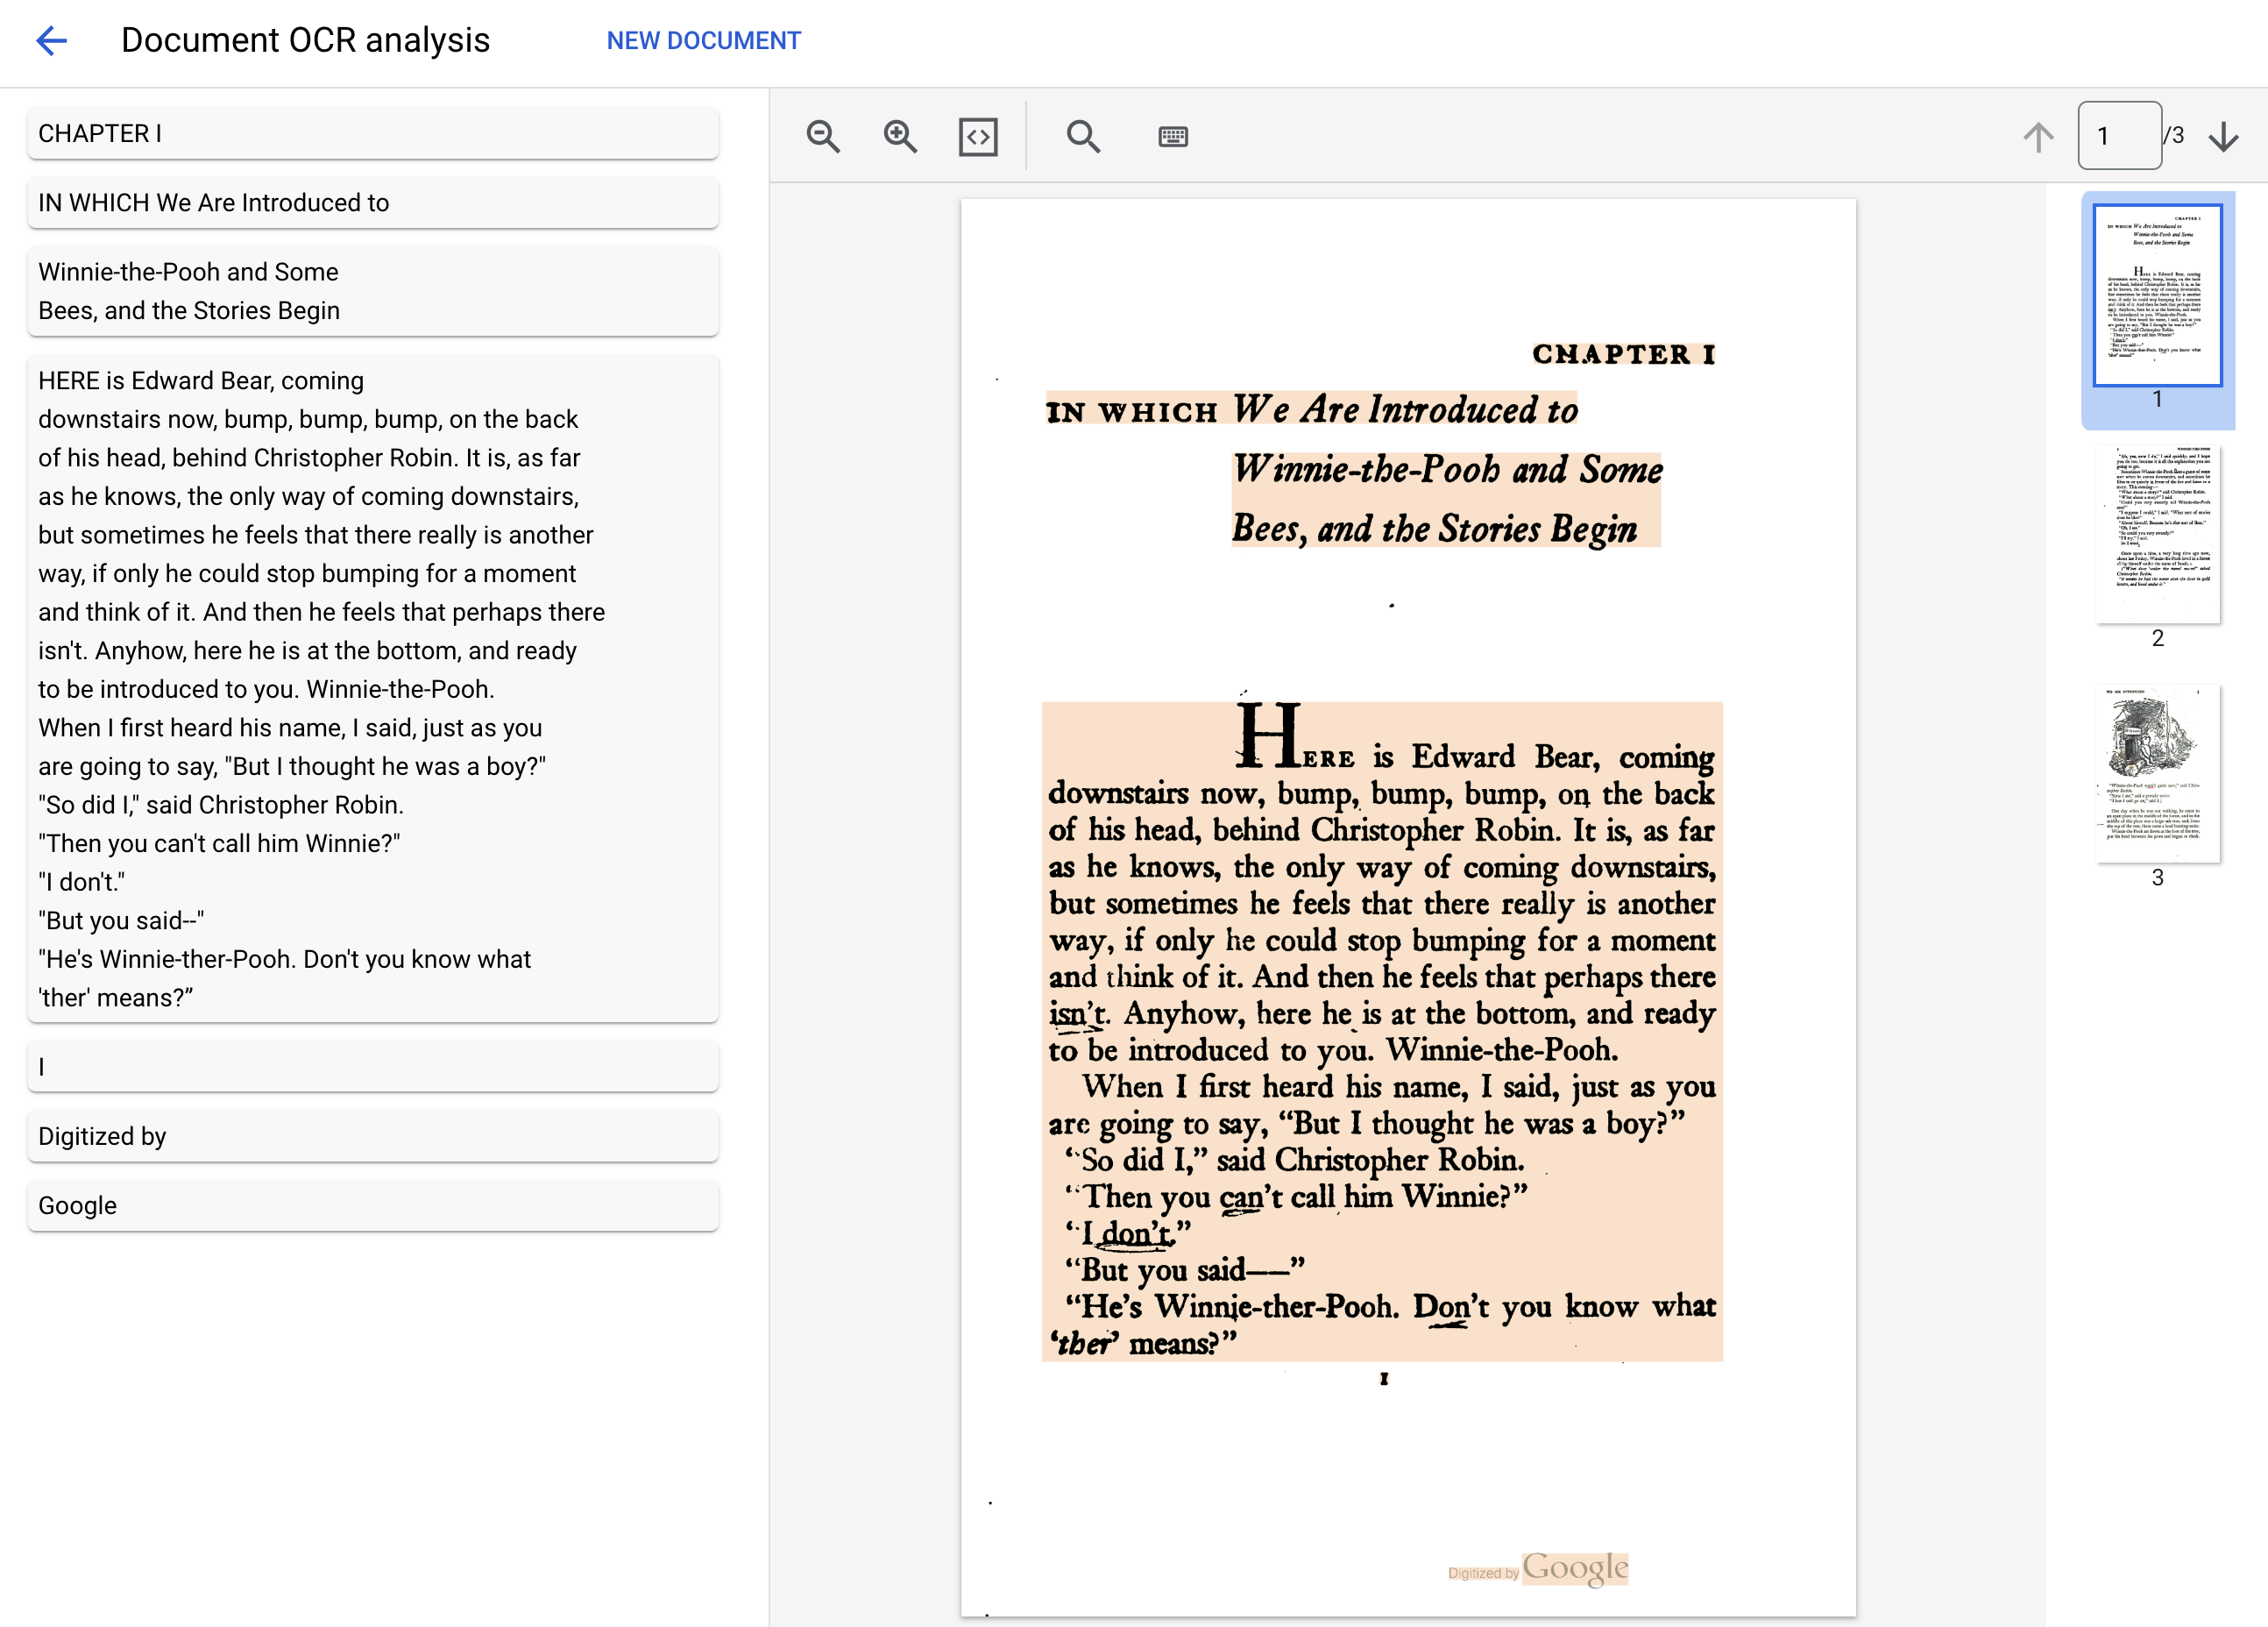
Your output should look this:
Click Check my progress to verify the objective.
Create and test a processor
Task 3. Authenticate API requests
In order to make requests to the Document AI API, you must use a Service Account. A Service Account belongs to your project and it is used by the Python Client library to make API requests. Like any other user account, a service account is represented by an email address. In this section, you will use the Cloud SDK to create a service account and then create credentials you need to authenticate as the service account.
- First, open a new Cloud Shell window and set an environment variable with your Project ID by running the following command:
export GOOGLE_CLOUD_PROJECT=$(gcloud config get-value core/project
- Next, create a new service account to access the Document AI API by using:
gcloud iam service-accounts create my-docai-sa \
  --display-name "my-docai-service-account"
- Give your service account permissions to access Document AI, Cloud Storage, and Service Usage by using the following commands:
gcloud projects add-iam-policy-binding ${GOOGLE_CLOUD_PROJECT} \
    --member="serviceAccount:my-docai-sa@${GOOGLE_CLOUD_PROJECT}.iam.gserviceaccount.com" \
    --role="roles/documentai.admin"

gcloud projects add-iam-policy-binding ${GOOGLE_CLOUD_PROJECT} \
    --member="serviceAccount:my-docai-sa@${GOOGLE_CLOUD_PROJECT}.iam.gserviceaccount.com" \
    --role="roles/storage.admin"

gcloud projects add-iam-policy-binding ${GOOGLE_CLOUD_PROJECT} \
    --member="serviceAccount:my-docai-sa@${GOOGLE_CLOUD_PROJECT}.iam.gserviceaccount.com" \
    --role="roles/serviceusage.serviceUsageConsumer"
- Create credentials that your Python code uses to login as your new service account. Create these credentials and save it as a JSON file
~/key.jsonby using the following command:
gcloud iam service-accounts keys create ~/key.json \
  --iam-account  my-docai-sa@${GOOGLE_CLOUD_PROJECT}.iam.gserviceaccount.com
- Finally, set the
GOOGLE_APPLICATION_CREDENTIALSenvironment variable, which is used by the library to find your credentials. The environment variable should be set to the full path of the credentials JSON file you created, by using:
export GOOGLE_APPLICATION_CREDENTIALS=$(realpath key.json)
To read more about this form of authentication, see the guide.
Click Check my progress to verify the objective.
Authenticate API requests
Task 4. Install the client library
- In Cloud Shell, run the following commands to install the Python client libraries for Document AI and Cloud Storage.
pip3 install --upgrade google-cloud-documentai
pip3 install --upgrade google-cloud-storage
You should see something like this:
...
Installing collected packages: google-cloud-documentai
Successfully installed google-cloud-documentai-1.4.1
.
.
Installing collected packages: google-cloud-storage
Successfully installed google-cloud-storage-1.43.0
Now, you're ready to use the Document AI API!
Note: If you're setting up your own Python development environment, you can follow these guidelines.
Upload the sample PDF to Cloud Shell
From the Cloud Shell toolbar, click the three dots and select Upload.
Select File > Choose Files and select the 3-page PDF file you downloaded earlier.
Click Upload.
Alternatively, you can also download the PDF from a public Google Cloud Storage Bucket using
gcloud storage cp.
gcloud storage cp gs://cloud-samples-data/documentai/codelabs/ocr/Winnie_the_Pooh_3_Pages.pdf .
Task 5. Make an online processing request
In this step, you'll process the first 3 pages of the novel using the online processing (synchronous) API. This method is best suited for smaller documents that are stored locally. Check out the full processor list for the maximum pages and file size for each processor type.
- In Cloud Shell, create a file called
online_processing.pyand paste the following code into it:
from google.api_core.client_options import ClientOptions
from google.cloud import documentai_v1 as documentai


PROJECT_ID = "YOUR_PROJECT_ID"
LOCATION = "YOUR_PROJECT_LOCATION"  # Format is 'us' or 'eu'
PROCESSOR_ID = "YOUR_PROCESSOR_ID"  # Create processor in Cloud Console

# The local file in your current working directory
FILE_PATH = "Winnie_the_Pooh_3_Pages.pdf"
# Refer to https://cloud.google.com/document-ai/docs/file-types
# for supported file types
MIME_TYPE = "application/pdf"

# Instantiates a client
docai_client = documentai.DocumentProcessorServiceClient(
    client_options=ClientOptions(api_endpoint=f"{LOCATION}-documentai.googleapis.com")
)

# The full resource name of the processor, e.g.:
# projects/project-id/locations/location/processor/processor-id
# You must create new processors in the Cloud Console first
RESOURCE_NAME = docai_client.processor_path(PROJECT_ID, LOCATION, PROCESSOR_ID)

# Read the file into memory
with open(FILE_PATH, "rb") as image:
    image_content = image.read()

# Load Binary Data into Document AI RawDocument Object
raw_document = documentai.RawDocument(content=image_content, mime_type=MIME_TYPE)

# Configure the process request
request = documentai.ProcessRequest(name=RESOURCE_NAME, raw_document=raw_document)

# Use the Document AI client to process the sample form
result = docai_client.process_document(request=request)

document_object = result.document
print("Document processing complete.")
print(f"Text: {document_object.text}")
- Replace
YOUR_PROJECT_ID,YOUR_PROJECT_LOCATION,YOUR_PROCESSOR_ID, and theFILE_PATHwith appropriate values for your environment.
Note: FILE_PATH is the name of the file you uploaded to Cloud Shell in the previous step. If you didn't rename the file, it should be Winnie_the_Pooh_3_Pages.pdf which is the default value and doesn't need to be changed.
- Run the code, which will extract the text and print it to the console.
python3 online_processing.py
You should see the following output:
Document processing complete.
Text: IN WHICH We Are Introduced to
CHAPTER I
Winnie-the-Pooh and Some
Bees, and the Stories Begin
HERE is Edward Bear, coming
downstairs now, bump, bump, bump, on the back
of his head, behind Christopher Robin. It is, as far
as he knows, the only way of coming downstairs,
but sometimes he feels that there really is another
way, if only he could stop bumping for a moment
and think of it. And then he feels that perhaps there
isn't. Anyhow, here he is at the bottom, and ready
to be introduced to you. Winnie-the-Pooh.
When I first heard his name, I said, just as you
are going to say, "But I thought he was a boy?"
"So did I," said Christopher Robin.
"Then you can't call him Winnie?"
"I don't."
"But you said--"
...
Task 6. Make a batch processing request
Now, suppose that you want to read in the text from the entire novel.
Online Processing has limits on the number of pages and file size that can be sent and it only allows for one document file per API call.
Batch Processing allows for processing of larger/multiple files in an asynchronous method.
In this section, you will process the entire "Winnie the Pooh" novel with the Document AI Batch Processing API and output the text into a Google Cloud Storage Bucket.
Batch processing uses Long Running Operations to manage requests in an asynchronous manner, so we have to make the request and retrieve the output in a different manner than online processing. However, the output will be in the same Document object format whether using online or batch processing.
This section shows how to provide specific documents for Document AI to process. A later section will show how to process an entire directory of documents.
Upload PDF to Cloud Storage
The batch_process_documents() method currently accepts files from Google Cloud Storage. You can reference documentai_v1.types.BatchProcessRequest for more information on the object structure.
- Run the following command to create a Google Cloud Storage Bucket to store the PDF file and upload the PDF file to the bucket:
gcloud storage buckets create gs://$GOOGLE_CLOUD_PROJECT
gcloud storage cp gs://cloud-samples-data/documentai/codelabs/ocr/Winnie_the_Pooh.pdf gs://$GOOGLE_CLOUD_PROJECT/
Using the batch_process_documents() method
- Create a file called
batch_processing.pyand paste in the following code:
import re
from typing import List

from google.api_core.client_options import ClientOptions
from google.cloud import documentai_v1 as documentai
from google.cloud import storage


PROJECT_ID = "YOUR_PROJECT_ID"
LOCATION = "YOUR_PROJECT_LOCATION"  # Format is 'us' or 'eu'
PROCESSOR_ID = "YOUR_PROCESSOR_ID"  # Create processor in Cloud Console

# Format 'gs://input_bucket/directory/file.pdf'
GCS_INPUT_URI = "gs://cloud-samples-data/documentai/codelabs/ocr/Winnie_the_Pooh.pdf"
INPUT_MIME_TYPE = "application/pdf"

# Format 'gs://output_bucket/directory'
GCS_OUTPUT_URI = "YOUR_OUTPUT_BUCKET_URI"

# Instantiates a client
docai_client = documentai.DocumentProcessorServiceClient(
    client_options=ClientOptions(api_endpoint=f"{LOCATION}-documentai.googleapis.com")
)

# The full resource name of the processor, e.g.:
# projects/project-id/locations/location/processor/processor-id
# You must create new processors in the Cloud Console first
RESOURCE_NAME = docai_client.processor_path(PROJECT_ID, LOCATION, PROCESSOR_ID)

# Cloud Storage URI for the Input Document
input_document = documentai.GcsDocument(
    gcs_uri=GCS_INPUT_URI, mime_type=INPUT_MIME_TYPE
)

# Load GCS Input URI into a List of document files
input_config = documentai.BatchDocumentsInputConfig(
    gcs_documents=documentai.GcsDocuments(documents=[input_document])
)

# Cloud Storage URI for Output directory
gcs_output_config = documentai.DocumentOutputConfig.GcsOutputConfig(
    gcs_uri=GCS_OUTPUT_URI
)

# Load GCS Output URI into OutputConfig object
output_config = documentai.DocumentOutputConfig(gcs_output_config=gcs_output_config)

# Configure Process Request
request = documentai.BatchProcessRequest(
    name=RESOURCE_NAME,
    input_documents=input_config,
    document_output_config=output_config,
)

# Batch Process returns a Long Running Operation (LRO)
operation = docai_client.batch_process_documents(request)

# Continually polls the operation until it is complete.
# This could take some time for larger files
# Format: projects/PROJECT_NUMBER/locations/LOCATION/operations/OPERATION_ID
print(f"Waiting for operation {operation.operation.name} to complete...")
operation.result()

# NOTE: Can also use callbacks for asynchronous processing
#
# def my_callback(future):
#   result = future.result()
#
# operation.add_done_callback(my_callback)

print("Document processing complete.")

# Once the operation is complete,
# get output document information from operation metadata
metadata = documentai.BatchProcessMetadata(operation.metadata)

if metadata.state != documentai.BatchProcessMetadata.State.SUCCEEDED:
    raise ValueError(f"Batch Process Failed: {metadata.state_message}")

documents: List[documentai.Document] = []

# Storage Client to retrieve the output files from GCS
storage_client = storage.Client()

# One process per Input Document
for process in metadata.individual_process_statuses:

    # output_gcs_destination format: gs://BUCKET/PREFIX/OPERATION_NUMBER/0
    # The GCS API requires the bucket name and URI prefix separately
    output_bucket, output_prefix = re.match(
        r"gs://(.*?)/(.*)", process.output_gcs_destination
    ).groups()

    # Get List of Document Objects from the Output Bucket
    output_blobs = storage_client.list_blobs(output_bucket, prefix=output_prefix)

    # DocAI may output multiple JSON files per source file
    for blob in output_blobs:
        # Document AI should only output JSON files to GCS
        if ".json" not in blob.name:
            print(f"Skipping non-supported file type {blob.name}")
            continue

        print(f"Fetching {blob.name}")

        # Download JSON File and Convert to Document Object
        document = documentai.Document.from_json(
            blob.download_as_bytes(), ignore_unknown_fields=True
        )

        documents.append(document)

# Print Text from all documents
# Truncated at 100 characters for brevity
for document in documents:
    print(document.text[:100])
Replace
YOUR_PROJECT_ID,YOUR_PROJECT_LOCATION,YOUR_PROCESSOR_ID,GCS_INPUT_URIandGCS_OUTPUT_URIwith the appropriate values for your environment.For
GCS_INPUT_URI, use the URI of the file you uploaded to your bucket in the previous step, i.egs://qwiklabs-gcp-04-1d70349cc55a/Winnie_the_Pooh.pdf.For
GCS_OUTPUT_URI, use the URI of the bucket you created in the previous step, i.egs://qwiklabs-gcp-04-1d70349cc55a.
Run the code, and you should see the full novel text extracted and printed in your console.
python3 batch_processing.py
Note: this may take some time to complete as the file is much larger than the previous example. However, with the Batch Processing API, you will receive an Operation ID which can be used to get the output from Cloud Storage once the task is completed.
Your output should look something like this:
Document processing complete.
Fetching 16218185426403815298/0/Winnie_the_Pooh-0.json
Fetching 16218185426403815298/0/Winnie_the_Pooh-1.json
Fetching 16218185426403815298/0/Winnie_the_Pooh-10.json
Fetching 16218185426403815298/0/Winnie_the_Pooh-11.json
Fetching 16218185426403815298/0/Winnie_the_Pooh-12.json
Fetching 16218185426403815298/0/Winnie_the_Pooh-13.json
Fetching 16218185426403815298/0/Winnie_the_Pooh-14.json
Fetching 16218185426403815298/0/Winnie_the_Pooh-15.json
..
This is a reproduction of a library book that was digitized
by Google as part of an ongoing effort t
0
TAM MTAA
Digitized by
Google
Introduction
(I₂
F YOU happen to have read another
book about Christo
84
Eeyore took down his right hoof from his right
ear, turned round, and with great difficulty put u
94
..
Great! You have now successfully extracted text from a PDF file using the Document AI Batch Processing API.
Click Check my progress to verify the objective.
Make a batch processing request
Task 7. Make a batch processing request for a directory
Sometimes, you may want to process an entire directory of documents, without listing each document individually. The batch_process_documents() method supports input of a list of specific documents or a directory path.
In this section, you will learn how to process a full directory of document files. Most of the code is the same as the previous step, the only difference is the GCS URI sent with the BatchProcessRequest.
- Run the following command to copy the sample directory (which contains multiple pages of the novel in separate files) to your Cloud Storage bucket.
gsutil -m cp -r gs://cloud-samples-data/documentai/codelabs/ocr/multi-document/* gs://$GOOGLE_CLOUD_PROJECT/multi-document/
You can read the files directly or copy them into your own Cloud Storage bucket.
- Create a file called
batch_processing_directory.pypaste in the following code:
import re
from typing import List

from google.api_core.client_options import ClientOptions
from google.cloud import documentai_v1 as documentai
from google.cloud import storage


PROJECT_ID = "YOUR_PROJECT_ID"
LOCATION = "YOUR_PROJECT_LOCATION"  # Format is 'us' or 'eu'
PROCESSOR_ID = "YOUR_PROCESSOR_ID"  # Create processor in Cloud Console

# Format 'gs://input_bucket/directory'
GCS_INPUT_PREFIX = "gs://cloud-samples-data/documentai/codelabs/ocr/multi-document"

# Format 'gs://output_bucket/directory'
GCS_OUTPUT_URI = "YOUR_OUTPUT_BUCKET_URI"

# Instantiates a client
docai_client = documentai.DocumentProcessorServiceClient(
    client_options=ClientOptions(api_endpoint=f"{LOCATION}-documentai.googleapis.com")
)

# The full resource name of the processor, e.g.:
# projects/project-id/locations/location/processor/processor-id
# You must create new processors in the Cloud Console first
RESOURCE_NAME = docai_client.processor_path(PROJECT_ID, LOCATION, PROCESSOR_ID)

# Cloud Storage URI for the Input Directory
gcs_prefix = documentai.GcsPrefix(gcs_uri_prefix=GCS_INPUT_PREFIX)

# Load GCS Input URI into Batch Input Config
input_config = documentai.BatchDocumentsInputConfig(gcs_prefix=gcs_prefix)

# Cloud Storage URI for Output directory
gcs_output_config = documentai.DocumentOutputConfig.GcsOutputConfig(
    gcs_uri=GCS_OUTPUT_URI
)

# Load GCS Output URI into OutputConfig object
output_config = documentai.DocumentOutputConfig(gcs_output_config=gcs_output_config)

# Configure Process Request
request = documentai.BatchProcessRequest(
    name=RESOURCE_NAME,
    input_documents=input_config,
    document_output_config=output_config,
)

# Batch Process returns a Long Running Operation (LRO)
operation = docai_client.batch_process_documents(request)

# Continually polls the operation until it is complete.
# This could take some time for larger files
# Format: projects/PROJECT_NUMBER/locations/LOCATION/operations/OPERATION_ID
print(f"Waiting for operation {operation.operation.name} to complete...")
operation.result()

# NOTE: Can also use callbacks for asynchronous processing
#
# def my_callback(future):
#   result = future.result()
#
# operation.add_done_callback(my_callback)

print("Document processing complete.")

# Once the operation is complete,
# get output document information from operation metadata
metadata = documentai.BatchProcessMetadata(operation.metadata)

if metadata.state != documentai.BatchProcessMetadata.State.SUCCEEDED:
    raise ValueError(f"Batch Process Failed: {metadata.state_message}")

documents: List[documentai.Document] = []

# Storage Client to retrieve the output files from GCS
storage_client = storage.Client()

# One process per Input Document
for process in metadata.individual_process_statuses:

    # output_gcs_destination format: gs://BUCKET/PREFIX/OPERATION_NUMBER/0
    # The GCS API requires the bucket name and URI prefix separately
    output_bucket, output_prefix = re.match(
        r"gs://(.*?)/(.*)", process.output_gcs_destination
    ).groups()

    # Get List of Document Objects from the Output Bucket
    output_blobs = storage_client.list_blobs(output_bucket, prefix=output_prefix)

    # DocAI may output multiple JSON files per source file
    for blob in output_blobs:
        # Document AI should only output JSON files to GCS
        if ".json" not in blob.name:
            print(f"Skipping non-supported file type {blob.name}")
            continue

        print(f"Fetching {blob.name}")

        # Download JSON File and Convert to Document Object
        document = documentai.Document.from_json(
            blob.download_as_bytes(), ignore_unknown_fields=True
        )

        documents.append(document)

# Print Text from all documents
# Truncated at 100 characters for brevity
for document in documents:
    print(document.text[:100])
Replace the
PROJECT_ID,LOCATION,PROCESSOR_ID,GCS_INPUT_PREFIXandGCS_OUTPUT_URIwith the appropriate values for your environment.For
GCS_INPUT_PREFIX, use the URI of the directory you uploaded to your bucket in the previous section, i.egs://qwiklabs-gcp-04-1d70349cc55a/multi-document.For
GCS_OUTPUT_URI, use the URI of the bucket you created in the previous section, i.egs://qwiklabs-gcp-04-1d70349cc55a.
Use the following command to run the code, and you should see the extracted text from all of the document files in the Cloud Storage directory.
python3 batch_processing_directory.py
Your output should look something like this:
Document processing complete.
Fetching 16354972755137859334/0/Winnie_the_Pooh_Page_0-0.json
Fetching 16354972755137859334/1/Winnie_the_Pooh_Page_1-0.json
Fetching 16354972755137859334/2/Winnie_the_Pooh_Page_10-0.json
..
Introduction
(I₂
F YOU happen to have read another
book about Christopher Robin, you may remember
th
IN WHICH We Are Introduced to
CHAPTER I
Winnie-the-Pooh and Some
Bees, and the Stories Begin
HERE is
..
Great! You've successfully used the Document AI Python Client Library to process a directory of documents using a Document AI Processor, and output the results to Cloud Storage.
Click Check my progress to verify the objective.
Make a batch processing request for a directory
Solution of Lab
curl -LO raw.githubusercontent.com/Techcps/GSP-Short-Trick/master/Optical%20Character%20Recognition%20OCR%20with%20Document%20AI%20Python/techcps1138.sh
sudo chmod +x techcps1138.sh
./techcps1138.sh