Overview
Container virtualization is a fast evolving technology, which aims to simplify the deployment and management of distributed applications. When people discuss containers, they usually mean Linux-based containers. This makes sense, because native Linux kernel features like cgroups introduced the idea of resource isolation, eventually leading to containers as we know them today. Until recently, only Linux processes could be containerized, but Microsoft introduced support for Windows-based containers in Windows Server 2016 and Windows 10.
You can take an existing Windows application, containerize it using Docker, and run it as an isolated container on Windows. There are two flavors of Windows containers: Windows Server and Hyper-V. You can build Windows containers on either the microsoft/windowsservercore and microsoft/nanoserver base images. You can read more about Windows containers in the Microsoft Windows containersdocumentation.
Google Cloud provides container-optimized VM images on which to run containers on Compute Engine. There is also a Windows VM image for containers. It comes with Docker, microsoft/windowsservercore, and microsoft/nanoserver base images installed.
In this lab you will create a container app and deploy the container app to Compute Engine.
What you'll learn
Create a Windows Server VM for containers on Compute Engine.
Create a HelloWorld Windows container app.
Containerize the app using Docker.
Run the Windows container app on Compute Engine.
Task 1. RDP into the Windows VM
From the Navigation menu click on Compute Engine. Here you'll see a Windows VM provisioned for you.
Click the RDP button next to the windows-instance instance or you can use any Remote Desktop client Tools (or use your own RDP client if you like).
Note: If you're using a Chromebook, you will need to use a third-party RDP tool rather than the RDP button.
- Use the following credentials to complete the RDP login:
| User name | demouser |
| Password | P@ssw0rd |
Note: If you have any issues logging in, wait a minute and retry.
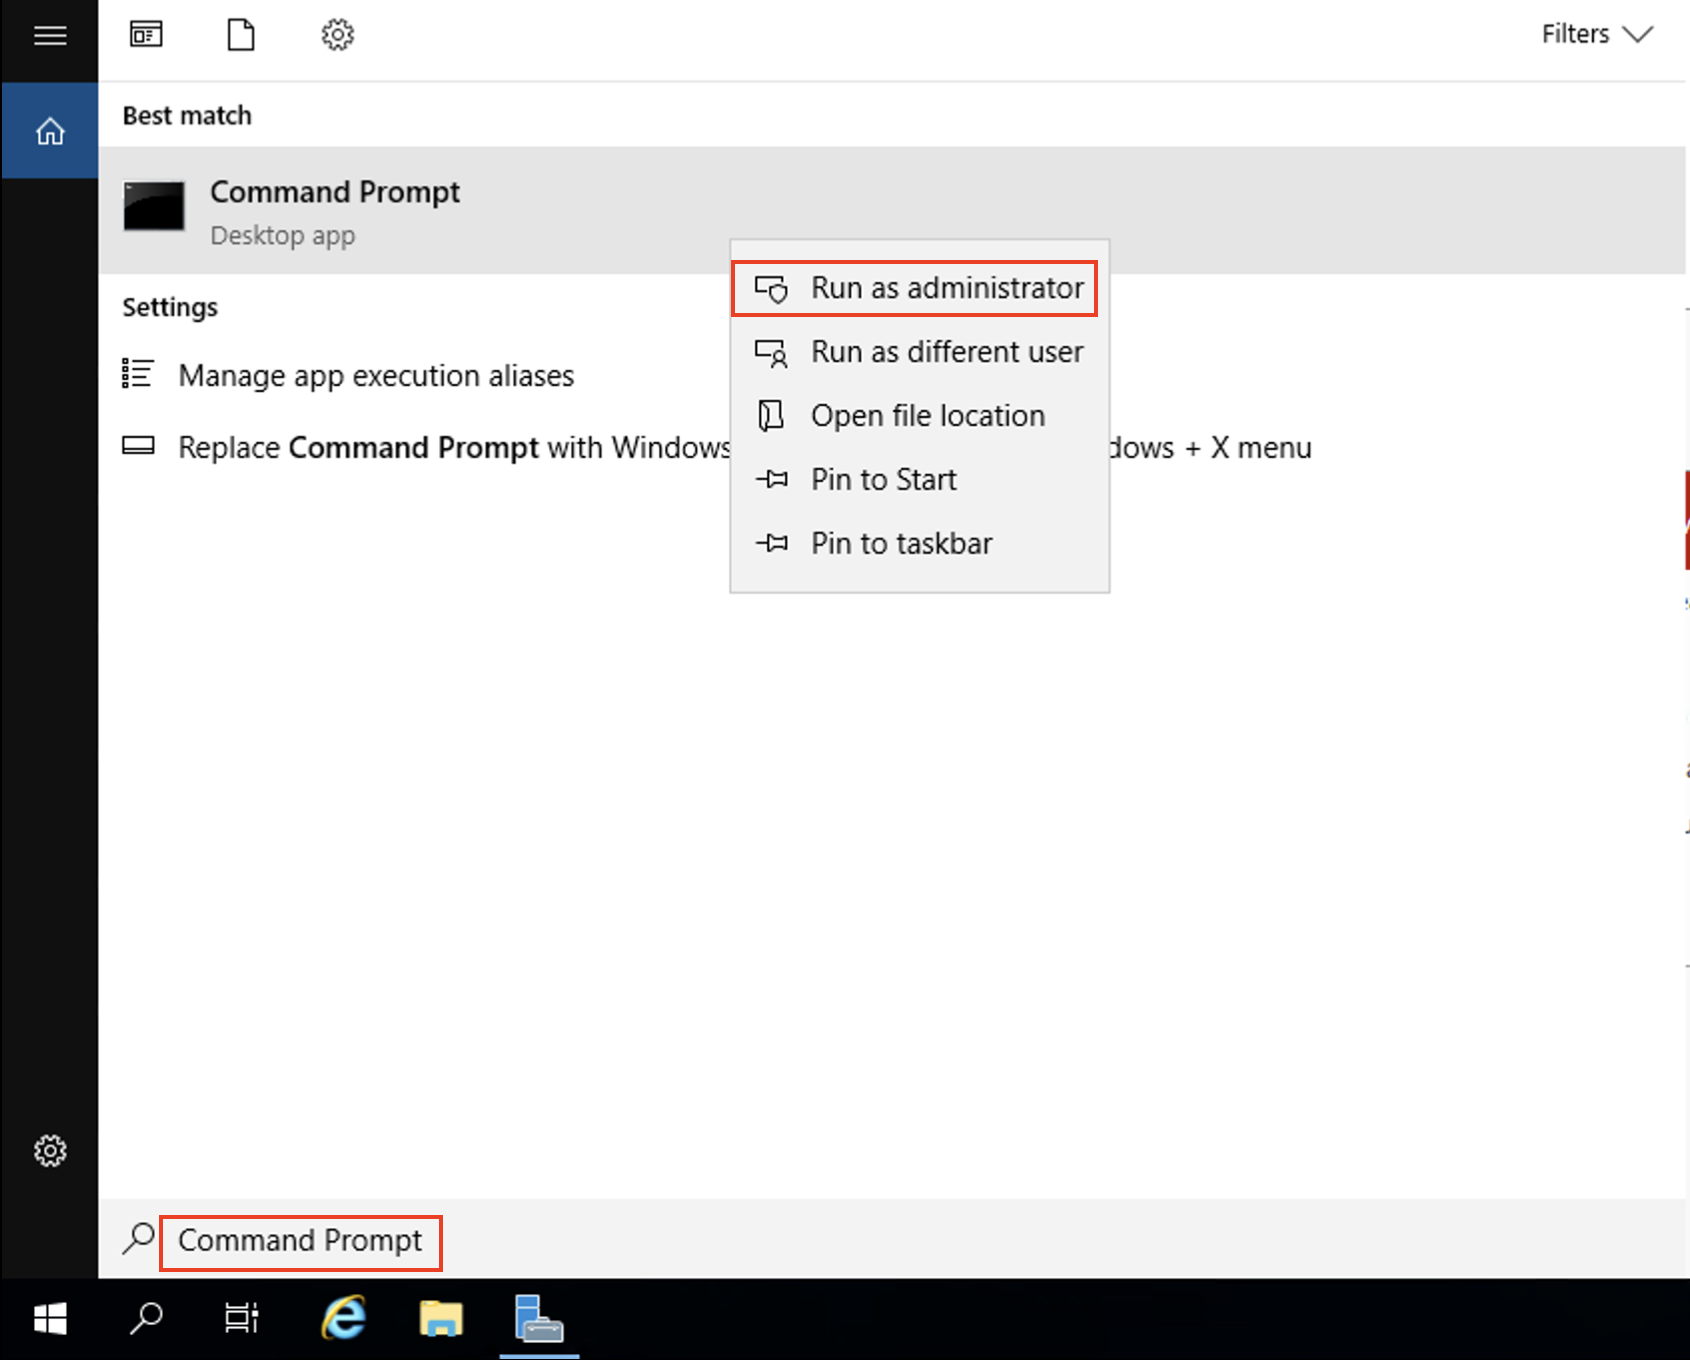
- Enter Command Prompt in the Type here to search box, right-click on Command Prompt, and then select Run as administrator.
- In the Windows command prompt run the following to see the images that are installed by default:
docker images
Output:
REPOSITORY                             TAG                    IMAGE ID
mcr.microsoft.com/windows/servercore   ltsc2019               29a2c2cb7e4d
Copy and paste with the RDP client
Once you are securely logged into your instance, you may find yourself copying and pasting commands from the lab manual.
To paste, hold the CTRL-V keys (if you are a Mac user, using CMND-V will not work.) If you are in a Powershell window, be sure that you have clicked into the window or else the paste shortcut won't work.
If you are pasting into putty, right click.
Task 2. Create a Windows container app
For the app inside the Windows container, use an IIS Web Server. IIS has an image for Windows Server 2019. You can use the image as is and it will serve the default IIS page, but fot this lab, do something more interesting and have IIS serve a page you define.
Your folder and file structure should look like:
C:\my-windows-app>dir /s /b
C:\my-windows-app\content
C:\my-windows-app\Dockerfile
C:\my-windows-app\content\index.html
- Create a folder called
my-windows-appand enter into the directory:
mkdir my-windows-app
cd my-windows-app
- Create folder named
content, a file namedindex.htmlwithin it:
mkdir content
call > content\index.html
- Edit the dockerfile:
notepad content\index.html
- Add the following content in
index.html:
<html>
  <head>
    <title>Windows containers</title>
  </head>
  <body>
    <p>Windows containers are cool!</p>
  </body>
</html>
- Save the
index.html
This is the page IIS will serve.
Task 3. Build Docker image
- Create a Dockerfile for the Docker image:
call > Dockerfile
- Edit the dockerfile:
notepad Dockerfile
You're using the IIS Container image version compatible with Windows Server 2019.
- Add the following contents in the Dockerfile:
FROM mcr.microsoft.com/windows/servercore/iis:windowsservercore-ltsc2019

RUN powershell -NoProfile -Command Remove-Item -Recurse C:\inetpub\wwwroot\*

WORKDIR /inetpub/wwwroot

COPY content/ .
Save the
Dockerfile.Build the Docker image and tag it with Google Container Registry (GCR) and your project id. This will be useful when we push the image to GCR later (replace dotnet-atamel with your GCP Project ID):
docker build -t gcr.io/dotnet-atamel/iis-site-windows .
Once the Docker image is built, you can see it along with its IIS dependency:
docker images
Sample output:
REPOSITORY                                 TAG
gcr.io/dotnet-atamel/iis-site-windows      latest
mcr.microsoft.com/windows/servercore/iis   windowsservercore-ltsc2019
mcr.microsoft.com/windows/servercore       ltsc2019
Click Check my progress to verify the objective.
Build Docker image
Check my progress
Task 4. Run the Windows container
You're now ready to run the Windows container.
- Inside Command Prompt, run the container and expose it on port 80 (replace dotnet-atamel with your GCP Project ID):
docker run -d -p 80:80 gcr.io/dotnet-atamel/iis-site-windows
- You can check that the container is running:
docker ps
Sample output:
CONTAINER ID        IMAGE
3d7c71a258ce        gcr.io/dotnet-atamel/iis-site-windows
To see the web page, go to the External IP column of Compute Engine instance and simply open it with HTTP in the browser:
Note: This setup is not ideal for production. It does not survive server restarts or crashes. In a production system, you want to get a static IP for your VM and have a startup script to start the container. This will take care of server restarts but doesn't help so much for server crashes.
Task 5. Cleanup
Type
exitto leave the VM.Close the RDP window by clicking the X in the top right corner and confirm that you want to be disconnected.
When you are done with experimenting with Windows containers, it is a good idea to either stop or delete the VM you created.
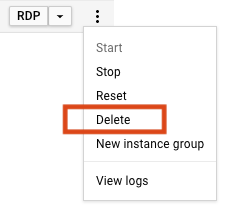
- To delete the VM, go back to the Console and click the three dots in the right-hand menu and select Delete.
Solution of Lab
curl -LO raw.githubusercontent.com/Techcps/GSP-Short-Trick/master/Running%20Windows%20Containers%20on%20Compute%20Engine/techcps153.bat
techcps153.bat
Note: Run CMD as Administrator


