Stream Processing with Cloud Pub/Sub and Dataflow: Qwik Start - GSP903
Table of Contents
Overview
Google Cloud Pub/Sub is a messaging service for exchanging event data among applications and services. A producer of data publishes messages to a Cloud Pub/Sub topic. A consumer creates a subscription to that topic. Subscribers either pull messages from a subscription or are configured as webhooks for push subscriptions. Every subscriber must acknowledge each message within a configurable window of time.
Dataflow is a fully-managed service for transforming and enriching data in stream (real-time) and batch modes with equal reliability and expressiveness. It provides a simplified pipeline development environment using the Apache Beam SDK, which has a rich set of windowing and session analysis primitives as well as an ecosystem of source and sink connectors.
Pub/Sub is a scalable, durable event ingestion and delivery system. Dataflow compliments Pub/Sub's scalable, at-least-once delivery model with message deduplication and exactly-once, in-order processing if you use windows and buffering.
What you'll do
Read messages published to a Pub/Sub topic
Window (or group) the messages by timestamp
Write the messages to Cloud Storage
Setup
Before you click the Start Lab button
Read these instructions. Labs are timed and you cannot pause them. The timer, which starts when you click Start Lab, shows how long Google Cloud resources are made available to you.
This hands-on lab lets you do the lab activities in a real cloud environment, not in a simulation or demo environment. It does so by giving you new, temporary credentials you use to sign in and access Google Cloud for the duration of the lab.
To complete this lab, you need:
- Access to a standard internet browser (Chrome browser recommended).
Note: Use an Incognito (recommended) or private browser window to run this lab. This prevents conflicts between your personal account and the student account, which may cause extra charges incurred to your personal account.
- Time to complete the lab—remember, once you start, you cannot pause a lab.
Note: Use only the student account for this lab. If you use a different Google Cloud account, you may incur charges to that account.
How to start your lab and sign in to the Google Cloud console
Click the Start Lab button. If you need to pay for the lab, a dialog opens for you to select your payment method. On the left is the Lab Details pane with the following:
The Open Google Cloud console button
Time remaining
The temporary credentials that you must use for this lab
Other information, if needed, to step through this lab
Click Open Google Cloud console (or right-click and select Open Link in Incognito Window if you are running the Chrome browser).
The lab spins up resources, and then opens another tab that shows the Sign in page.
Tip: Arrange the tabs in separate windows, side-by-side.
Note: If you see the Choose an account dialog, click Use Another Account.
If necessary, copy the Username below and paste it into the Sign in dialog.
student-03-b0c130af25b9@qwiklabs.netYou can also find the Username in the Lab Details pane.
Click Next.
Copy the Password below and paste it into the Welcome dialog.
nESsA5Ud0pL2You can also find the Password in the Lab Details pane.
Click Next.
Important: You must use the credentials the lab provides you. Do not use your Google Cloud account credentials.
Note: Using your own Google Cloud account for this lab may incur extra charges.
Click through the subsequent pages:
Accept the terms and conditions.
Do not add recovery options or two-factor authentication (because this is a temporary account).
Do not sign up for free trials.
After a few moments, the Google Cloud console opens in this tab.
Note: To access Google Cloud products and services, click the Navigation menu or type the service or product name in the Search field.
Activate Cloud Shell
Cloud Shell is a virtual machine that is loaded with development tools. It offers a persistent 5GB home directory and runs on the Google Cloud. Cloud Shell provides command-line access to your Google Cloud resources.
Click Activate Cloud Shell at the top of the Google Cloud console.
Click through the following windows:
Continue through the Cloud Shell information window.
Authorize Cloud Shell to use your credentials to make Google Cloud API calls.
When you are connected, you are already authenticated, and the project is set to your Project_ID, qwiklabs-gcp-03-8f7826a76f90. The output contains a line that declares the Project_ID for this session:
Your Cloud Platform project in this session is set to qwiklabs-gcp-03-8f7826a76f90
gcloud is the command-line tool for Google Cloud. It comes pre-installed on Cloud Shell and supports tab-completion.
- (Optional) You can list the active account name with this command:
gcloud auth list
- Click Authorize.
Output:
ACTIVE: *
ACCOUNT: student-03-b0c130af25b9@qwiklabs.net

To set the active account, run:
    $ gcloud config set account `ACCOUNT`
- (Optional) You can list the project ID with this command:
gcloud config list project
Output:
[core]
project = qwiklabs-gcp-03-8f7826a76f90
Note: For full documentation of gcloud, in Google Cloud, refer to the gcloud CLI overview guide.
Set the region
- In Cloud Shell, run the following command to set the project region for this lab:
gcloud config set compute/region us-central1
Ensure that the Dataflow API is successfully enabled
To ensure access to the necessary API, restart the connection to the Dataflow API.
gcloud services disable dataflow.googleapis.com --project qwiklabs-gcp-03-8f7826a76f90 --force
gcloud services enable dataflow.googleapis.com --project qwiklabs-gcp-03-8f7826a76f90
Click Check my progress to verify the objective.
Disable and re-enable the Dataflow API
Task 1. Create project resources
- In Cloud Shell, create variables for your bucket, project, and region.
PROJECT_ID=$(gcloud config get-value project)
BUCKET_NAME="${PROJECT_ID}-bucket"
TOPIC_ID=my-id
REGION=us-central1
- Set your App Engine region.
Note: For regions other than us-central1 and europe-west1, set the AppEngine region variable to be the same as the assigned region. If you are assigned us-central1, set the AppEngine region variable to us-central. If you are assigned europe-west1, set the AppEngine region variable to europe-west.
You can refer to the App Engine locations for more information.
AE_REGION=us-central
- Create a Cloud Storage bucket owned by this project:
gsutil mb gs://$BUCKET_NAME
Note: Cloud Storage bucket names must be globally unique. Your Qwiklabs Project ID is always unique, so that is used in your bucket name in this lab.
- Create a Pub/Sub topic in this project:
gcloud pubsub topics create $TOPIC_ID
- Create an App Engine app for your project:
gcloud app create --region=$AE_REGION
- Create a Cloud Scheduler job in this project. The job publishes a message to a Pub/Sub topic at one-minute intervals:
gcloud scheduler jobs create pubsub publisher-job --schedule="* * * * *" \
    --topic=$TOPIC_ID --message-body="Hello!"
- If prompted to enable the Cloud Scheduler API, press
yand enter.
Click Check my progress to verify the objective.
Create Project Resources
- Start the job:
gcloud scheduler jobs run publisher-job
Note: If you encounter an error for RESOURCE_EXHAUSTED, attempt to execute the command again.
- Use the following commands to clone the quickstart repository and navigate to the sample code directory:
JavaPython
git clone https://github.com/GoogleCloudPlatform/java-docs-samples.git
cd java-docs-samples/pubsub/streaming-analytics
Note: If you are using the Python option, execute the Python commands individually.
Click Check my progress to verify the objective.
Start the cloud scheduler job
Task 2. Review code to stream messages from Pub/Sub to Cloud Storage
Code sample
Review the following sample code, which uses Dataflow to:
Read Pub/Sub messages.
Window (or group) messages into fixed-size intervals by publish timestamps.
Write the messages in each window to files in Cloud Storage.
JavaPython
import java.io.IOException;
import org.apache.beam.examples.common.WriteOneFilePerWindow;
import org.apache.beam.sdk.Pipeline;
import org.apache.beam.sdk.io.gcp.pubsub.PubsubIO;
import org.apache.beam.sdk.options.Default;
import org.apache.beam.sdk.options.Description;
import org.apache.beam.sdk.options.PipelineOptionsFactory;
import org.apache.beam.sdk.options.StreamingOptions;
import org.apache.beam.sdk.options.Validation.Required;
import org.apache.beam.sdk.transforms.windowing.FixedWindows;
import org.apache.beam.sdk.transforms.windowing.Window;
import org.joda.time.Duration;

public class PubSubToGcs {
  /*
   * Define your own configuration options. Add your own arguments to be processed
   * by the command-line parser, and specify default values for them.
   */
  public interface PubSubToGcsOptions extends StreamingOptions {
    @Description("The Cloud Pub/Sub topic to read from.")
    @Required
    String getInputTopic();

    void setInputTopic(String value);

    @Description("Output file's window size in number of minutes.")
    @Default.Integer(1)
    Integer getWindowSize();

    void setWindowSize(Integer value);

    @Description("Path of the output file including its filename prefix.")
    @Required
    String getOutput();

    void setOutput(String value);
  }

  public static void main(String[] args) throws IOException {
    // The maximum number of shards when writing output.
    int numShards = 1;

    PubSubToGcsOptions options =
        PipelineOptionsFactory.fromArgs(args).withValidation().as(PubSubToGcsOptions.class);

    options.setStreaming(true);

    Pipeline pipeline = Pipeline.create(options);

    pipeline
        // 1) Read string messages from a Pub/Sub topic.
        .apply("Read PubSub Messages", PubsubIO.readStrings().fromTopic(options.getInputTopic()))
        // 2) Group the messages into fixed-sized minute intervals.
        .apply(Window.into(FixedWindows.of(Duration.standardMinutes(options.getWindowSize()))))
        // 3) Write one file to GCS for every window of messages.
        .apply("Write Files to GCS", new WriteOneFilePerWindow(options.getOutput(), numShards));

    // Execute the pipeline and wait until it finishes running.
    pipeline.run().waitUntilFinish();
  }
}
Note: To explore the sample code further, visit the respective java-docs-samples and python-docs-samples GitHub pages.
Task 3. Start the pipeline
- To start the pipeline, run the following command:
JavaPython
mvn compile exec:java \
-Dexec.mainClass=com.examples.pubsub.streaming.PubSubToGcs \
-Dexec.cleanupDaemonThreads=false \
-Dexec.args=" \
    --project=$PROJECT_ID \
    --region=$REGION \
    --inputTopic=projects/$PROJECT_ID/topics/$TOPIC_ID \
    --output=gs://$BUCKET_NAME/samples/output \
    --runner=DataflowRunner \
    --windowSize=2 \
    --tempLocation=gs://$BUCKET_NAME/temp"
Note: When executing the python command, replace project_id, bucket_name, and region with your project id, bucket name, and assigned lab region.
The preceding command runs locally and launches a Dataflow job that runs in the cloud.
Note: You may have to wait around 10 minutes for the code to fully execute and for the pipeline job to appear in the Dataflow console in the next task.
Note: If you receive a warning regarding StaticLoggerBinder, you can safely ignore it and move ahead in the lab.
Click Check my progress to verify the objective.
Start the pipeline and launch dataflow job
Task 4. Observe job and pipeline progress
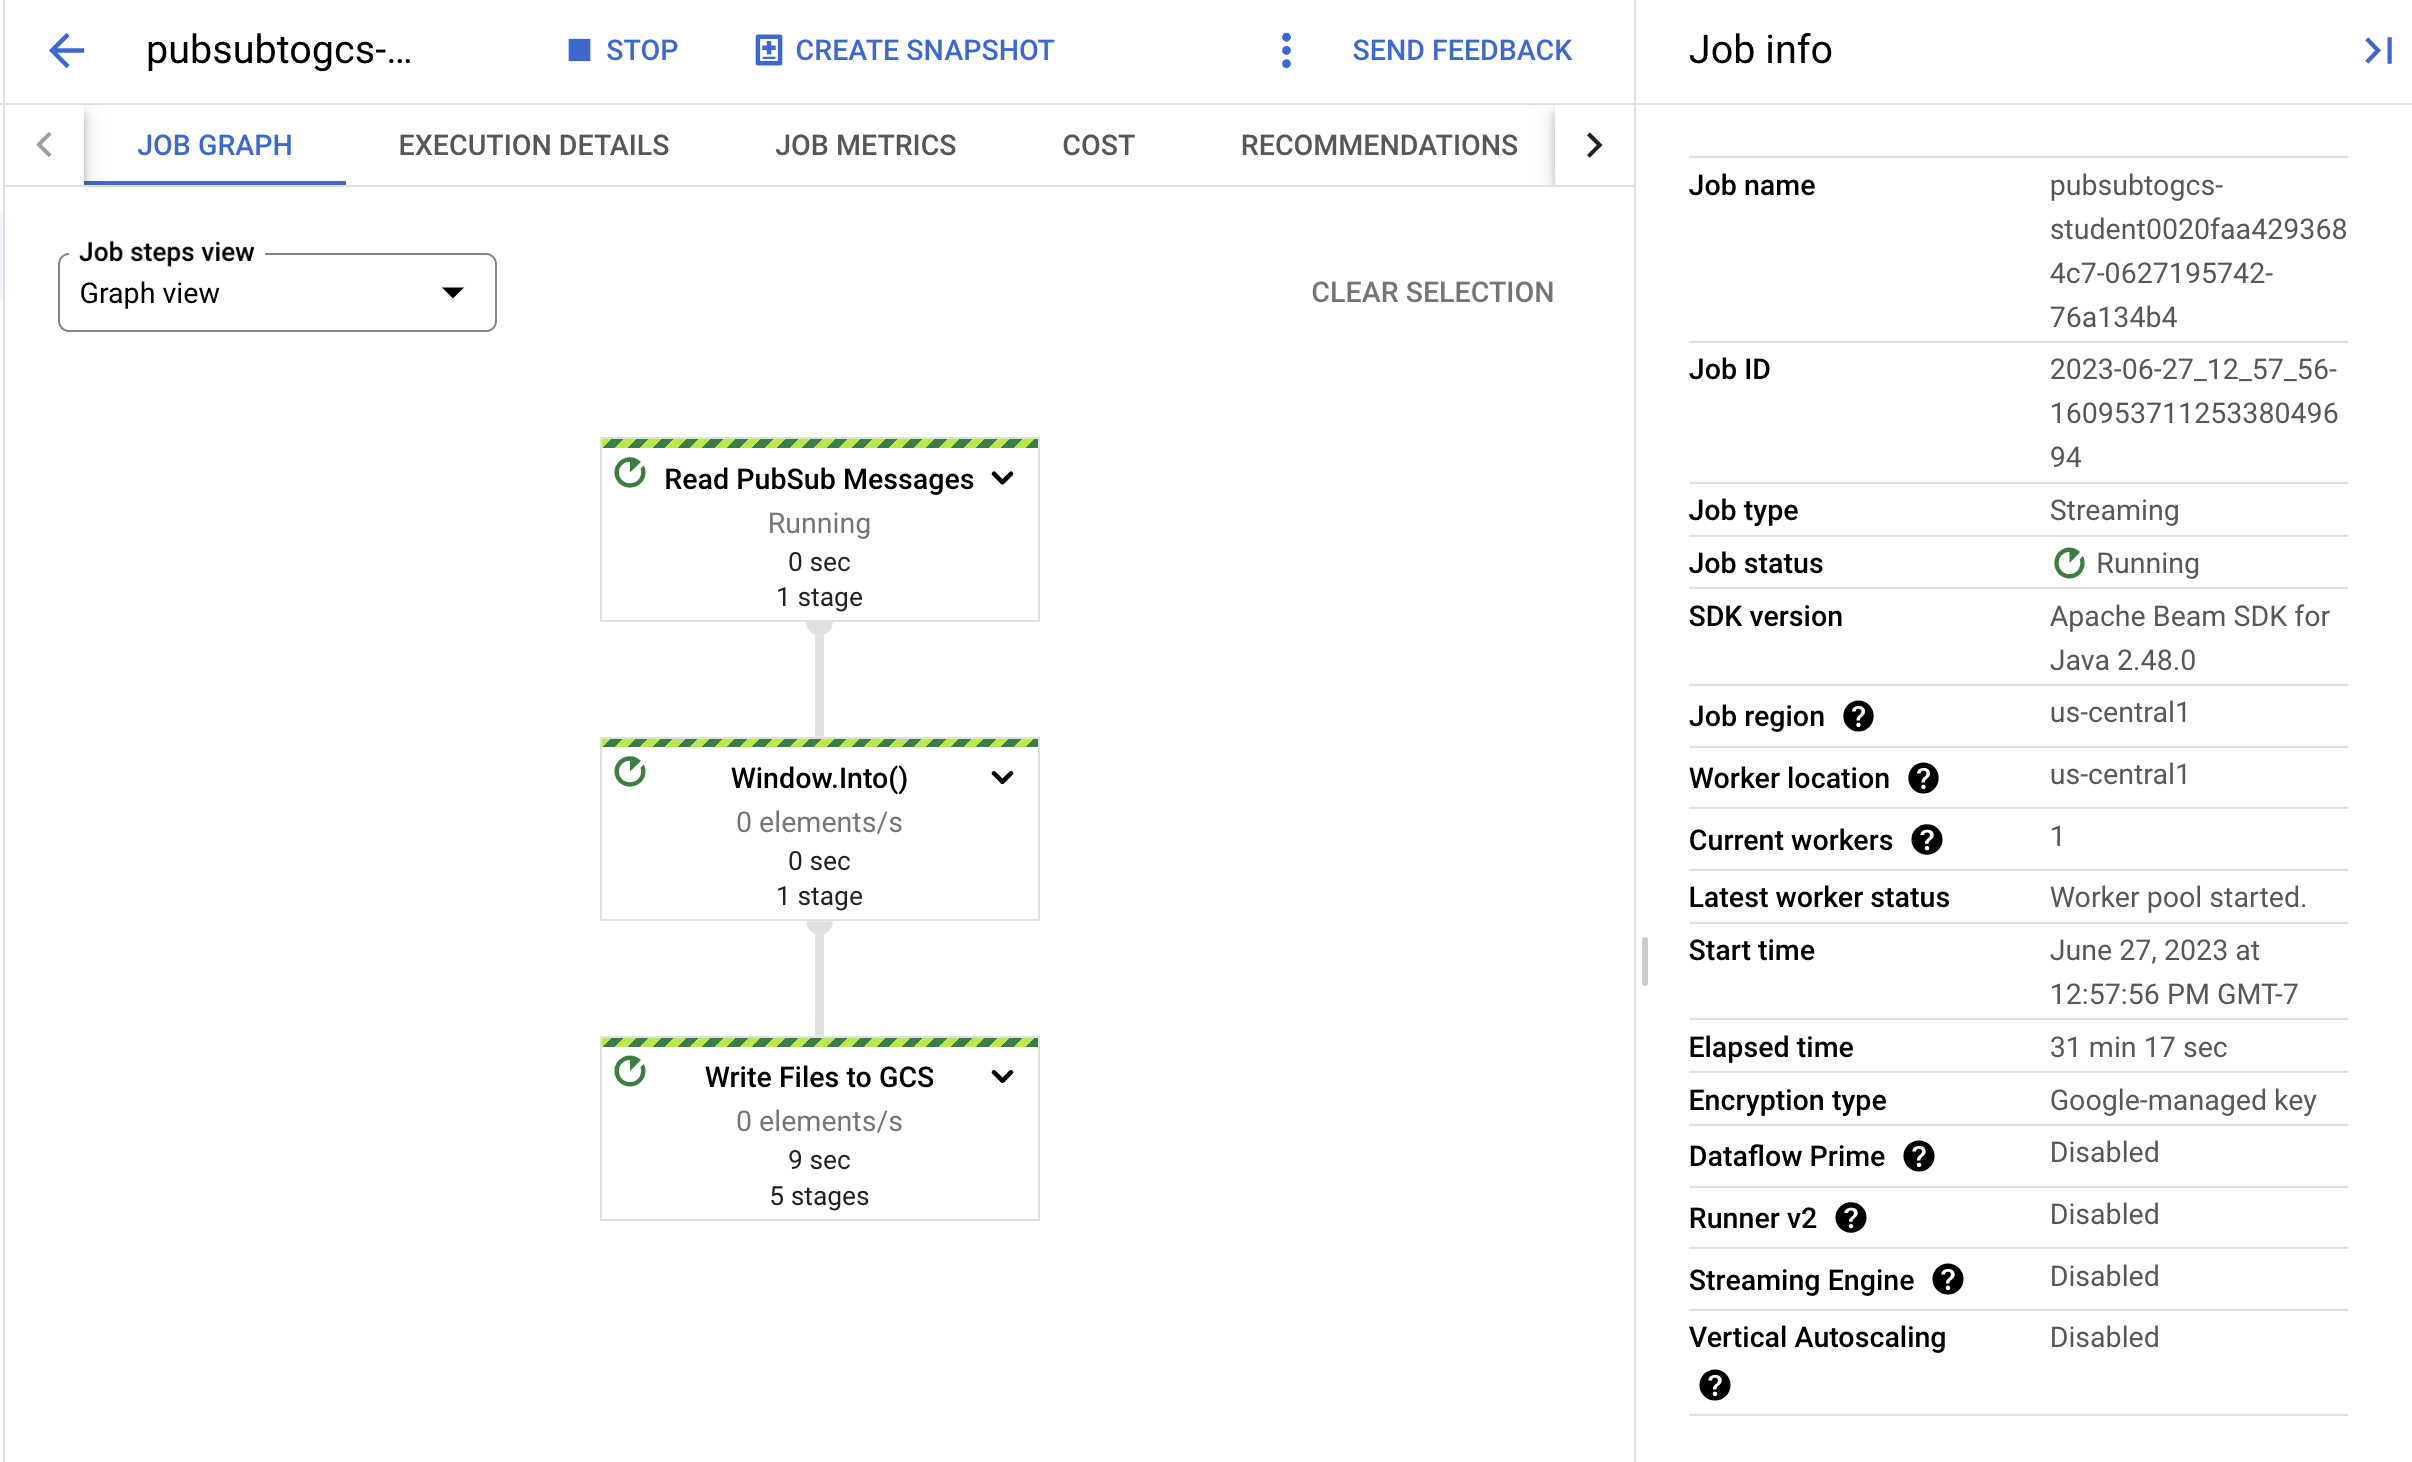
Go to Dataflow console to observe the job's progress.
Click Refresh to see the job and the latest status updates.
- Click on the job name to open the job details and review the following:
Job structure
Job logs
Stage metrics
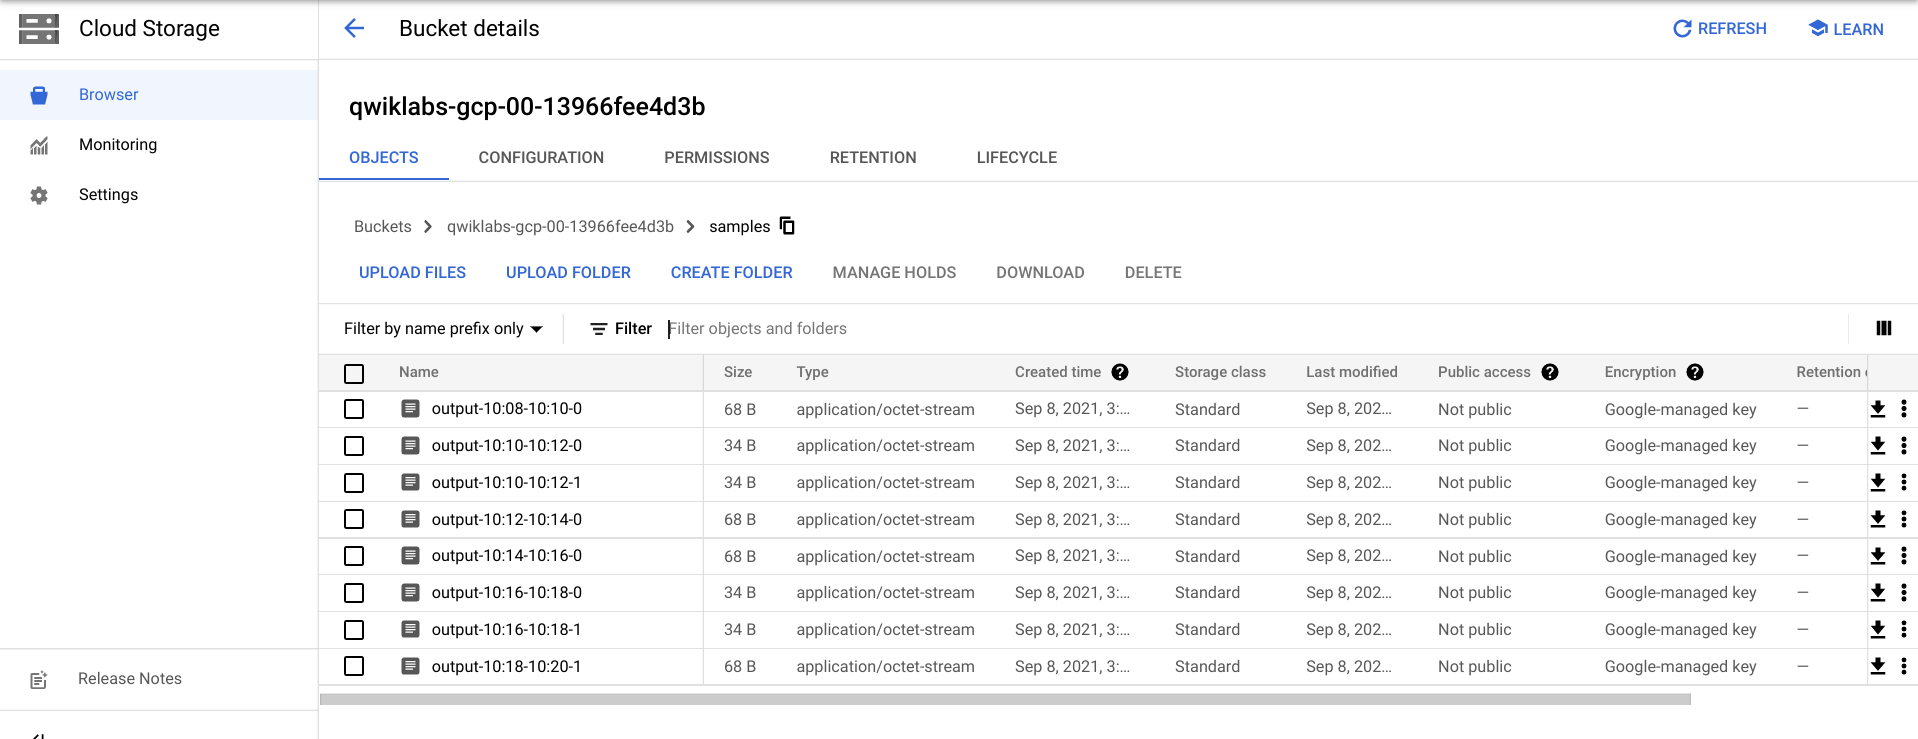
You may have to wait a few more minutes to see the output files in Cloud Storage.
- You can see the output files by navigating to Navigation menu > Cloud Storage, and clicking on your bucket name and then clicking Samples.
- Alternately, you can exit the application in Cloud Shell using CTRL+C (and for the Python option, type
exit), and then execute the command below to list the files that have been written out to Cloud Storage:
gsutil ls gs://${BUCKET_NAME}/samples/
The output should look like the following:
javapython
gs://{$BUCKET_NAME}/samples/output-22:30-22:32-0-of-1
gs://{$BUCKET_NAME}/samples/output-22:32-22:34-0-of-1
gs://{$BUCKET_NAME}/samples/output-22:34-22:36-0-of-1
gs://{$BUCKET_NAME}/samples/output-22:36-22:38-0-of-1
Task 5. Cleanup
- If you have not already, exit the application in Cloud Shell using CTRL+C.
For the Python option, type exit to exit the Python environment.
- In Cloud Shell, delete the Cloud Scheduler job:
gcloud scheduler jobs delete publisher-job
If prompted "Do you want to continue", press Y and enter.
- In the Dataflow console, stop the job by selecting your job name, and clicking Stop.
When prompted, click Stop Job > Cancel to cancel the pipeline without draining.
- In Cloud Shell, delete the topic:
gcloud pubsub topics delete $TOPIC_ID
- In Cloud Shell, delete the files created by the pipeline:
gsutil -m rm -rf "gs://${BUCKET_NAME}/samples/output*"
gsutil -m rm -rf "gs://${BUCKET_NAME}/temp/*"
- In Cloud Shell, delete the Cloud Storage bucket:
gsutil rb gs://${BUCKET_NAME}
Solution of Lab
curl -LO raw.githubusercontent.com/ePlus-DEV/storage/refs/heads/main/labs/GSP903/lab.sh
sudo chmod +x lab.sh
./lab.sh


