Overview
The Web Security Scanner, one of Security Command Center's built-in services, identifies security vulnerabilities in your Google App Engine, Google Kubernetes Engine (GKE), and Compute Engine web applications. It crawls your application, following all links within the scope of your starting URLs, and attempts to exercise as many user inputs and event handlers as possible.
The scanner is designed to complement your existing secure design and development processes. To avoid distracting developers with false positives, the scanner errs on the side of under reporting and will not display low confidence alerts. It does not replace a manual security review, and it does not guarantee that your application is free from security flaws.
Task 1. Before you begin, you need an app to scan
In this lab, you will deploy a sample Hello World application to run Security Scanner on.
- Run the following command in Cloud Shell to clone the Hello World sample app repository:
gsutil -m cp -r gs://spls/gsp067/python-docs-samples .
- Then go to the directory that contains the sample code:
cd python-docs-samples/appengine/standard_python3/hello_world
- Change the python version with the sed command.
sed -i "s/python37/python39/g" app.yaml
- Run the below command and add
itsdangerous==2.0.1,Jinja2==3.0.3andwerkzeug==2.0.1in the requirements.txt file:
nano requirements.txt
so that the file looks like:
Flask==1.1.2
itsdangerous==2.0.1
Jinja2==3.0.3
werkzeug==2.0.1
- Save the file (press Ctrl+O then Enter) and exit nano (press Ctrl+X).
Note: The package itsdangerous==2.0.1 is added in requirements.txt file to safely pass data to untrusted environments and get it back safe.
Task 2. Test app
- Installing Prerequisites Python environment.
sudo apt install python3.11-venv -y
python3 -m venv create myvenv
source myvenv/bin/activate
- From within the
hello_worlddirectory where the app's app.yaml configuration file is located, start the local development server with the following command:
dev_appserver.py app.yaml
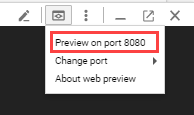
- The local development server is now running and listening for requests on port 8080. Click on the web preview button in Cloud Shell, and select Preview on port 8080 to see it:
Note: If you cannot see the web preview icon, close the Navigation menu, top left corner.
- Press Ctrl+c to stop the local app and return to the command line.
Task 3. Deploy app
In this lab use us-west4 as the App Engine region.
- Deploy your app to App Engine by running the following command from within the root directory of your application (
hello_world):
gcloud app deploy
You'll be asked to select a region. Choose the number for one that is near where you are.
After the app is created in your lab, you'll be asked if you want to continue. Click Y to continue.
Deployment of your app will then begin.
Note: If you get Timed out error re-run the command.
Task 4. View app
- To launch the app in your browser, run the following command:
gcloud app browse
There will be a link in Cloud Shell that you can use, or view the app at http://[YOUR_PROJECT_ID].uc.r.appspot.com. This is the URL you'll scan for vulnerabilities and it will be added to your scan parameters in the next step.
Test completed task
Click Check my progress to verify your performed task. If you have completed the task successfully you will be granted with an assessment score.
Deploy sample App Engine application.
Check my progress
Task 5. Run the scan
The scan does not run immediately, but is queued for later execution; it can take hours before the scan executes, depending on current load. For more information about these form settings, refer to Using Web Security Scanner.
Go to Navigation menu > APIs & Services > Library.
In Search for APIs & Services type Web Security Scanner.
Select the Web Security Scanner API then Click Enable to enable the API.
From the Navigation menu select Security > Web Security Scanner.
Click New Scan.
Under
Starting URL 1, enter the URL of the application you want to scan.Click Save to create the scan.
Click Run to start scanning:
The scan will be queued, and you can watch the status bar progress as it scans. The scan overview page displays a results section when the scan completes. The following image shows example scan results when no vulnerabilities are detected:
Note: It will take 4-5 minutes for the scan to complete. Try refreshing the page if you aren't seeing any updates.
Nice job! You just completed a scan using Web Security Scanner. You will see a warning to let you know that only scanning 1 URL isn't ideal. This lab is just to demonstrate a simple example. Your production environment will have plenty of URLs to scan.
Task 6. Test your understanding
Below is a multiple-choice question to reinforce your understanding of this lab's concepts. Answer it to the best of your abilities.
Web Security Scanner scans for common vulnerabilities in Google App Engine applications.True False
Solution of Lab
New Solution
curl -LO raw.githubusercontent.com/ePlus-DEV/storage/refs/heads/main/labs/GSP112/lab.sh
source lab.sh
Old Solution
export REGION=

curl -LO raw.githubusercontent.com/quiccklabs/Labs_solutions/master/Web%20Security%20Scanner%20Qwik%20Start/quicklabgsp112.sh
sudo chmod +x quicklabgsp112.sh
./quicklabgsp112.sh


