
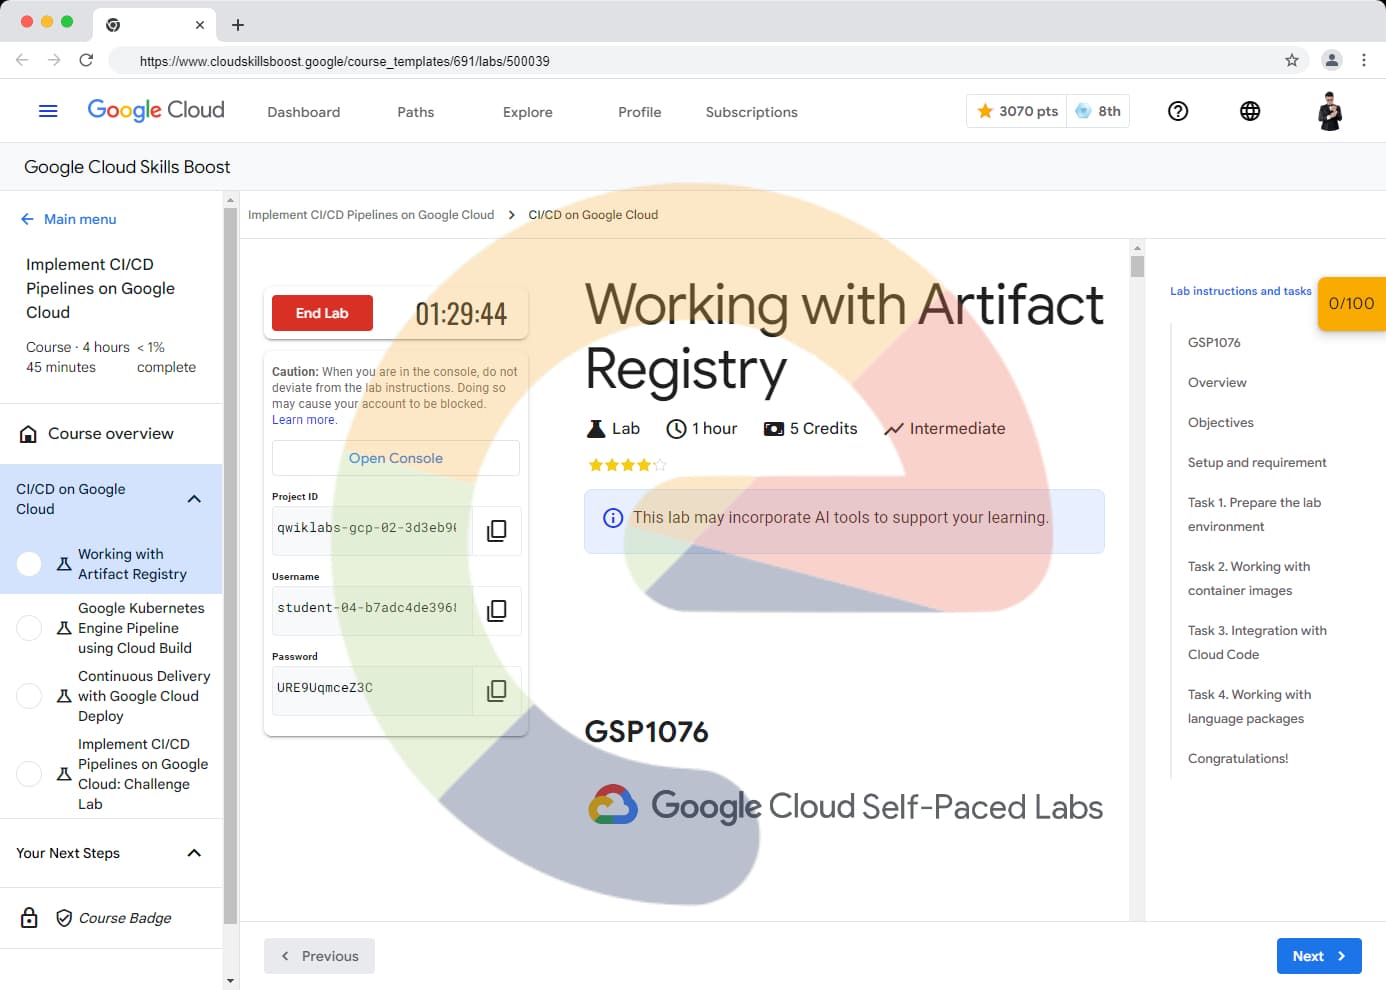
Working with Artifact Registry - GSP1076
A passionate full-stack developer from @ePlus.DEV
Overview
As the evolution of Container Registry, Artifact Registry is a single place for your organization to manage container images and language packages (such as Maven and npm). It is fully integrated with Google Cloud's tooling and runtimes and comes with support for native artifact protocols. This makes it simple to integrate it with your CI/CD tooling to set up automated pipelines.
In this lab you will learn about some of the features available in Artifact Registry.
Objectives
In this lab, you learn how to:
Create repositories for Containers and Language Packages
Manage container images with Artifact Registry
Integrate Artifact Registry with Cloud Code
Configure Maven to use Artifact Registry for Java Dependencies
Setup and requirement
Before you click the Start Lab button
Read these instructions. Labs are timed and you cannot pause them. The timer, which starts when you click Start Lab, shows how long Google Cloud resources will be made available to you.
This hands-on lab lets you do the lab activities yourself in a real cloud environment, not in a simulation or demo environment. It does so by giving you new, temporary credentials that you use to sign in and access Google Cloud for the duration of the lab.
To complete this lab, you need:
- Access to a standard internet browser (Chrome browser recommended).
Note: Use an Incognito or private browser window to run this lab. This prevents any conflicts between your personal account and the Student account, which may cause extra charges incurred to your personal account.
- Time to complete the lab---remember, once you start, you cannot pause a lab.
Note: If you already have your own personal Google Cloud account or project, do not use it for this lab to avoid extra charges to your account.
How to start your lab and sign in to the Google Cloud console
Click the Start Lab button. If you need to pay for the lab, a pop-up opens for you to select your payment method. On the left is the Lab Details panel with the following:
The Open Google Cloud console button
Time remaining
The temporary credentials that you must use for this lab
Other information, if needed, to step through this lab
Click Open Google Cloud console (or right-click and select Open Link in Incognito Window if you are running the Chrome browser).
The lab spins up resources, and then opens another tab that shows the Sign in page.
Tip: Arrange the tabs in separate windows, side-by-side.
Note: If you see the Choose an account dialog, click Use Another Account.
If necessary, copy the Username below and paste it into the Sign in dialog.
student-04-b7adc4de3968@qwiklabs.netYou can also find the Username in the Lab Details panel.
Click Next.
Copy the Password below and paste it into the Welcome dialog.
URE9UqmceZ3CYou can also find the Password in the Lab Details panel.
Click Next.
Important: You must use the credentials the lab provides you. Do not use your Google Cloud account credentials.
Note: Using your own Google Cloud account for this lab may incur extra charges.
Click through the subsequent pages:
Accept the terms and conditions.
Do not add recovery options or two-factor authentication (because this is a temporary account).
Do not sign up for free trials.
After a few moments, the Google Cloud console opens in this tab.
Note: To view a menu with a list of Google Cloud products and services, click the Navigation menu at the top-left.

Activate Cloud Shell
Cloud Shell is a virtual machine that is loaded with development tools. It offers a persistent 5GB home directory and runs on the Google Cloud. Cloud Shell provides command-line access to your Google Cloud resources.
Click Activate Cloud Shell
at the top of the Google Cloud console.

When you are connected, you are already authenticated, and the project is set to your Project_ID, qwiklabs-gcp-02-3d3eb9021675. The output contains a line that declares the Project_ID for this session:
Your Cloud Platform project in this session is set to qwiklabs-gcp-02-3d3eb9021675
gcloud is the command-line tool for Google Cloud. It comes pre-installed on Cloud Shell and supports tab-completion.
- (Optional) You can list the active account name with this command:
gcloud auth list
- Click Authorize.
Output:
ACTIVE: *
ACCOUNT: student-04-b7adc4de3968@qwiklabs.net

To set the active account, run:
    $ gcloud config set account `ACCOUNT`
- (Optional) You can list the project ID with this command:
gcloud config list project
Output:
[core]
project = qwiklabs-gcp-02-3d3eb9021675
Note: For full documentation of gcloud, in Google Cloud, refer to the gcloud CLI overview guide.
You must wait for the lab to provision before making any changes to the environment! The pre-configured parts of the environment that you need to work with will be available to you as soon as the lab indicates it is ready.
Task 1. Prepare the lab environment
Set up variables
- In Cloud Shell, set your project ID and project number. Save them as
PROJECT_IDandPROJECT_NUMBERvariables:
export PROJECT_ID=$(gcloud config get-value project)
export PROJECT_NUMBER=$(gcloud projects describe $PROJECT_ID --format='value(projectNumber)')
export REGION=us-east1
gcloud config set compute/region $REGION
Enable Google services
- Run the following to enable necessary Google services:
gcloud services enable \
  cloudresourcemanager.googleapis.com \
  container.googleapis.com \
  artifactregistry.googleapis.com \
  containerregistry.googleapis.com \
  containerscanning.googleapis.com
Get the source code
The source code for this lab is located in the GoogleCloudPlatform org on GitHub.
- Clone the source code with the command below, then change into the directory.
git clone https://github.com/GoogleCloudPlatform/cloud-code-samples/
cd ~/cloud-code-samples
Provision the infrastructure used in this lab
In this lab you will deploy code to Kubernetes Engine (GKE).
- Run the setup script below to prepare this infrastructure:
gcloud container clusters create container-dev-cluster --zone=us-east1-d
Click Check my progress to verify the objective.
Enable Google Services and create GKE cluster
Check my progress
Task 2. Working with container images
Create a Docker Repository on Artifact registry
Artifact Registry supports managing container images and language packages. Different artifact types require different specifications. For example, the requests for Maven dependencies are different from requests for Node dependencies.
To support the different API specifications, Artifact Registry needs to know what format you want the API responses to follow. To do this you will create a repository and pass in the --repository-format flag indicating the type of repository desired.
- From Cloud Shell run the following command to create a repository for Docker images:
gcloud artifacts repositories create container-dev-repo --repository-format=docker \
  --location=$REGION \
  --description="Docker repository for Container Dev Workshop"
Click Authorize if the Cloud Shell authorization prompt appears.
- In the Cloud console, go to Artifact Registry > Repositories and notice your newly created Docker repository named
container-dev-repo. If you click on it you can see that it's empty at the moment.
Click Check my progress to verify the objective. (It may take a minute to validate. If you have completed successfully and it is not validating, wait a minute and try again.)
Working with container images
Check my progress
Configure Docker Authentication to Artifact Registry
When connecting to Artifact Registry credentials are required in order to provide access. Rather than set up separate credentials, Docker can be configured to use your gcloud credentials seamlessly.
- From Cloud Shell run the following command to configure Docker to use the Google Cloud CLI to authenticate requests to Artifact Registry in the
us-east1region:
gcloud auth configure-docker us-east1-docker.pkg.dev
- The command will prompt for a confirmation to change the Cloud Shell docker configuration, click ENTER.
Explore the sample Application
A sample application is provided in the git repository you cloned.
- Change into the java directory and review the application code:
cd ~/cloud-code-samples/java/java-hello-world
The folder contains an example Java application that renders a simple web page: in addition to various files not relevant for this specific lab, it contains the source code, under the src folder, and a Dockerfile you will use to build a container image locally.
Build the Container Image
Before you can store container images in Artifact Registry you need to create one.
- Run the following command to build the container image and tag it properly:
docker build -t us-east1-docker.pkg.dev/qwiklabs-gcp-02-3d3eb9021675/container-dev-repo/java-hello-world:tag1 .
Push the Container Image to Artifact Registry
- Run the following command to push the container image to the repository you created:
docker push us-east1-docker.pkg.dev/qwiklabs-gcp-02-3d3eb9021675/container-dev-repo/java-hello-world:tag1
Review the image in Artifact Registry
In Artifact Registry > Repositories, click into
container-dev-repoand check that thejava-hello-worldimage is there.Click on the image and note the image tagged
tag1. You can see that Vulnerability Scanning is running or already completed and the number of vulnerabilities detected is visible.
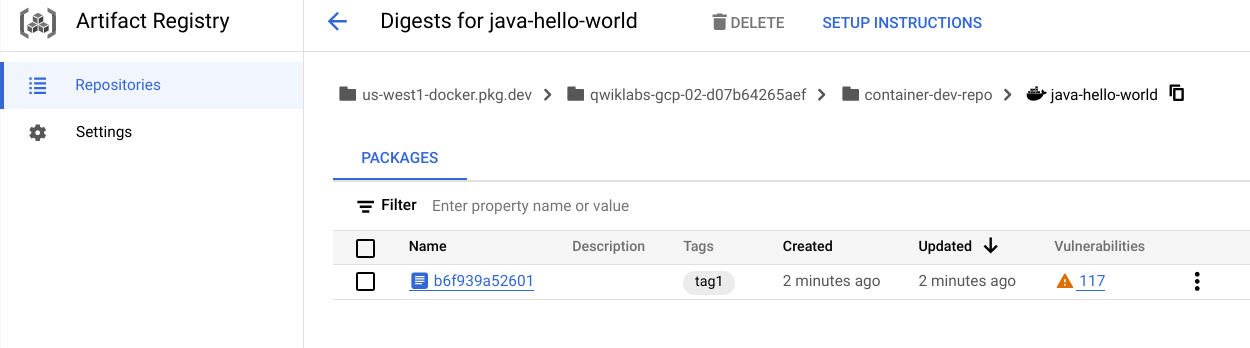
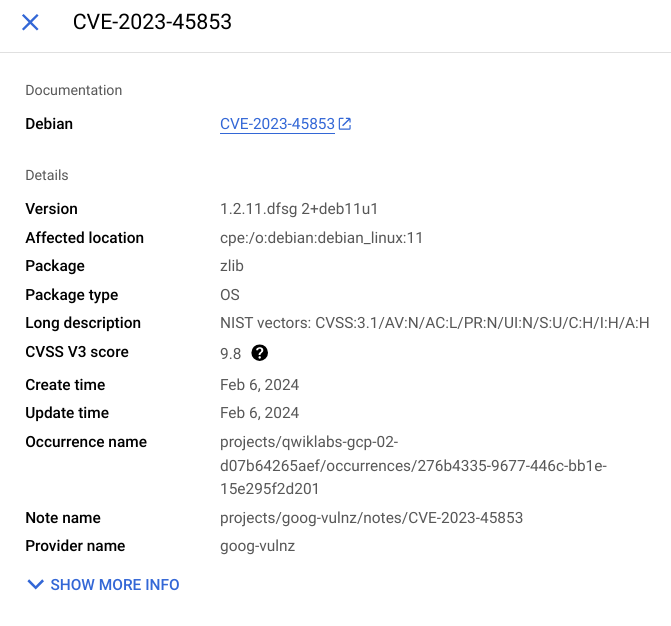
Click on the number of vulnerabilities and you will see the list of vulnerabilities detected in the image, with the CVE bulletin name and the severity. Click VIEW on each listed vulnerability to get more details:
Task 3. Integration with Cloud Code
In this section you use the Artifact Registry Docker image repository with Cloud Code.
Deploy the Application to GKE Cluster from Cloud Code
- From the
java-hello-worldfolder run the following command to open Cloud Shell Editor and add the application folder to this workspace:
cd ~/cloud-code-samples/
cloudshell workspace .
The Cloud Shell editor will open with the explorer in the application folder.
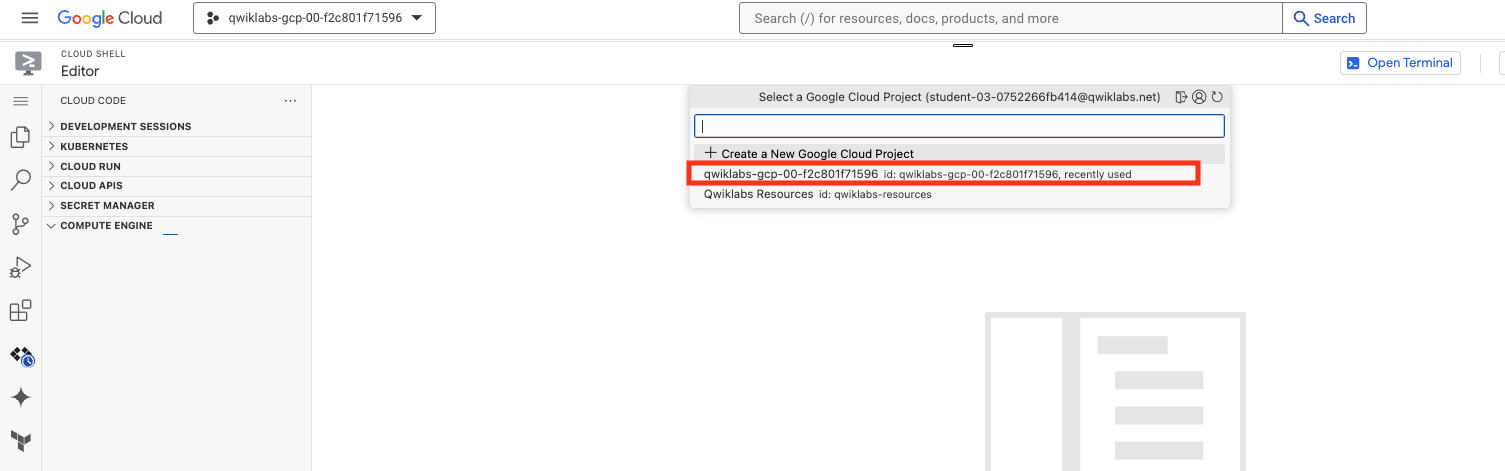
- From the left menu, select Cloud Code and then expand the COMPUTE ENGINE option and click on Select a Project and choose the project ID provided in the Lab Instruction.
Also, expand the KUBERNETES option. You will be able to see the cluster loading.
Wait until you see the cluster listed under KUBERNETES as well as under COMPUTE ENGINE.
- The following steps will require you to enter your Artifact Registry repository location. The format for the location is:
us-east1-docker.pkg.dev/qwiklabs-gcp-02-3d3eb9021675/container-dev-repo
Click Navigation menu under the Cloud Shell Editor

View > Command Palette... and type Run on Kubernetes and select Cloud Code: Run on Kubernetes.

Choose cloud-code-samples/java/java-hello-world/skaffold.yaml and then dockerfile.
If Prompted for a context, select Yes to use the current context.
In the prompt for the image registry select Enter the address of an image repository and put the address location you located below and press Enter.
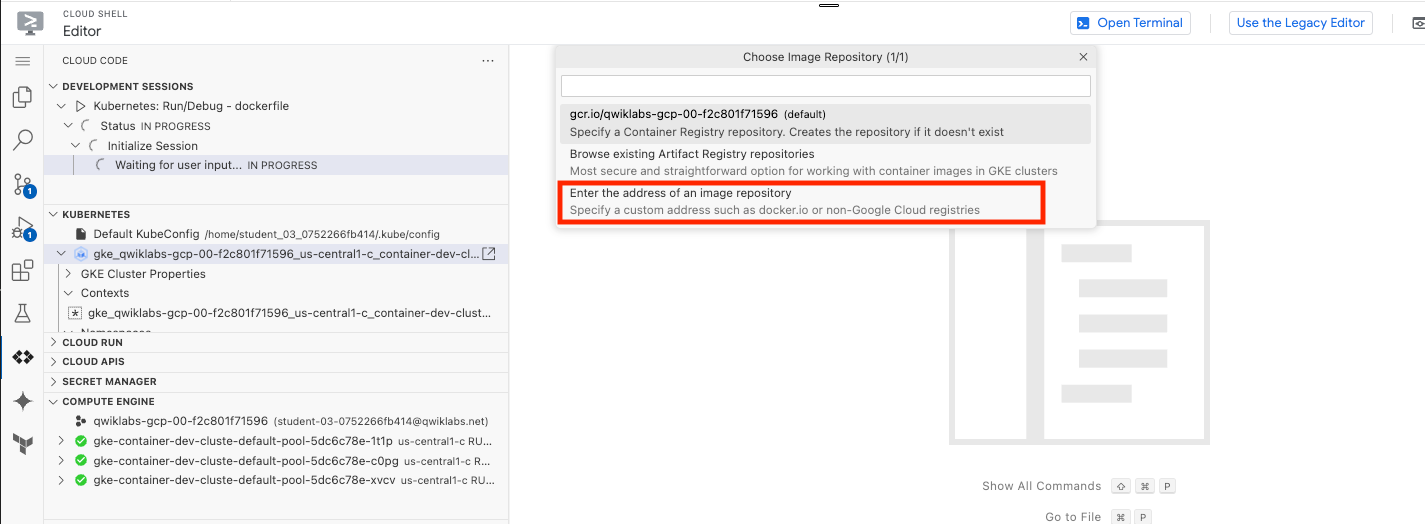
us-east1-docker.pkg.dev/qwiklabs-gcp-02-3d3eb9021675/container-dev-repo
- When you execute Run on Kubernetes for the first time Cloud Code prompts you for the target image repository location. Once provided, the repository url is stored in the file
.vscode/launch.jsonwhich is created in the application folder.
In the output pane you see that the build starts for the application image java-hello-world, the image is uploaded to the Artifact Registry repository configured previously.
- In Artifact Registry > Repositories click into
container-dev-repoand check that thejava-hello-worldimage and note a new image taggedlatest.
Review the Deployed Application
- Go back to Cloud Shell Editor. When deployment is complete Skaffold/Cloud Code will print the exposed url where the service have been forwarded, click on the link - Follow link:
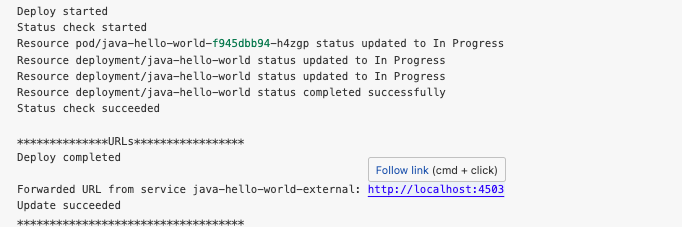
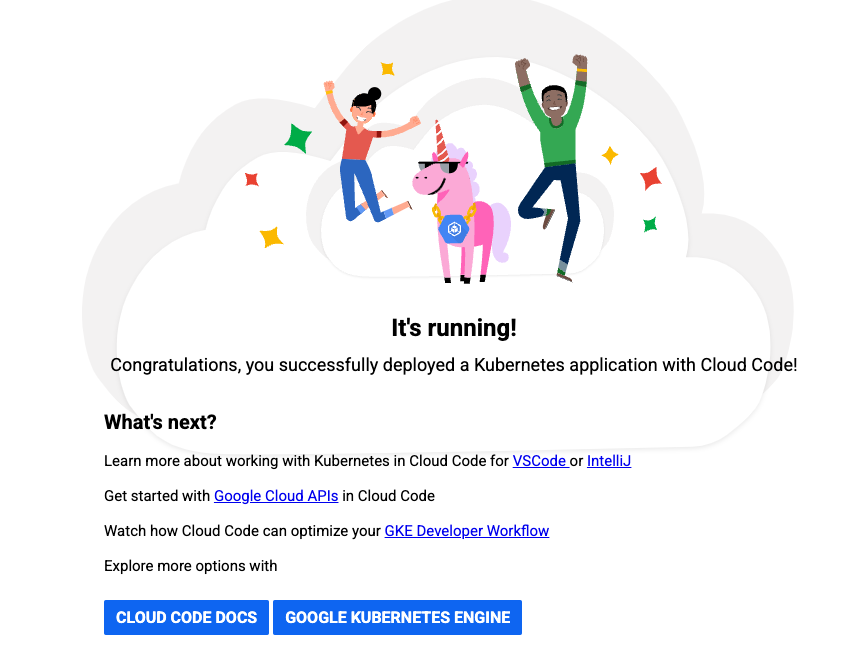
In the new browser window you see the hello world app page.
Update application code
Now update the application to see the change implemented immediately in the deployment on the cluster:
Open the
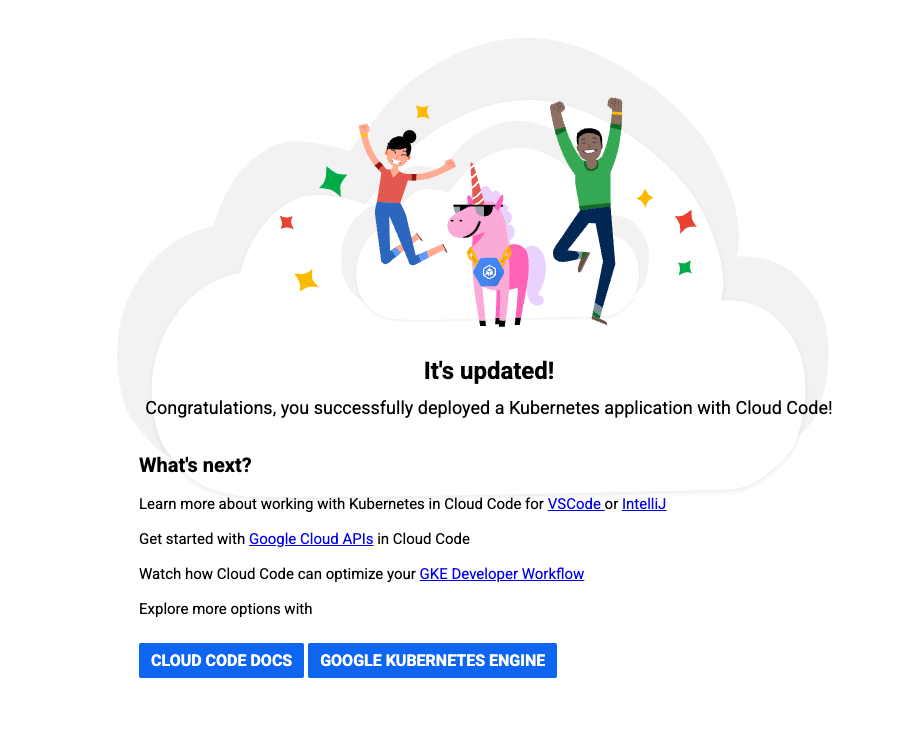
HelloWorldController.javaby clicking on the Navigation menu under the Cloud Shell Editor View > Command Palette... and then click one backspace and then enter the path src/main/java/cloudcode/helloworld/web and click the option starting withHello...Change the text in row 20 from "It's running!" to "It's updated!". You should see the build and deployment process starting immediately.
At the end of the deploy click again on the forwarded url or refresh the browser window with the application to see your change deployed:
- In the Cloud console go to Navigation Menu > Artifact Registry > Repositories and click into
container-dev-repoto check that thejava-hello-worldimage and note the new image.
Click Check my progress to verify the objective.
Integration with Cloud Code
Check my progress
Task 4. Working with language packages
In this section you will set up an Artifact Registry Java repository and upload packages to it, leveraging them in different applications.
Create a Java package repository
- From Cloud Shell run the following command to create a repository for Java artifacts:
gcloud artifacts repositories create container-dev-java-repo \
    --repository-format=maven \
    --location=us-east1 \
    --description="Java package repository for Container Dev Workshop"
Click Authorize if the Cloud Shell authorization prompt appears
In the Cloud console go to Artifact Registry > Repositories and notice your newly created Maven repository named
container-dev-java-repo, if you click on it you can see that it's empty at the moment.
Click Check my progress to verify the objective.
Create a Java package repository
Check my progress
Set up authentication to Artifact Repository
- Use the following command to update the well-known location for Application Default Credentials (ADC) with your user account credentials so that the Artifact Registry credential helper can authenticate using them when connecting with repositories:
gcloud auth login --update-adc
If prompted to authenticate:
Choose Y.
Paste the code into a browser window.
Select Google Sign In and sign in using the credentials in the lab.
Copy the authentication code from the browser back into the console to complete the authentication.
Configure Maven for Artifact Registry
- Run the following command to print the repository configuration to add to your Java project:
gcloud artifacts print-settings mvn \
    --repository=container-dev-java-repo \
    --location=us-east1
- Open the
pom.xmlin Cloud Shell Editor and add the returned settings to the appropriate sections in the file:
- Add the distributionManagement section.
  <distributionManagement>
    <snapshotRepository>
      <id>artifact-registry</id>
      <url>artifactregistry://us-east1-maven.pkg.dev/qwiklabs-gcp-02-3d3eb9021675/container-dev-java-repo</url>
    </snapshotRepository>
    <repository>
      <id>artifact-registry</id>
      <url>artifactregistry://us-east1-maven.pkg.dev/qwiklabs-gcp-02-3d3eb9021675/container-dev-java-repo</url>
    </repository>
  </distributionManagement>
- Add the repositories section.
 <repositories>
   <repository>
     <id>artifact-registry</id>
     <url>artifactregistry://us-east1-maven.pkg.dev/qwiklabs-gcp-02-3d3eb9021675/container-dev-java-repo</url>
     <releases>
       <enabled>true</enabled>
     </releases>
     <snapshots>
       <enabled>true</enabled>
     </snapshots>
   </repository>
 </repositories>
- Update the extensions in the Builds section.
<extensions>
     <extension>
       <groupId>com.google.cloud.artifactregistry</groupId>
       <artifactId>artifactregistry-maven-wagon</artifactId>
       <version>2.1.0</version>
     </extension>
   </extensions>
Here's an example of the complete file for your reference.
<?xml version="1.0" encoding="UTF-8"?>
<project xmlns="http://maven.apache.org/POM/4.0.0" xmlns:xsi="http://www.w3.org/2001/XMLSchema-instance"
       xsi:schemaLocation="http://maven.apache.org/POM/4.0.0 http://maven.apache.org/xsd/maven-4.0.0.xsd">
 <modelVersion>4.0.0</modelVersion>

 <artifactId>hello-world</artifactId>
 <packaging>jar</packaging>
 <name>Cloud Code Hello World</name>
 <description>Getting started with Cloud Code</description>
 <version>1.0.0</version>
<distributionManagement>
   <snapshotRepository>
     <id>artifact-registry</id>
     <url>artifactregistry://us-east1-maven.pkg.dev/qwiklabs-gcp-02-3d3eb9021675/container-dev-java-repo</url>
   </snapshotRepository>
   <repository>
     <id>artifact-registry</id>
     <url>artifactregistry://us-east1-maven.pkg.dev/qwiklabs-gcp-02-3d3eb9021675/container-dev-java-repo</url>
   </repository>
 </distributionManagement>

 <repositories>
   <repository>
     <id>artifact-registry</id>
     <url>artifactregistry://us-east1-maven.pkg.dev/qwiklabs-gcp-02-3d3eb9021675/container-dev-java-repo</url>
     <releases>
       <enabled>true</enabled>
     </releases>
     <snapshots>
       <enabled>true</enabled>
     </snapshots>
   </repository>
 </repositories>

 <parent>
   <groupId>org.springframework.boot</groupId>
   <artifactId>spring-boot-starter-parent</artifactId>
   <version>2.6.3</version>
 </parent>

 <properties>
   <java.version>1.8</java.version>
   <checkstyle.config.location>./checkstyle.xml</checkstyle.config.location>
 </properties>

 <build>
   <plugins>
     <plugin>
       <groupId>com.google.cloud.tools</groupId>
       <artifactId>jib-maven-plugin</artifactId>
       <version>3.2.0</version>
     </plugin>
     <plugin>
       <groupId>org.springframework.boot</groupId>
       <artifactId>spring-boot-maven-plugin</artifactId>
     </plugin>
     <plugin>
       <groupId>org.apache.maven.plugins</groupId>
       <artifactId>maven-checkstyle-plugin</artifactId>
       <version>3.1.2</version>
     </plugin>
   </plugins>
   <extensions>
     <extension>
       <groupId>com.google.cloud.artifactregistry</groupId>
       <artifactId>artifactregistry-maven-wagon</artifactId>
       <version>2.1.0</version>
     </extension>
   </extensions>
 </build>

 <!-- The Spring Cloud GCP BOM will manage spring-cloud-gcp version numbers for you. -->
 <dependencyManagement>
   <dependencies>
     <dependency>
       <groupId>org.springframework.cloud</groupId>
       <artifactId>spring-cloud-gcp-dependencies</artifactId>
       <version>1.2.8.RELEASE</version>
       <type>pom</type>
       <scope>import</scope>
     </dependency>
   </dependencies>
 </dependencyManagement>

 <dependencies>

   <dependency>
     <groupId>org.springframework.boot</groupId>
     <artifactId>spring-boot-starter</artifactId>
   </dependency>

   <dependency>
     <groupId>org.springframework.boot</groupId>
     <artifactId>spring-boot-starter-jetty</artifactId>
   </dependency>

   <dependency>
     <groupId>org.springframework</groupId>
     <artifactId>spring-webmvc</artifactId>
   </dependency>

   <dependency>
     <groupId>org.springframework.boot</groupId>
     <artifactId>spring-boot-starter-thymeleaf</artifactId>
   </dependency>

   <dependency>
     <groupId>org.springframework.boot</groupId>
     <artifactId>spring-boot-starter-test</artifactId>
     <scope>test</scope>
   </dependency>

   <dependency>
     <groupId>org.springframework.cloud</groupId>
     <artifactId>spring-cloud-gcp-starter-logging</artifactId>
   </dependency>

 </dependencies>

</project>
Upload your Java package to Artifact Registry
With Artifact Registry configured in Maven, you can now use Artifact Registry to store Java Jars for use by other projects in your organization.
- Enter the below command to change to
java-hello-worldfolder.
cd ~/cloud-code-samples/java/java-hello-world
- Run the following command to upload your Java package to Artifact Registry:
mvn deploy
Check the Java package in Artifact Registry
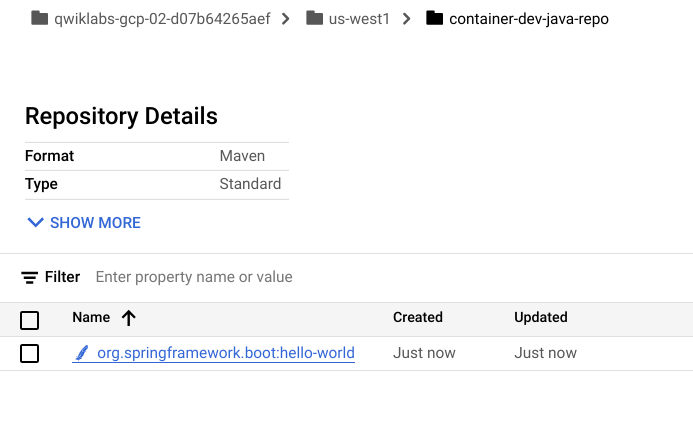
In the Cloud console go to Artifact Registry > Repositories and click into container-dev-java-repo to check that the hello-world binary artifact is there:
Solution of Lab
export ZONE=

curl -LO raw.githubusercontent.com/QUICK-GCP-LAB/2-Minutes-Labs-Solutions/main/Working%20with%20Artifact%20Registry/gsp1076-1.sh
sudo chmod +x gsp1076-1.sh
./gsp1076-1.sh


- NOW FOLLOW VIDEO'S INSTRUCTIONS
curl -LO raw.githubusercontent.com/QUICK-GCP-LAB/2-Minutes-Labs-Solutions/main/Working%20with%20Artifact%20Registry/gsp1076-2.sh
sudo chmod +x gsp1076-2.sh
./gsp1076-2.sh


