Build a Smart Cloud Application with Vibe Coding and MCP: Challenge Lab - GSP532

A passionate full-stack developer from @ePlus.DEV
Challenge overview
In a challenge lab you’re given a scenario and a set of tasks. Instead of following step-by-step instructions, you will use the skills learned from the labs in the course to figure out how to complete the tasks on your own! An automated scoring system (shown on this page) will provide feedback on whether you have completed your tasks correctly.
When you take a challenge lab, you will not be taught new Google Cloud concepts. You are expected to extend your learned skills, like changing default values and reading and researching error messages to fix your own mistakes.
To score 100% you must successfully complete all tasks within the time period!
This lab is recommended for students who have enrolled in the Build a Smart Cloud Application with Vibe Coding and MCP course. Are you ready for the challenge?
Topics tested
Enable the APIs and set the environment variables.
Perform the IAM policy bindings.
Deploy the MCP server locally for testing and deploy to Cloud Run.
Use the Agent Development Kit (ADK) to update the Python application to use MCP.
Dockerize and deploy the MCP server and ADK agent to Cloud Run.
Setup and requirements
Before you click the Start Lab button
Read these instructions. Labs are timed and you cannot pause them. The timer, which starts when you click Start Lab, shows how long Google Cloud resources are made available to you.
This hands-on lab lets you do the lab activities in a real cloud environment, not in a simulation or demo environment. It does so by giving you new, temporary credentials you use to sign in and access Google Cloud for the duration of the lab.
To complete this lab, you need:
- Access to a standard internet browser (Chrome browser recommended).
Note: Use an Incognito (recommended) or private browser window to run this lab. This prevents conflicts between your personal account and the student account, which may cause extra charges incurred to your personal account.
- Time to complete the lab—remember, once you start, you cannot pause a lab.
Note: Use only the student account for this lab. If you use a different Google Cloud account, you may incur charges to that account.
Challenge scenario
The Cloud Creek Zoo has contracted the Cymbal Group's 'Digital Experience' consulting division to implement a state-of-the-art visitor engagement system. Cloud Creek Zoo's ultimate goal is a highly accurate, dynamic, and engaging Tour Guide powered by AI that can provide deep, contextual answers to visitor questions. At the core of the systems upgrade is the implementation and upgrade of the "zoo tour guide" AI agent that can perform lookups of animal information via a remote Model Context Protocol (MCP) server, the "zoo server".

In addition to using Wikipedia for context when answering visitor queries, the "zoo tour guide" agent should have access to real-time, broad information via a dedicated Google Search MCP Server tool. This would give the agent the capacity to answer questions such as, "Give me recent conservation news about the lion species."
A junior consultant made some mistakes while upgrading the existing "zoo server", resulting in a slightly broken, non-functional Python server. In addition, the project's architecture had not yet been finalized according to Cymbal Group's strict IAM policies.
You have been called to address these issues.
Your challenge
In this lab, your mission as a Senior AI Integration Specialist for the Cymbal Group is the following:
Set up the project and enable the necessary APIs as well as services.
Enforce corporate IAM policy.
Fix the broken MCP server's code and deploy the server to Cloud Run for testing.
Integrate and upgrade the "zoo tour guide" ADK AI agent's functionality and workflow to support Google Search.
Dockerize the ADK agent package and deploy it to Cloud Run to achieve production readiness.
Task 1. Set up the environment and enable the necessary APIs
In this task, you create the project-specific foundation in Google Cloud to support an AI deployment at scale.
Ensure your Google Cloud project is configured to allow the required services to function and communicate effectively.
Download the code files
In Cloud Shell, click Open Editor to open the Cloud Shell Editor to your home directory.
In the Cloud Shell Editor action bar, click View > Terminal.
Note: You may have to lengthen your browser window or click More options (
) to see the View menu option.
Use this window as your IDE, with both the Cloud Shell Editor (top) and the Cloud Shell Terminal (bottom), for the remainder of this lab.
Close any additional tutorial or Gemini panels that appear on the right side of the screen to save more of your window for your code editor.In the terminal, enter the following command to set up your project:
gcloud config set project qwiklabs-gcp-01-6a13f120e283Expected output: You should get an output message confirming the updated property.
In the terminal, run the following commands to download and extract the boilerplate code files:
gcloud storage cp gs://qwiklabs-gcp-01-6a13f120e283-labconfig-bucket/labs_code.zip .
unzip labs_code.zip
Run the following to create the environment variables:
cd ~/zoo_guide_agent
cat <<EOF > .env
MODEL="gemini-3.5-flash"
SERVICE_ACCOUNT="480083809913-compute@developer.gserviceaccount.com"
MCP_SERVER_URL="https://coding-zoo-mcp-server-480083809913.us-central1.run.app/mcp/"
GOOGLE_GENAI_USE_ENTERPRISE=1
GOOGLE_CLOUD_PROJECT=qwiklabs-gcp-01-6a13f120e283
PROJECT_NUMBER=480083809913
GOOGLE_CLOUD_LOCATION=us-central1
EOF
Your final directory structure should look similar to the following.
Output:
.
├── mcp-on-cloudrun
│   ├── Dockerfile
│   ├── local_mcp_call.py
│   ├── pyproject.toml
│   ├── server.py
│   └── uv.lock
└── zoo_guide_agent
    ├── agent.py
    ├── __init__.py
    ├── .env
    └── requirements.txt
Finally, enable the necessary APIs—
Agent Platform API,Artifact Registry API,Compute Engine API,Cloud Build API, andCloud Run Admin API.

Task 2. Perform the necessary policy bindings (IAM setup)
The automated services (Cloud Build and Cloud Run) need specific permissions to interact with each other and the AI Platform.
In this task, you must perform the necessary policy bindings to give the user/service account permissions to invoke Cloud Run and use the AI Platform.
You need to grant the following IAM roles to the respective service accounts:
- Grant the
Cloud Run AdminandAgent Platform Userrole tostudent-01-3af95278d1f5@qwiklabs.netuser to allow it to deploy services to Cloud Run.
Task 3. Fix and deploy the MCP server to Cloud Run
In this task, you must use the Gemini CLI to troubleshoot and revitalize the MCP server, which acts as the application's backbone and orchestrates AI tool use.
Once you've fixed the problem(s) in the code, ensure you use the relevant Cloud Build integration command in the Gemini CLI to deploy the preexisting, remote MCP server to the Gemini CLI repository for testing.
Deploy and test locally
In the terminal, execute the following commands to run
~/mcp-on-cloudrun/server.py:cd ~/mcp-on-cloudrun uv run server.pyYou will get an error; you need to fix that error using
Geminiin Cloud Shell.Note: Gemini CLI may take some time to update and make code changes in the actual Python file. If the Gemini CLI asks for your permission to execute the Python file that it has fixed, press ESC to cancel, and exit the Gemini CLI to return to the terminal. Then perform the lab steps that follow to proceed with the lab.
Once the error is fixed, re-run the previous command. It should start the
MCP serverlocally and you should get output confirming that.Open another
terminalinstance and run~/mcp-on-cloudrun/local_mcp_call.pyto test the locally deployed agent:gcloud config set project qwiklabs-gcp-01-6a13f120e283 cd ~/mcp-on-cloudrun uv run local_mcp_call.pyNote: If you get a
google.logging.v2.WriteLogEntriesPartialErrorserror, set your project using thegcloud config set project qwiklabs-gcp-01-6a13f120e283command.
Expected output: The resulting output, presented as aCallToolResult, should show the successful retrieval of structured data about the walrus species.
Deploy to Cloud Run
Note: You need to authorize Cloud Shell during the deployment process if prompted.
Run the following gcloud command to deploy the application to Cloud Run:
cd ~/mcp-on-cloudrun
gcloud run deploy coding-zoo-mcp-server \
    --no-allow-unauthenticated \
    --region=us-central1 \
    --source=. \
    --min=1 \
    --project=qwiklabs-gcp-01-6a13f120e283 \
    --labels=lab-dev=mcp-zoo-cloud-run-service
Note: Deployment can take up to 10 minutes. If you encounter a Quota exceeded for total allowable CPU per project per region error during the Cloud Run deployment, please wait a moment and retry the command.
Click Check my progress to verify the objective.
Task 4. Update the agent to use MCP
In this task, you deploy your Python Agent code and link it to the newly deployed MCP server.
Using the ADK commands within the Gemini CLI, deploy the local (updated) agent.py file. Configure this deployment to use the MCP Server deployed in Task 3, making the zoo tour guide operational within your local CLI environment.
Generate tokens and configure the settings.json file
Save your Google Cloud credentials and project number in environment variables for use in the Gemini settings file:
```
Note: If you get an authentication error in Gemini CLI, yourID_TOKENmay have expired. Exit with/quitand set your project using thegcloud config set project qwiklabs-gcp-01-6a13f120e283command.In the Cloud Shell Editor, select View > Toggle hidden files, and open or create the
~/.gemini/settings.jsonfile so you can update it. Populate the file contents with the following Gemini CLI settings to add the Cloud Run MCP server:
```
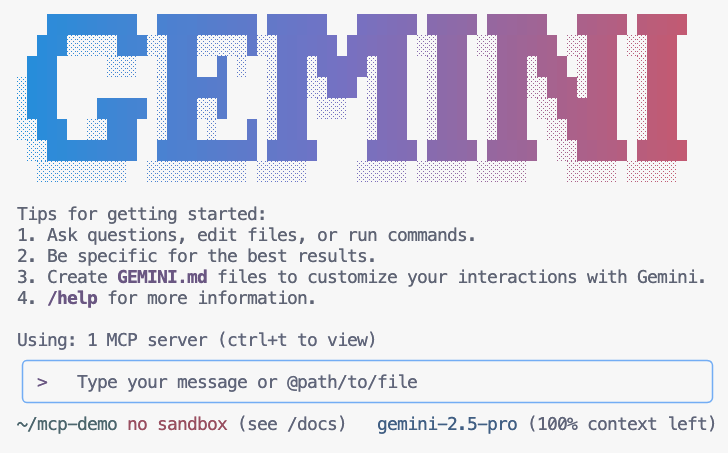
Open the Gemini CLI
Perform the steps that follow to open the Gemini CLI.
In the terminal, run the command to launch the Gemini CLI.
You may need to press ENTER to accept some default settings.
Use the relevant slash command to have Gemini list the MCP tools available to it within its context.
Ask Gemini to find something in the zoo:
Where can I find penguins?The Gemini CLI should know to use the
zoo-remoteMCP server and should ask if you allow execution of the MCP tool.Choose to always allow all tools from the
zoo-remoteMCP server.Expected output: The output should show the correct answer and a display box showing that the MCP server was used.
Prompt the Gemini CLI as follows to use the new custom command that you created:
/find --animal="lion"Expected output: You should see that Gemini CLI calls the
fetch_animals_by_speciestool and formats the response as instructed by the MCP prompt.When you are ready to end your session, exit Gemini CLI using the relevant command or keyboard shortcuts.
Verify server logs
In the terminal, enter the following to verify the server logs:
gcloud run services logs read coding-zoo-mcp-server --region us-central1 --limit=5Copied!
Expected output: You should see an output log that confirms a tool call was made. 🛠️
Click Check my progress to verify the objective.
Task 5. Dockerize and deploy the ADK agent to Cloud Run
For the final task, you must move the entire system from your local testing environment to a scalable, production-ready serverless environment.
You need to containerize the complete ADK application, including the MCP server and the Zoo Tour Guide agent that has Google Search integrated, and deploy the resulting container image(s) to Google Cloud Run. You must ensure the service is configured for public invocation and confirm the agent is responsive at its public URL.
Deploy and test locally
Open ~/zoo_guide_agent/agent.py, review the TODO comments, and update the code accordingly to complete the agent setup.
Run the following commands to install the package zoo_guide_agent:
gcloud config set project qwiklabs-gcp-01-6a13f120e283
cd ~/zoo_guide_agent
python -m venv .venv
source .venv/bin/activate
pip install --no-cache-dir -r requirements.txt
Run the following to deploy the ADK agent locally:
cd ~
adk web
In Cloud Shell, CTRL+click the
http://localhost:8000orhttp://127.0.0.1:8000link to open the ADK dev UI in a new browser tab.In the ADK dev UI, select the
zoo_guide_agent, and ask it the following query:Where can I find bears?Expected output: You should see events for all function calls, and a resolution to your query that combines information from all sources. The agent should also provide an approximate count of the number of species available globally.
Note: It may take some time to consolidate the actual agent response.
Deploy to Cloud Run
In the terminal, terminate the local ADK web instance by hitting Ctrl+C twice, and run the following commands to deploy your agent:
cd ~/zoo_guide_agent
adk deploy cloud_run \
--project=qwiklabs-gcp-01-6a13f120e283  \
--region=us-central1 \
--service_name=coding-zoo-tour-guide \
--with_ui \
. \
-- \
--labels=lab-dev=cloud-zoo-run-adk-service
Copied!
Note: It may take 15 minutes on average for the deployment to complete. If you get prompted to confirm if you allow unauthenticated invocations, ENTER y to proceed.
Click Check my progress to verify the objective.
Verify the deployed ADK agent
With your agent now live on Cloud Run, perform a test to confirm a successful deployment and to verify that the agent is working as expected. Use the public Service URL to access the ADK's web interface and interact with the agent.
- Once the agent has successfully been deployed to Cloud Run, CTRL+click the Service URL in the output to open it in a new browser tab.
It should resemble the following format.
Service URL output:
https://coding-zoo-tour-guide-480083809913.us-central1.run.app/
Because you used the --with_ui flag while deploying to Cloud Run, you should see the ADK developer UI.
Toggle Token Streaming to On in the upper right.
Interact with the zoo agent. Enter the query that follows to start a new conversation:
Where can I find elephants?Copied!
Expected output: You should see events for all function calls with a resolution to your query that combines information from all sources. The agent should also provide an approximate count of the number of species available globally.
Note: It may take some time to consolidate the actual agent response.
Click Check my progress to verify the objective.
Solution of Lab
Manual
https://www.youtube.com/watch?v=0UchpXk8E0Y