Using BigQuery in the Google Cloud Console - GSP406
A passionate full-stack developer from @ePlus.DEV
Overview
Storing and querying massive datasets can be time consuming and expensive without the right hardware and infrastructure. BigQuery is an enterprise data warehouse that solves this problem by enabling super-fast SQL queries using the processing power of Google's infrastructure. Simply move your data into BigQuery and let us handle the hard work. You can control access to both the project and your data based on your business needs, such as giving others the ability to view or query your data.
You access BigQuery through the Cloud Console, the command-line tool, or by making calls to the BigQuery REST API using a variety of client libraries such as Java, .NET, or Python. There are also a variety of third-party tools that you can use to interact with BigQuery, such as visualizing the data or loading the data. In this lab you access BigQuery using the Cloud Console.
Using BigQuery in the Cloud Console will give you a visual interface to complete tasks like running queries, loading data, and exporting data. This hands-on lab shows you how to query tables in a public dataset and how to load sample data into BigQuery through the Cloud Console.
What you'll do
In this lab you:
Query a public dataset
Create a custom table
Load data into a table
Query a table
Setup and requirements
Qwiklabs setup
Before you click the Start Lab button
Read these instructions. Labs are timed and you cannot pause them. The timer, which starts when you click Start Lab, shows how long Google Cloud resources are made available to you.
This hands-on lab lets you do the lab activities in a real cloud environment, not in a simulation or demo environment. It does so by giving you new, temporary credentials you use to sign in and access Google Cloud for the duration of the lab.
To complete this lab, you need:
- Access to a standard internet browser (Chrome browser recommended).
Note: Use an Incognito (recommended) or private browser window to run this lab. This prevents conflicts between your personal account and the student account, which may cause extra charges incurred to your personal account.
- Time to complete the lab—remember, once you start, you cannot pause a lab.
Note: Use only the student account for this lab. If you use a different Google Cloud account, you may incur charges to that account.
Cloud Console
How to start your lab and sign in to the Google Cloud console
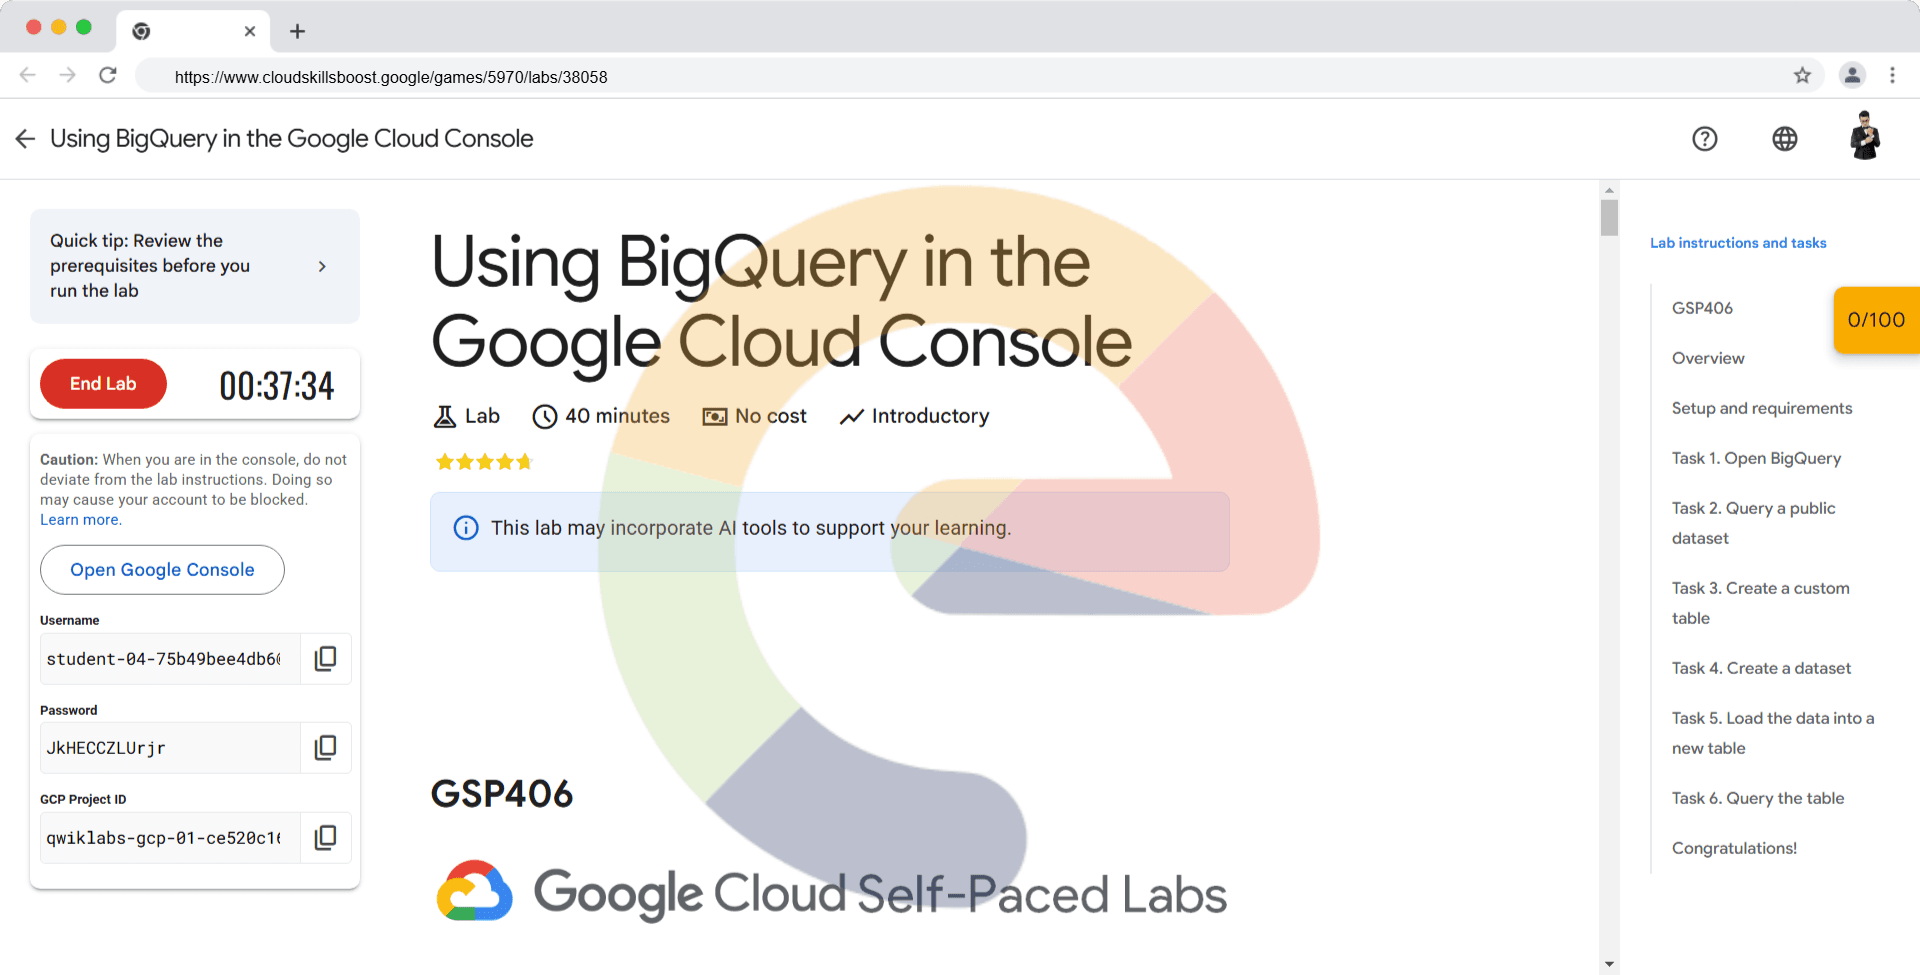
Click the Start Lab button. If you need to pay for the lab, a dialog opens for you to select your payment method. On the left is the Lab Details pane with the following:
The Open Google Cloud console button
Time remaining
The temporary credentials that you must use for this lab
Other information, if needed, to step through this lab
Click Open Google Cloud console (or right-click and select Open Link in Incognito Window if you are running the Chrome browser).
The lab spins up resources, and then opens another tab that shows the Sign in page.
Tip: Arrange the tabs in separate windows, side-by-side.
Note: If you see the Choose an account dialog, click Use Another Account.
If necessary, copy the Username below and paste it into the Sign in dialog.
student-04-75b49bee4db6@qwiklabs.netYou can also find the Username in the Lab Details pane.
Click Next.
Copy the Password below and paste it into the Welcome dialog.
JkHECCZLUrjrYou can also find the Password in the Lab Details pane.
Click Next.
Important: You must use the credentials the lab provides you. Do not use your Google Cloud account credentials.
Note: Using your own Google Cloud account for this lab may incur extra charges.
Click through the subsequent pages:
Accept the terms and conditions.
Do not add recovery options or two-factor authentication (because this is a temporary account).
Do not sign up for free trials.
After a few moments, the Google Cloud console opens in this tab.
Note: To access Google Cloud products and services, click the Navigation menu or type the service or product name in the Search field.

Task 1. Open BigQuery
The BigQuery console provides an interface to query tables, including public datasets offered by BigQuery.
Open the BigQuery console
- In the Google Cloud Console, select Navigation menu > BigQuery.
The Welcome to BigQuery in the Cloud Console message box opens. This message box provides a link to the quickstart guide and the release notes.
- Click Done.
The BigQuery console opens.
Task 2. Query a public dataset
In this section, you load a public dataset, USA Names, into BigQuery, then query the dataset to determine the most common names in the US between 1910 and 2013.
Load USA Name dataset
In the Explorer pane, click + ADD.
In ADD Data window, select Star a project by name.
Enter project name as
bigquery-public-dataand click STAR.
The project bigquery-public-data is added to your resources and you see the dataset usa_names listed in the left pane in your Explorer section under bigquery-public-data.
Click usa_names to expand the dataset.
Click usa_1910_2013 to open that table.
Query the USA Names dataset
Query bigquery-public-data.usa_names.usa_1910_2013 for the name and gender of the babies in this dataset, and then list the top 10 names in descending order.
Click Query > In a new tab.
Remove the default query text in the Query editor.
Copy and paste the following query into the query EDITOR text area:
SELECT
  name, gender,
  SUM(number) AS total
FROM
  `bigquery-public-data.usa_names.usa_1910_2013`
GROUP BY
  name, gender
ORDER BY
  total DESC
LIMIT
  10
- In the upper right of the window, view the query validator.
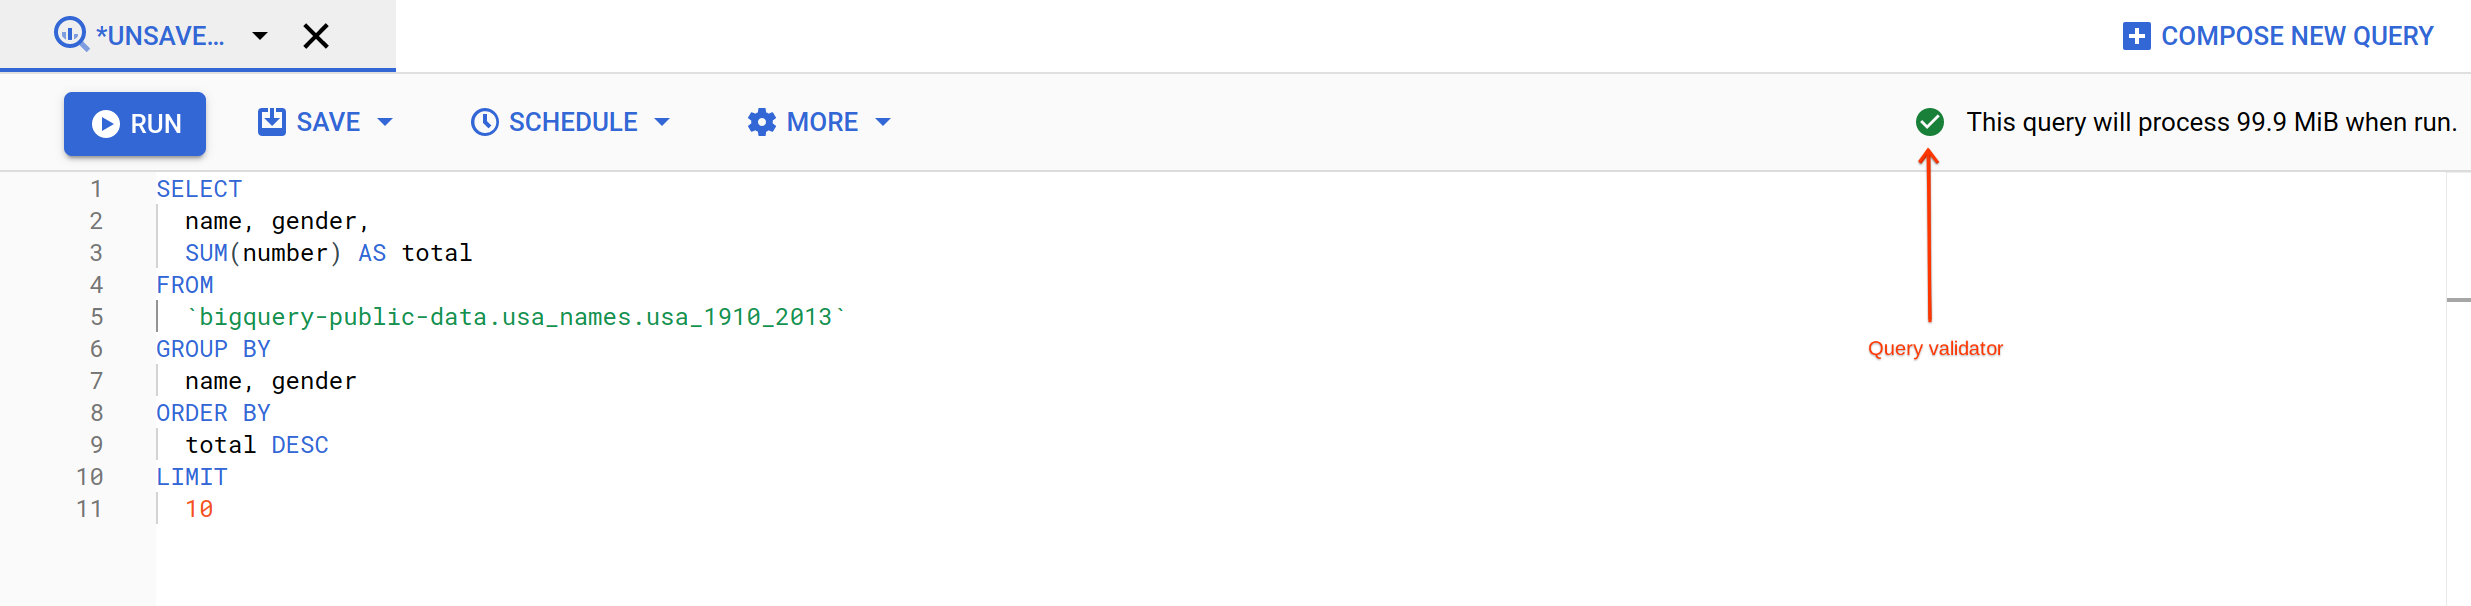
BigQuery displays a green check mark icon if the query is valid. If the query is invalid, a red exclamation point icon is displayed. When the query is valid, the validator also shows the amount of data the query processes when you run it. This helps to determine the cost of running the query.
- Click Run.
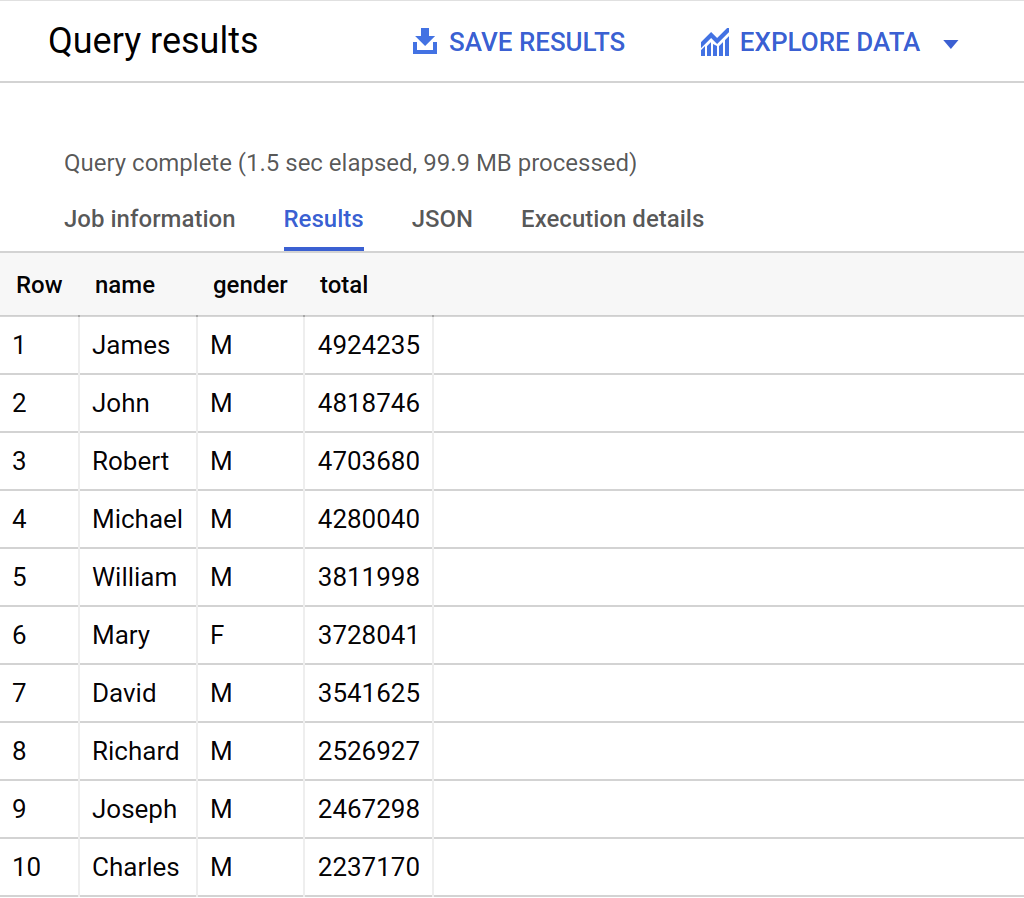
The query results opens below the Query editor. At the top of the Query results section, BigQuery displays the time elapsed and the data processed by the query. Below the time is the table that displays the query results. The header row contains the name of the column as specified in GROUP BY in the query.
Click Check my progress to verify the objective.
Query a public dataset
Check my progress
Task 3. Create a custom table
In this section, you create a custom table, load data into it, and then run a query against the table.
Download the data to your local computer
The file you're downloading contains approximately 7 MB of data about popular baby names, and it is provided by the US Social Security Administration.
Download the baby names zip file to your local computer.
Unzip the file onto your computer.
Open the file named
yob2014.txtto see what the data looks like. The file is a comma-separated value (CSV) file with the following three columns: name, sex (MorF), and number of children with that name. The file has no header row.Note the location of the
yob2014.txtfile so that you can find it later.
Task 4. Create a dataset
In this section, you create a dataset to hold your table, add data to your project, then make the data table you'll query against.
Datasets help you control access to tables and views in a project. This lab uses only one table, but you still need a dataset to hold the table.
Back in the console, in the Explorer section, click on the View actions icon next to your project ID and select Create dataset.
On the Create dataset page:
For Dataset ID, enter
babynames.For Data location, choose us (multiple regions in United States).
For Default table expiration, leave the default value.
Currently, the public datasets are stored in the US multi-region location. For simplicity, place your dataset in the same location.
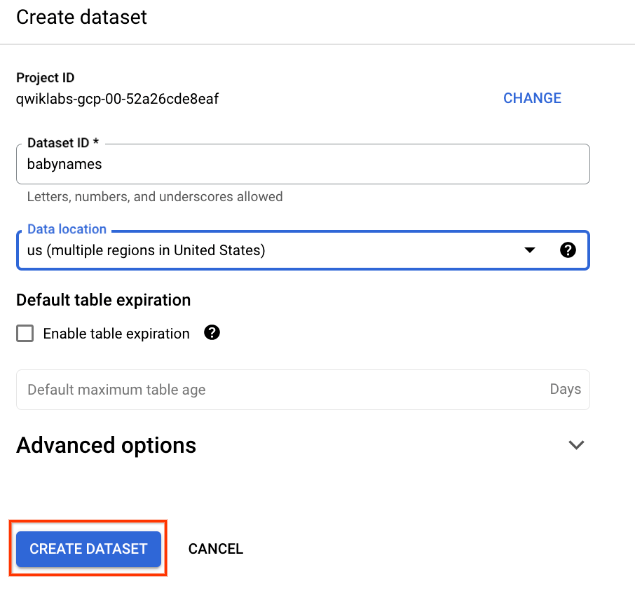
- Click Create dataset at the bottom of the panel.
Click Check my progress to verify the objective.
Create a new dataset
Check my progress
Task 5. Load the data into a new table
In this section, you load data into the table you made.
- Create a table by clicking on the View actions icon next to your babynames dataset in the Explorer section. Select Open, then click Create table.
Use the default values for all settings unless otherwise indicated.
- On the Create table page:
For Create table from, choose Upload from the dropdown menu.
For Select file, click Browse, navigate to the
yob2014.txtfile and click Open.For File format, choose CSV from the dropdown menu.
For Table name, enter
names_2014.In the Schema section, click the Edit as text toggle and paste the following schema definition in the text box.
name:string,gender:string,count:integer
Click Create table (at the bottom of the window).
Wait for BigQuery to create the table and load the data. While BigQuery loads the data, you can check the status from Personal history pane.
Preview the table
In the left pane, select babynames > names_2014 in the navigation panel.
In the details panel, click the Preview tab.

Quick quiz. You need a table to hold the datasetTrueFalse
Task 6. Query the table
Now that you've loaded data into your table, you can run queries against it. The process is identical to the previous example, except that this time, you're querying your table instead of a public table.
Click Query > In a new tab.
Remove the default query text in the Query editor.
Copy and paste the following query into the query EDITOR. This query retrieves the top 5 baby names for US males in 2014.
SELECT
 name, count
FROM
 `babynames.names_2014`
WHERE
 gender = 'M'
ORDER BY count DESC LIMIT 5
- Click Run. The results are displayed below the query window.
Click Check my progress to verify the objective.
Query new dataset
Solution of Lab
curl -LO raw.githubusercontent.com/quiccklabs/Labs_solutions/master/Using%20BigQuery%20in%20the%20Google%20Cloud%20Console/quicklabgsp406.sh
sudo chmod +x quicklabgsp406.sh
./quicklabgsp406.sh